What COLOR to paint my buddy
Moderator: Modern Buddy Staff
-
buddymon
- Member
- Posts: 18
- Joined: Mon Dec 20, 2010 9:16 am
- Location: Phoeinx
What COLOR to paint my buddy
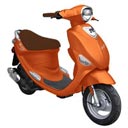
I'm looking for ideas on what to paint my scoot. Currently its the sunset orange but Im itching for a change. Can someone please post some good photos of their latest paint job.
-
lmgreco
- Member
- Posts: 22
- Joined: Fri Jul 23, 2010 3:26 pm
- Location: Tulsa
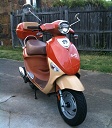
For prep work, I first filled all the scratches and dings from the previous owner then sanded and primed.
I used Oil based Rustoleum from the can and mixed up the color to try to match the little pad on the topcase. I thinned the mix and sprayed it with a HVLP gun.
After a few coats (with wet sanding in between) I used polishing compound and wax.
I used Oil based Rustoleum from the can and mixed up the color to try to match the little pad on the topcase. I thinned the mix and sprayed it with a HVLP gun.
After a few coats (with wet sanding in between) I used polishing compound and wax.
-
ericalm

- Site Admin
- Posts: 16842
- Joined: Sat Jun 10, 2006 3:01 am
- Location: Los Angeles, CA
- Contact:
A bunch of custom paint photos & such:
viewtopic.php?t=6751
viewtopic.php?t=16057
viewtopic.php?t=8419
viewtopic.php?t=18035
topic7255.html
topic9219.html
topic1066.html
topic10405.html
topic7541.html
viewtopic.php?t=6751
viewtopic.php?t=16057
viewtopic.php?t=8419
viewtopic.php?t=18035
topic7255.html
topic9219.html
topic1066.html
topic10405.html
topic7541.html
Eric // LA Scooter Meetup Group // Stella 4T // Vespa LX // Vespa LXS // Honda Helix // some, uh, projects…
-
buddymon
- Member
- Posts: 18
- Joined: Mon Dec 20, 2010 9:16 am
- Location: Phoeinx
wow that sounds like a lot of work. i saw someone here just painted it without preping. I can understand sanding some of the scratches. Will it work without really doing the prime and just using spray paint from the auto paint shop?lmgreco wrote:For prep work, I first filled all the scratches and dings from the previous owner then sanded and primed.
I used Oil based Rustoleum from the can and mixed up the color to try to match the little pad on the topcase. I thinned the mix and sprayed it with a HVLP gun.
After a few coats (with wet sanding in between) I used polishing compound and wax.
-
neotrotsky

- Member
- Posts: 1546
- Joined: Wed Jun 01, 2011 8:48 am
- Location: Phoenix, AZ
- Contact:
You can do it, but it will scratch very easy, be rather dull and not last very long. Prep work is 90% to a good paint job. When I repainted the cowls on my Stella, it was a 2 day process. And the paint I used was a PPG Pearl Satin single stage enamel that I had Space Age Auto Paint (now ACME Auto Paint) in Mesa, AZ custom mix into aerosol cans, simply because I cannot have a compressor at my apartment complex.buddymon wrote:wow that sounds like a lot of work. i saw someone here just painted it without preping. I can understand sanding some of the scratches. Will it work without really doing the prime and just using spray paint from the auto paint shop?lmgreco wrote:For prep work, I first filled all the scratches and dings from the previous owner then sanded and primed.
I used Oil based Rustoleum from the can and mixed up the color to try to match the little pad on the topcase. I thinned the mix and sprayed it with a HVLP gun.
After a few coats (with wet sanding in between) I used polishing compound and wax.
I then stripped the cowls to the steel with a chemical "Aircraft Remover", washed them down with a reduced stripper and then washed those again with water and detergent. I Then did a rinse with clear water and dried the cowls completely to avoid any issues with leftover oils from my skin, condensation or even mini bits of rust (since even sitting out for a day, unfinished steel can develop even slight rust if there's any moisture present). Then I used three coats of white primer, with a wet sanding to smooth out the finish. After that I shot the cowls with 4 coats of Enamel, wet sanding with ever increasing grits in between each coat. After applying the final coat, I let each sit for a few days to "cure" completely. Then I buffed it with a very fine polishing compound, and again with a wax.
After all of that, I was then able to attach the pinstriping (I went vinyl decal in case it didn't work for me. Luckily it looked spot on so I kept it for years!), attached the cowl rubber and signals, and then I was good to go!
Plastic has it's own prep, usually involving sanding and cleaning the surface for adhesion. Also, the type of primer may be different in order to bond to the plastic. Thankfully, plastic-friendly primers are common these days in rattle cans so that saves alot of cash and time. Any auto paint store that sells to custom builders can put single stage or dual stage enamels in spray cans for a small fee, but with paint you get what you pay for. I paid about $75 for Four cans of PPG Pearl. If you go clear coat, double that cost for the paint and coating. Automotive enamel is not the same as spray paint at the local big box store. Many use Rust-Oleum, but that can require a reduction with a paint thinner to get the right consistency. Almost all commercial spray paint cans are rather thick in mixture, simply to allow for alot of coverage with fewer coats. But, it's not the best application to get that factory auto finish. Automotive enamels are more expensive, but are easier to work with to get that factory showroom shine in comparison and will last far longer if you put the effort in. Again, that's not to say you can't do it with off the shelf spray paint, but it will be MUCH harder and depending on the brand and formulation, it may not last nearly as long or be as durable.
Each layer will need to be wet sanded to blend any imperfections, and if you go the spray can route, there will be MORE sanding and blending required than if you shot it with a spray gun. It's simply a more inconsistent pressure. But, it can be done and done well if you take your time, are patient and don't rush.
Just make sure to SLOW DOWN and sweat the small stuff. Also, time is critical so don't rush to finish and don't rush to slap them on the bike. Let them cure properly and make sure each step is complete before moving on to the next. It will literally make the difference between a paintjob that will last a season and a paintjob that will last the life of the bike. I have pictures of the painting process if you are interested. Even though it's steel, many of the painting techniques will apply to plastic as well.
Hope this helped!
"Earth" without Art is just "Eh"...
<a href="http://slowkidsscootergang.wordpress.com/">The Slow Kids Scooter Gang</a>
<a href="http://slowkidsscootergang.wordpress.com/">The Slow Kids Scooter Gang</a>


-
neotrotsky
- Member
- Posts: 1546
- Joined: Wed Jun 01, 2011 8:48 am
- Location: Phoenix, AZ
- Contact:
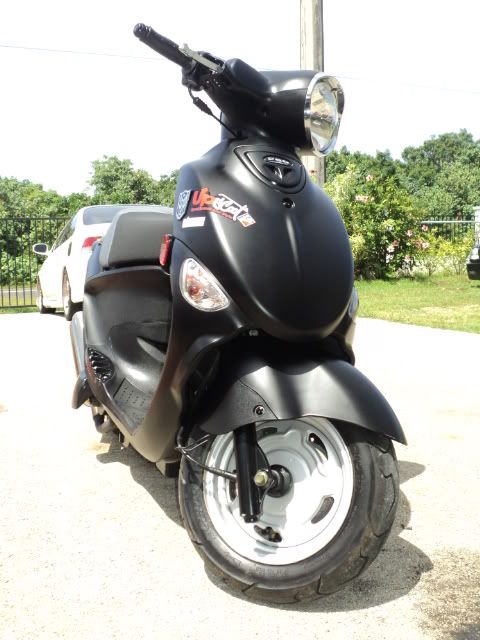
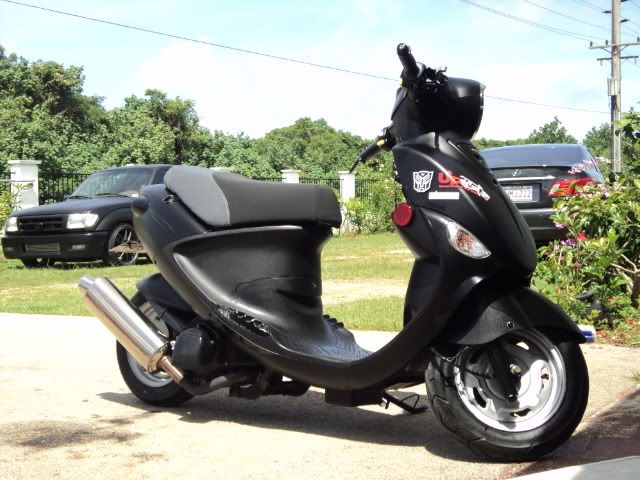
Not bad. Matte is always a good way to go with rattle can black. Less fuss, and the buddy has a good shape to pull it off.toycoma98 wrote:Here's my latest rattle can paintjob.
"Earth" without Art is just "Eh"...
<a href="http://slowkidsscootergang.wordpress.com/">The Slow Kids Scooter Gang</a>
<a href="http://slowkidsscootergang.wordpress.com/">The Slow Kids Scooter Gang</a>
-
neotrotsky
- Member
- Posts: 1546
- Joined: Wed Jun 01, 2011 8:48 am
- Location: Phoenix, AZ
- Contact:
er... ok. It's not-shiny black then 
"Earth" without Art is just "Eh"...
<a href="http://slowkidsscootergang.wordpress.com/">The Slow Kids Scooter Gang</a>
<a href="http://slowkidsscootergang.wordpress.com/">The Slow Kids Scooter Gang</a>
-
JSharpPhoto
- Member
- Posts: 243
- Joined: Thu Mar 12, 2009 8:17 pm
- Location: Dallas
another option to the one or two brands of plastic-safe spray paint, is something that cosplay fabricators have been using for a while. You can buy it at most auto-parts stores, it's called "Vinyl & Fabric Spray Paint", sometimes referred to as "Vinyl Dye". It's very similar to spray paint, but the chemistry is different. Since it's really made for upholstery, it's made to be very flexible, since every time you sit in the seat, the material bends.
The main difference is the ratio of pigment to adhesion promoter. Vinyl Dye is very thin, from a pigment standpoint, because of how much adhesion promoter there is. You'll end up doing 10 thin coats instead of 4 coats with paint. But the vinyl dye actually soaks into the surface of the plastic, instead of sitting on top of it. There is less running in the spray, since it's being absorbed INTO the plastic. The end result is something that is FAR FAR FAR more durable that spray painted plastic. I have several nerf guns that we dyed for a photoshoot, and they look amazing.
There are two limitations to using Vinyl Dye
1. Rather limited color selection (maybe 12 colors overall, as opposed to the thousands available in spray paint)
2. It has to be done on a factory finish plastic, you can't dye plastic that has already been spray painted.
If you choose to go this route, the process should be....
1. Dismantle your panels
2. Scuff them very lightly with a scotchbrite pad
3. Clean them throughly with simple green (or another degreaser) At this point you should be handling them with rubber gloves to you keep the oils from your skin off of the plastic.
4. Spray light coats. Vinyl dye also dries incredibly fast. The coats are dry-to-touch after about 10 minutes, making putting on ten coats of dye, a pretty fast process.
5. Let them cure for about 2 days. The plastic will be a little bit soft while the dye is curing, but it will harden back up easily.
6. Lightly wet sand with 1000 grit sandpaper.
7. Spray on Duplicolor ACRYLIC LAQUER clear coat (several coats)
8. Sand with 2000 grit sandpaper.
9. Install
Here's a great video about someone that used it on their XBOX controller. The fact this stuff holds up to something that sees as much skin contact and wear as a gaming controller, means that it will hold up well.
http://www.youtube.com/watch?v=Vvg51Oz_C-g
-
redhandmoto

- Member
- Posts: 286
- Joined: Tue Jul 01, 2008 3:37 am

-
ScooterTrash

- Member
- Posts: 2007
- Joined: Sun Jun 03, 2007 5:00 pm
- Location: Idaho Falls, ID
-
buddymon
- Member
- Posts: 18
- Joined: Mon Dec 20, 2010 9:16 am
- Location: Phoeinx
-
neotrotsky
- Member
- Posts: 1546
- Joined: Wed Jun 01, 2011 8:48 am
- Location: Phoenix, AZ
- Contact:
Anything you paint will take some degree of prep work to "stick". I have yet to find any miracle can of paint that allows you to just spray and have it turn into a perfect factory finish.buddymon wrote:I thought about that too but wasnt sure what its going to look like. can that be painted flat black without sanding.ScooterTrash wrote:Just change the ugly brownish inside plastics to black. I have always loved the sunset just hated the inside plastics
"Earth" without Art is just "Eh"...
<a href="http://slowkidsscootergang.wordpress.com/">The Slow Kids Scooter Gang</a>
<a href="http://slowkidsscootergang.wordpress.com/">The Slow Kids Scooter Gang</a>
-
buddymon
- Member
- Posts: 18
- Joined: Mon Dec 20, 2010 9:16 am
- Location: Phoeinx
True but Im not sure if I should sand that part. I can clean the grease and other debris that is stuck to them. I can understand the other panels that have the shine to them will required preping and sanding. Has anyone here or have you knows anyone that acutally just painted the insides without issues?
BTW what part of Mesa? Im in phoenix but I've taken the buddy a lot in gilbert area thats about 45 miles one way with a passenger and always came home with the smile lol
BTW what part of Mesa? Im in phoenix but I've taken the buddy a lot in gilbert area thats about 45 miles one way with a passenger and always came home with the smile lol
-
neotrotsky
- Member
- Posts: 1546
- Joined: Wed Jun 01, 2011 8:48 am
- Location: Phoenix, AZ
- Contact:
I'm over by the Fiesta Mall area. Alot more ghetto than it used to be but it's cheap. Although these days I'm beginning to wonder if cheap rent is worth the drive by's and meth labs in each building of my complex  I am worried that when I get my new bike (hopefully) next month if it will even be around or undamaged on a daily basis.
I've already had a half dozen tweakers banging on my door at 3 am looking for the local dealer. They get in here strung out and lost and just start banging on random doors. Some of them kick them in and just raid the place if they see something shiny in the process. It's seriously a factor on me getting a bike considering we've had 4 home invasions in 2 months in this complex alone, and I have to keep a Mossberg by the door now.
We may just end up breaking our lease in order to get a house so I can have a scooter. Yes, my wife is that much for me getting another bike!
"Earth" without Art is just "Eh"...
<a href="http://slowkidsscootergang.wordpress.com/">The Slow Kids Scooter Gang</a>
<a href="http://slowkidsscootergang.wordpress.com/">The Slow Kids Scooter Gang</a>
-
MYSCTR
- Member
- Posts: 1007
- Joined: Fri Jun 26, 2009 9:39 pm
- Location: McKinney Texas
Got something for ya - and only a few hours work - with a reduced price!
No chipping, cracking, scratching or peeling - all factory parts in the right color for you!
viewtopic.php?p=241768#241768
No chipping, cracking, scratching or peeling - all factory parts in the right color for you!
viewtopic.php?p=241768#241768

-
buddymon
- Member
- Posts: 18
- Joined: Mon Dec 20, 2010 9:16 am
- Location: Phoeinx
Painted it
I took someones advise in here and painted the inner plastic with Krylon Fusion satin black. Started with flat black but looked too dull and it didn't stick very well so i applied the satin black over it and time will tell how much chipping will happen. My wife and I are carefully placing our feet inside the mat =) I am extremely happy with the result as it made it look really sharp more manly that is lol. For the life of me I cant figure out 2 screws were left after i had completed the project but it doesn't seem to bother the buddy at all. I tried posting pics but size limitation on this site prevented me.
I hope the chipping doesn't happen =( I've read many postings of that issue. Ill try to post again..
I hope the chipping doesn't happen =( I've read many postings of that issue. Ill try to post again..