Carburetor Cleaning?
Moderator: Modern Buddy Staff
-
berryjames74
- Member
- Posts: 7
- Joined: Mon Jun 09, 2008 5:37 pm
- Location: Seattle
Carburetor Cleaning?
Hey all......anyone know of a step by step instructional on how to clean the carb on a buddy 150? I am a novice with mechanics and I believe that my carb is plugged after sitting for the winter/summer....Thanks!
-
bigbropgo

- Member
- Posts: 1607
- Joined: Thu Jul 31, 2008 1:41 am
- Location: gotham city and the 801


-
ericalm

- Site Admin
- Posts: 16842
- Joined: Sat Jun 10, 2006 3:01 am
- Location: Los Angeles, CA
- Contact:
Here's the link:
topic17556.html
Be careful with the 4 Philips screws on the bottom of the carb (float bowl screws), they're a bit soft and I managed to strip one of mine when doing this! My dealer says the Buddy toolkit screwdriver is actually a good size for these.
topic17556.html
Be careful with the 4 Philips screws on the bottom of the carb (float bowl screws), they're a bit soft and I managed to strip one of mine when doing this! My dealer says the Buddy toolkit screwdriver is actually a good size for these.
Eric // LA Scooter Meetup Group // Stella 4T // Vespa LX // Vespa LXS // Honda Helix // some, uh, projects…
-
ScooterTrash

- Member
- Posts: 2007
- Joined: Sun Jun 03, 2007 5:00 pm
- Location: Idaho Falls, ID
ericalm wrote:Here's the link:
topic17556.html
Be careful with the 4 Philips screws on the bottom of the carb (float bowl screws), they're a bit soft and I managed to strip one of mine when doing this! My dealer says the Buddy toolkit screwdriver is actually a good size for these.
-
djelliott

- Member
- Posts: 1364
- Joined: Thu Jun 05, 2008 4:44 pm
- Location: Avon Lake, OH
It's a good idea to replace them with some good quality hex bolts. It'll make it a lot easier next time you have to open it.ericalm wrote:Here's the link:
topic17556.html
Be careful with the 4 Philips screws on the bottom of the carb (float bowl screws), they're a bit soft and I managed to strip one of mine when doing this! My dealer says the Buddy toolkit screwdriver is actually a good size for these.
Prima pipe
UNI filter
125 Main Jet
2000RPM Stall Spring
1500RPM Clutch Springs
Dr. Pulley Variator with 11 Gram Sliders
NCY Front Forks
Prima/NCY 161cc Big Bore kit With 150 Head
KS Power GY6 Performance Springs
NCY Secondary Shieve
UNI filter
125 Main Jet
2000RPM Stall Spring
1500RPM Clutch Springs
Dr. Pulley Variator with 11 Gram Sliders
NCY Front Forks
Prima/NCY 161cc Big Bore kit With 150 Head
KS Power GY6 Performance Springs
NCY Secondary Shieve
-
berryjames74
- Member
- Posts: 7
- Joined: Mon Jun 09, 2008 5:37 pm
- Location: Seattle
Thanks!
Thanks......I guess I didn't look hard enough. Should be a good weekend project!
-
viney266

- Member
- Posts: 2270
- Joined: Thu May 19, 2011 8:49 pm
- Location: westminster md
- Contact:
^^^You need a hammer type impact driver with phillips bit. Works wonders.ericalm wrote:Here's the link:
topic17556.html
Be careful with the 4 Philips screws on the bottom of the carb (float bowl screws), they're a bit soft and I managed to strip one of mine when doing this! My dealer says the Buddy toolkit screwdriver is actually a good size for these.
And, for OP..Make SURE you have the pilot clean...check it again!
Speed is only a matter of money...How fast do you want to go?
-
LPcreation
- Member
- Posts: 14
- Joined: Thu Jul 22, 2010 9:01 pm
- Location: PA
-
Beamster

- Member
- Posts: 413
- Joined: Mon Apr 07, 2008 11:23 pm
- Location: State of Confusion
Before going to all that trouble, try replacing the gas with new treated with a dose of Seafoam treatment, run it a bit if possible but atleast get it to flow into the carb and let it sit overnight.
That has done the trick for us three years in a row.
After that, always add Seafoam in all the gas.
That has done the trick for us three years in a row.
After that, always add Seafoam in all the gas.
Last edited by Beamster on Thu Jun 21, 2012 2:03 am, edited 1 time in total.
-
mhardgrove
- Member
- Posts: 252
- Joined: Mon Sep 08, 2008 5:08 am
- Location: Denver, CO
This is going to sound strange, but trust me, if you need to clean the jets boil them in lemon or lime juice from one of those squeeze containers. Where the jets are brass they wont react with the acid in the juice, and any crap in them will come right out. I boiled mine for 3-5 minutes and they came out as clean as can be! Let them cool, then rinse with water, let em dry and you are good to go.
Also, where you are working with gas BE SAFE!!! Do this in a place that has lots of ventilation, use common sense, blah blah blah!!!
Good Luck!!!
Also, where you are working with gas BE SAFE!!! Do this in a place that has lots of ventilation, use common sense, blah blah blah!!!
Good Luck!!!
-
ericalm
- Site Admin
- Posts: 16842
- Joined: Sat Jun 10, 2006 3:01 am
- Location: Los Angeles, CA
- Contact:
Probably in a few hours. I would think…
Eric // LA Scooter Meetup Group // Stella 4T // Vespa LX // Vespa LXS // Honda Helix // some, uh, projects…
-
BuddyRaton

- Scooter Dork
- Posts: 3887
- Joined: Sat Sep 09, 2006 10:08 pm
- Location: Boca Raton, Florida
- Contact:
I do a lot of work with brass (restoring antique clocks). Shiny doesn't necessarily mean clean.mhardgrove wrote:This is going to sound strange, but trust me, if you need to clean the jets boil them in lemon or lime juice from one of those squeeze containers. Where the jets are brass they wont react with the acid in the juice, and any crap in them will come right out. I boiled mine for 3-5 minutes and they came out as clean as can be! Let them cool, then rinse with water, let em dry and you are good to go.
Also, where you are working with gas BE SAFE!!! Do this in a place that has lots of ventilation, use common sense, blah blah blah!!!
Good Luck!!!
"Things fall apart - it's scientific" - David Byrne
www.teamscootertrash.com
'06 Cream Buddy 125, 11 Blur 220, 13 BMW C 650 GT, 68 Vespa SS180, 64 Vespa GS MK II, 65 Lambretta TV 175, 67 Vespa GT, 64 Vespa 150 VBB 64 Vespa GL
www.teamscootertrash.com
'06 Cream Buddy 125, 11 Blur 220, 13 BMW C 650 GT, 68 Vespa SS180, 64 Vespa GS MK II, 65 Lambretta TV 175, 67 Vespa GT, 64 Vespa 150 VBB 64 Vespa GL
-
LPcreation
- Member
- Posts: 14
- Joined: Thu Jul 22, 2010 9:01 pm
- Location: PA
-
50CC Cape Cod
- Member
- Posts: 183
- Joined: Thu Jan 26, 2012 5:02 pm
- Location: Massachusetts
-
mhardgrove
- Member
- Posts: 252
- Joined: Mon Sep 08, 2008 5:08 am
- Location: Denver, CO
it doesn't actually make the brass shiny, but it sure does clean them out if you don't like using harsh chemicals. I don't like using chemical dips if I can keep from it, and the lime/lemon juice trick is something my grandfather taught me. It doesn't hurt the jets, so thats what I do  to each their own.
-
bluto
- Member
- Posts: 1
- Joined: Mon Aug 03, 2015 12:56 am
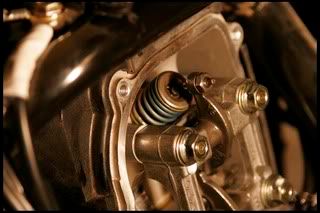
Thanks to all who posted tips on this thread and others. My GF's 125 would not idle and I suspected the pilot jet was plugged and that was the case. A few things I learned fixing it...
I did not have to remove the carb completely, getting it loose from the boots enabled me to turn it over and remove the bowl. The bowl screws are probably JIS, NOT phillips and that might be why many have stripped them...this had been causing amateur MC mechanics grief for many years as the difference is not obvious, was not aware myself until recently. The toolkit screwdriver did work as suggested and fit well.
I only removed the pilot jet, figured the main jet was OK and some Seafoam would take care of any deposits, and the less I did the less the odds of screwing the carb up in the process;-) The pilot jet was completely plugged and the orifice is TINY and hard to clean so I tried heat from a torch and that did the trick and boiled the varnish out, followed that up with Seafoam spray and compressed air.
Anyway put it all back together and the scooter now runs great and idles well...
![Image]()
I did not have to remove the carb completely, getting it loose from the boots enabled me to turn it over and remove the bowl. The bowl screws are probably JIS, NOT phillips and that might be why many have stripped them...this had been causing amateur MC mechanics grief for many years as the difference is not obvious, was not aware myself until recently. The toolkit screwdriver did work as suggested and fit well.
I only removed the pilot jet, figured the main jet was OK and some Seafoam would take care of any deposits, and the less I did the less the odds of screwing the carb up in the process;-) The pilot jet was completely plugged and the orifice is TINY and hard to clean so I tried heat from a torch and that did the trick and boiled the varnish out, followed that up with Seafoam spray and compressed air.
Anyway put it all back together and the scooter now runs great and idles well...
- Attachments
-
- JIS_detail.JPG (38.53 KiB) Viewed 1474 times