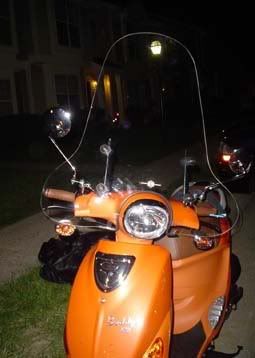
(Tall) Windshield Installation Instructions
Posted: Sat Sep 23, 2006 3:19 am
Well, here's the tall windshield and some pics and directions for the non-mechanically inclined
Really, it's not that bad a process. But there are a few potential stumbling blocks.
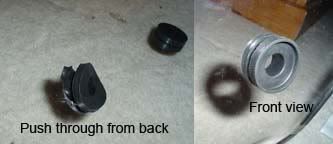
1. Twist the black circles into the window holes. Just bend and push the side with the indention through to the front of the windshield, and twist and push till it goes through.
2. Assemble the front black pieces: screw, rubber cap, windshield
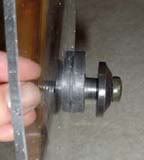
3. Add the black rubber piece that will attach the windshield to the metal rod. (The skinny hole goes closest to the windshield so that the nut can screw onto the back, the screws go to the outside and the rubber nodule thing to the inside.)
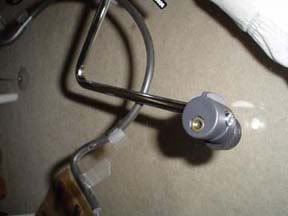
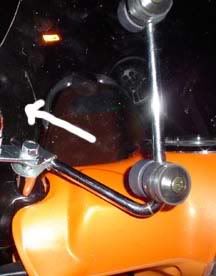
4. Then slide the metal rod up through rubber pieces. This worked best by starting off from inside the headlight hole, going through the bottom piece then twisting to push up through the top piece.
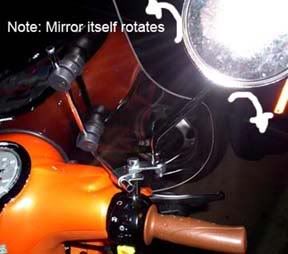
5. Remove the mirrors from the scooter. They just twist off, but note that the right-hand side is reverse threaded!
6. Determine which metal bolt is reverse threaded.
7. Assemble the metal pieces (excluding the rod) and attach to scooter making sure to use the appropriate bolt for each side (The first one I tried was the wrong bolt. It still screwed in, but caused a long and frustrating battle trying to figure out why the other bolt would not fit the other side.)
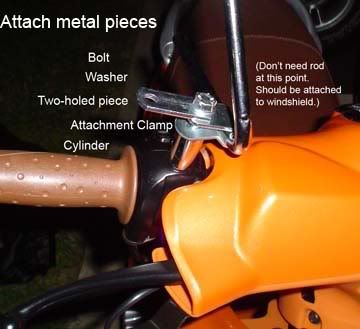
Also note that, as pointed out by others, the right hand, reverse-thread bolt might be too long. As James Tate recommended, you might want "six or so washers just to be sure you don't bottom out and damage the housing you are screwing into. Make sure to put them above the metal clamp so the height of the shield arm stays the same." topic145.html
8. Slide the windshield on by sliding the metal rod through the clamps.
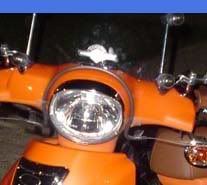
9. Make sure it is on straight. Easiest way to tell is by looking at the area around the headlight and making sure it is even all the way around. Then hold in place and tighten the bolts, but don't make them immovable yet.
10. Bolt the mirrors on and adjust as needed. Again remember the right hand side is reverse threaded.
11. Tighten the bolts.
Please add any other tips and recomendations. I haven't had a chance to ride with it yet, so will post how she fares later!
Really, it's not that bad a process. But there are a few potential stumbling blocks.
1. Twist the black circles into the window holes. Just bend and push the side with the indention through to the front of the windshield, and twist and push till it goes through.
2. Assemble the front black pieces: screw, rubber cap, windshield
3. Add the black rubber piece that will attach the windshield to the metal rod. (The skinny hole goes closest to the windshield so that the nut can screw onto the back, the screws go to the outside and the rubber nodule thing to the inside.)
4. Then slide the metal rod up through rubber pieces. This worked best by starting off from inside the headlight hole, going through the bottom piece then twisting to push up through the top piece.
5. Remove the mirrors from the scooter. They just twist off, but note that the right-hand side is reverse threaded!
6. Determine which metal bolt is reverse threaded.
7. Assemble the metal pieces (excluding the rod) and attach to scooter making sure to use the appropriate bolt for each side (The first one I tried was the wrong bolt. It still screwed in, but caused a long and frustrating battle trying to figure out why the other bolt would not fit the other side.)
Also note that, as pointed out by others, the right hand, reverse-thread bolt might be too long. As James Tate recommended, you might want "six or so washers just to be sure you don't bottom out and damage the housing you are screwing into. Make sure to put them above the metal clamp so the height of the shield arm stays the same." topic145.html
8. Slide the windshield on by sliding the metal rod through the clamps.
9. Make sure it is on straight. Easiest way to tell is by looking at the area around the headlight and making sure it is even all the way around. Then hold in place and tighten the bolts, but don't make them immovable yet.
10. Bolt the mirrors on and adjust as needed. Again remember the right hand side is reverse threaded.
11. Tighten the bolts.
Please add any other tips and recomendations. I haven't had a chance to ride with it yet, so will post how she fares later!