Page 1 of 2
STELLA LED Turn Signal and tail light installation
Posted: Wed Apr 24, 2013 1:28 am
by slotrod65
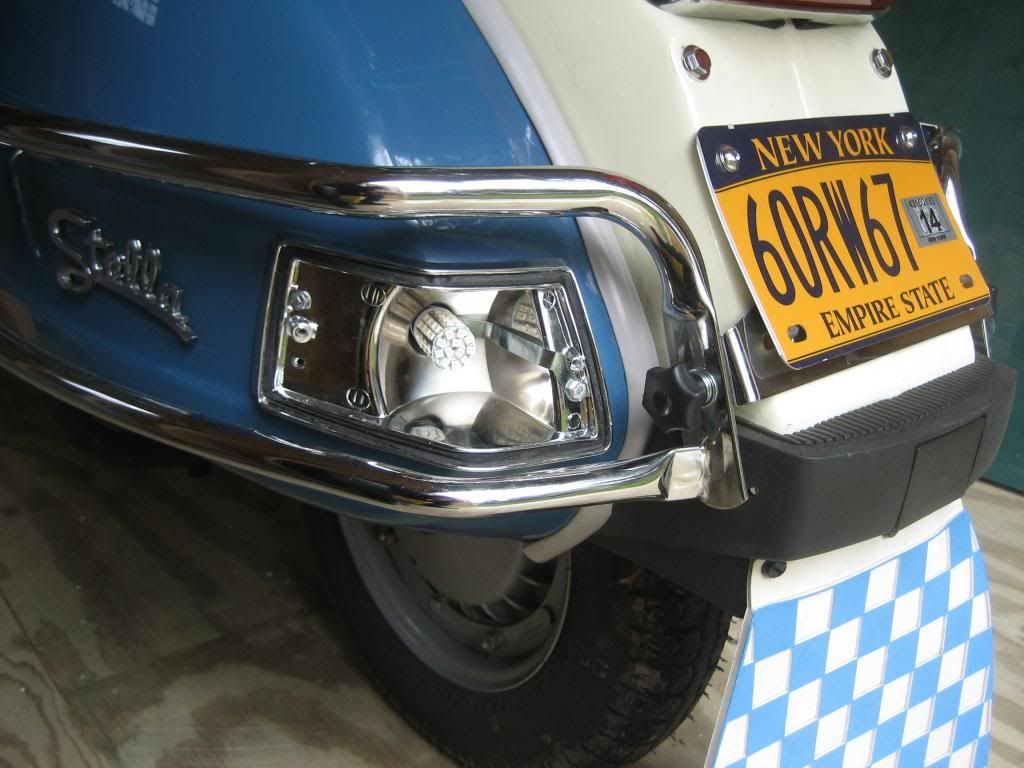
SWAPPING STOCK REAR TURN SIGNALS FOR LEDS:
I felt that the turn signal lights on my Stella 4T were a bit anemic, so I wanted to change the stock incandescent bulbs to LEDs. I have never done this before, and found that information on this mod was a bit sparse, so I decided to document my experience to share with others.
The first thing I did was to identify what incandescent bulbs came stock in the Stella. The front bulbs are accessible via the glovebox, an the rears are easily accessed by removing the two screws holding the turn signal lens. I found that both stock bulbs are 7507s with amber colored glass. Now I could search for LEDs...
One of the threads I found mentioned this website:
http://autolumination.com/ as a source for LEDs.
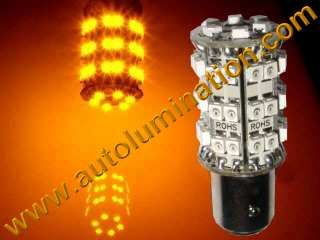
I entered 7507 in the search box, and then used the FIND function of my browser to search for available LED bulbs. As maximum visibility was my goal, I decided on the on the 7507 PY21W Tower European Bulbs with 60 High Powered Wide Angle SMT LEDS. At $19.99 each, I decided to get a pair of them and see how they worked out.
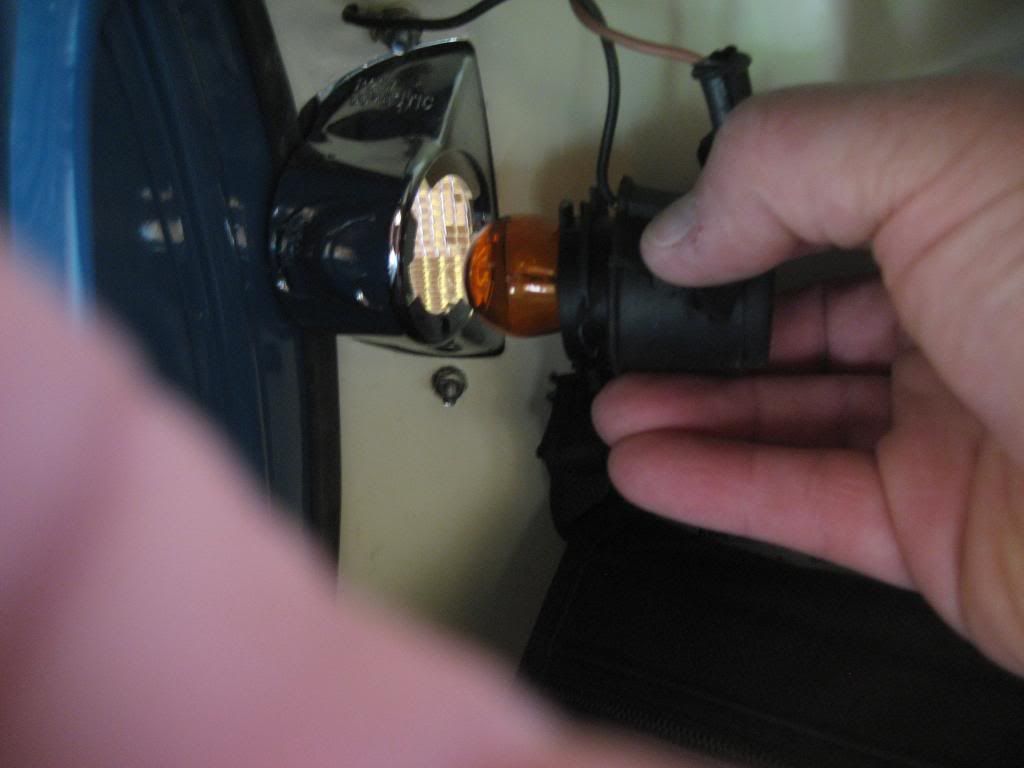
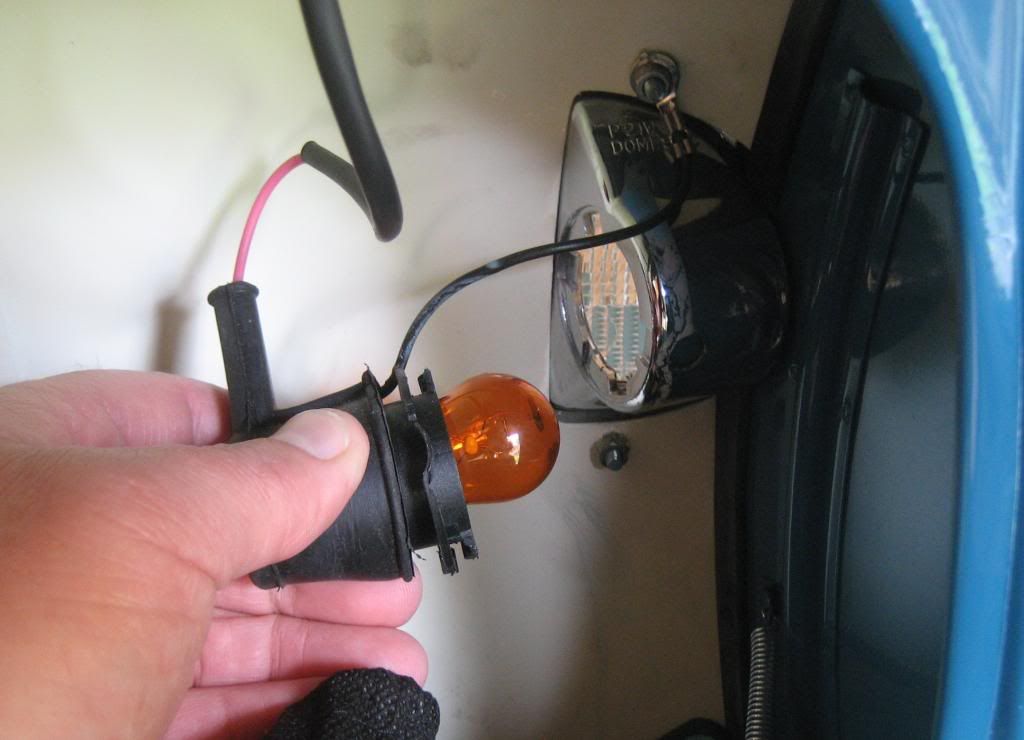
About a week later, I received my LEDs. The first thing I did was to remove the stock lens and bulb from one side:
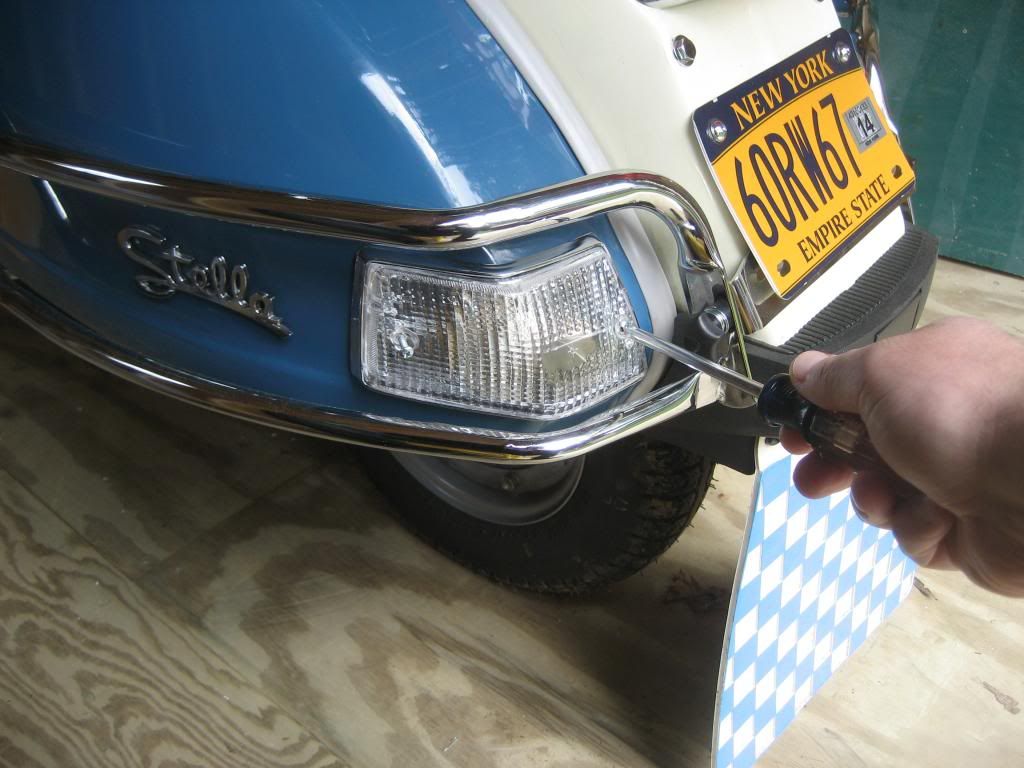
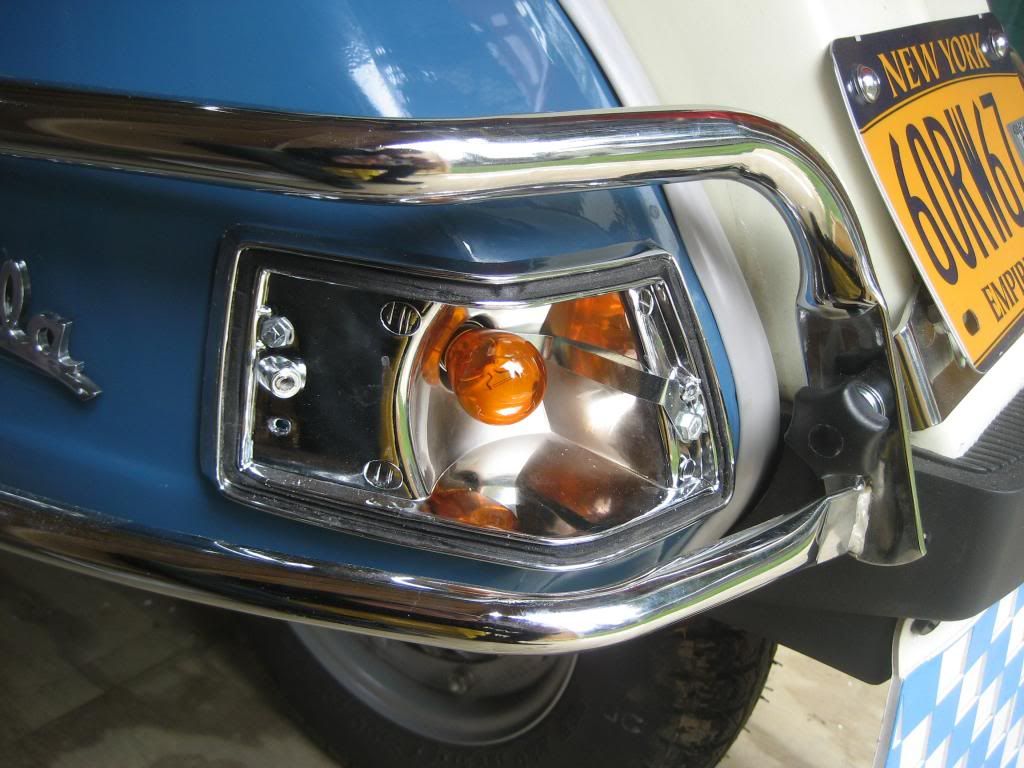
Once the rear lens was off, a gentle push and a counter clockwise twist was all that was needed to remove the stock bulb:
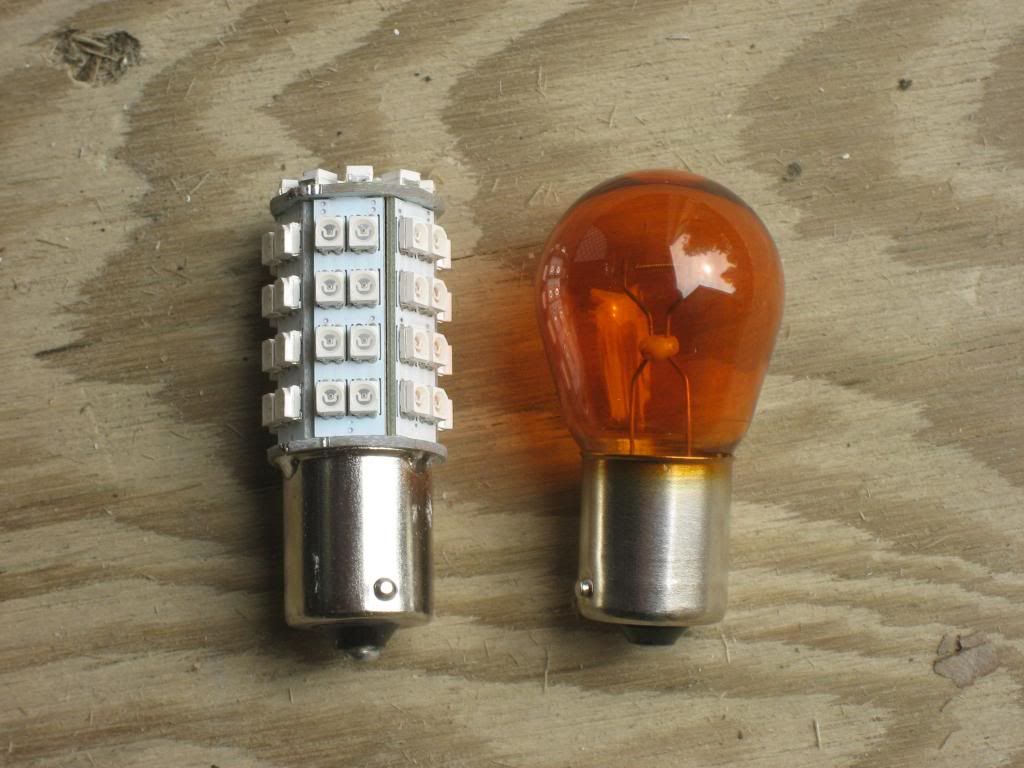
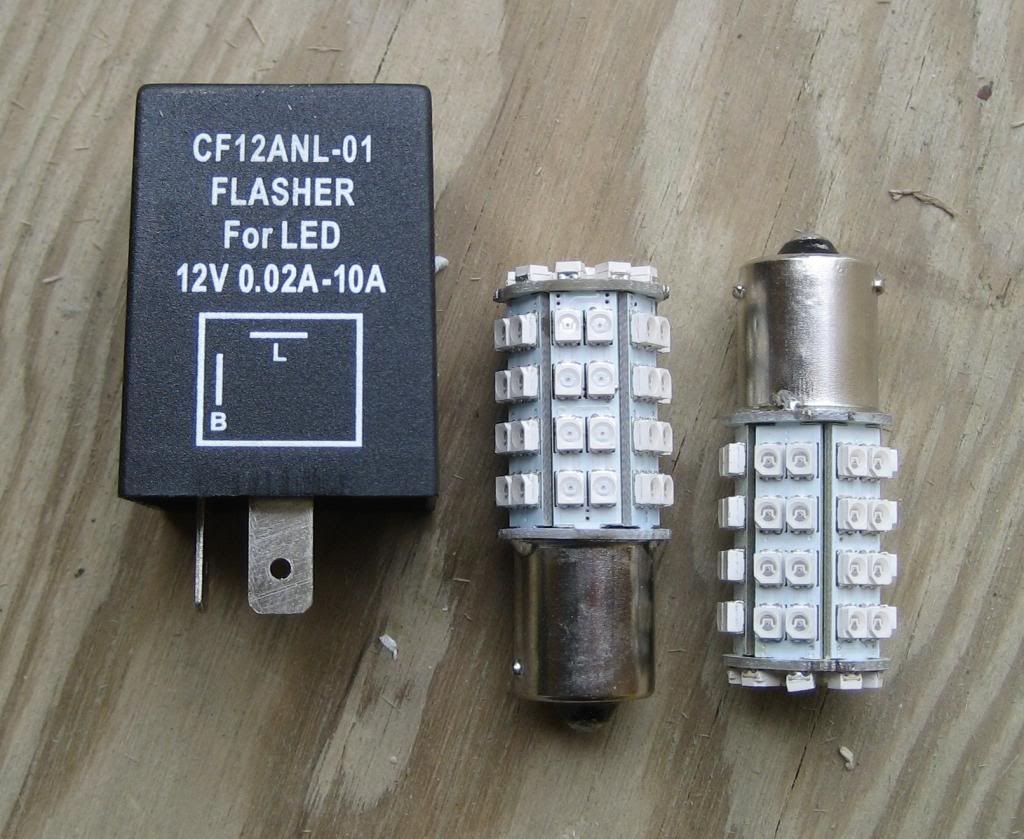
Next, I compared the two bulbs. I wanted to be sure the new LEDs would fit in the same space as the old incandescent bulb: I was pleased to see that they were the same size:
The LED went back in as easy as pie:
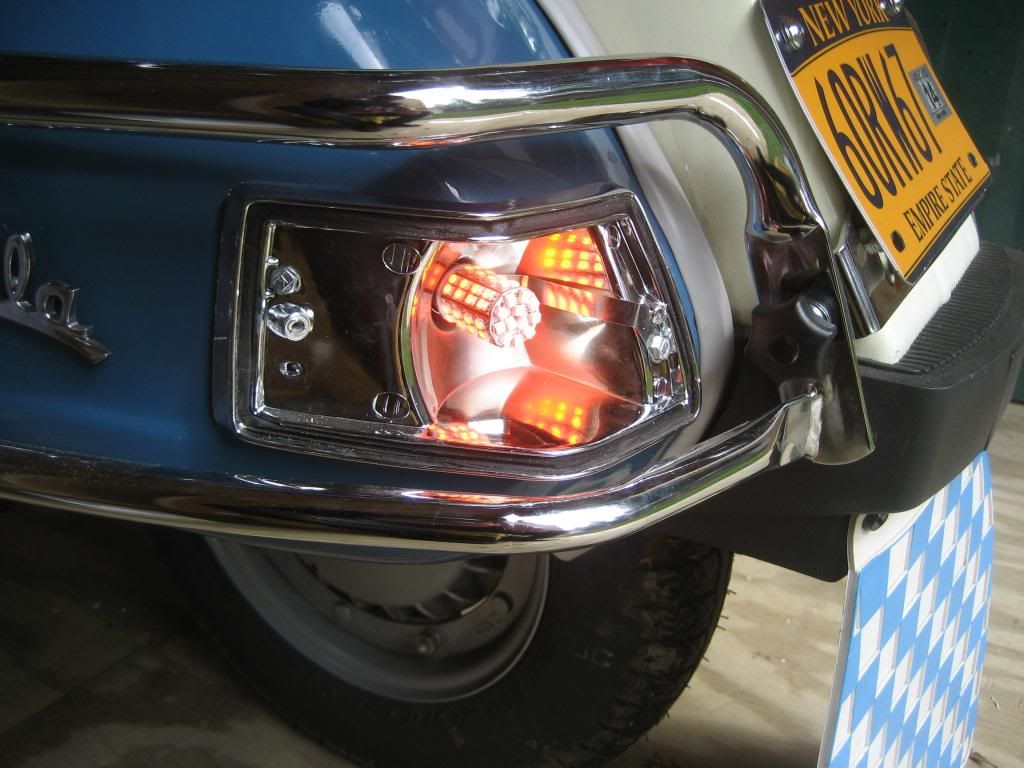
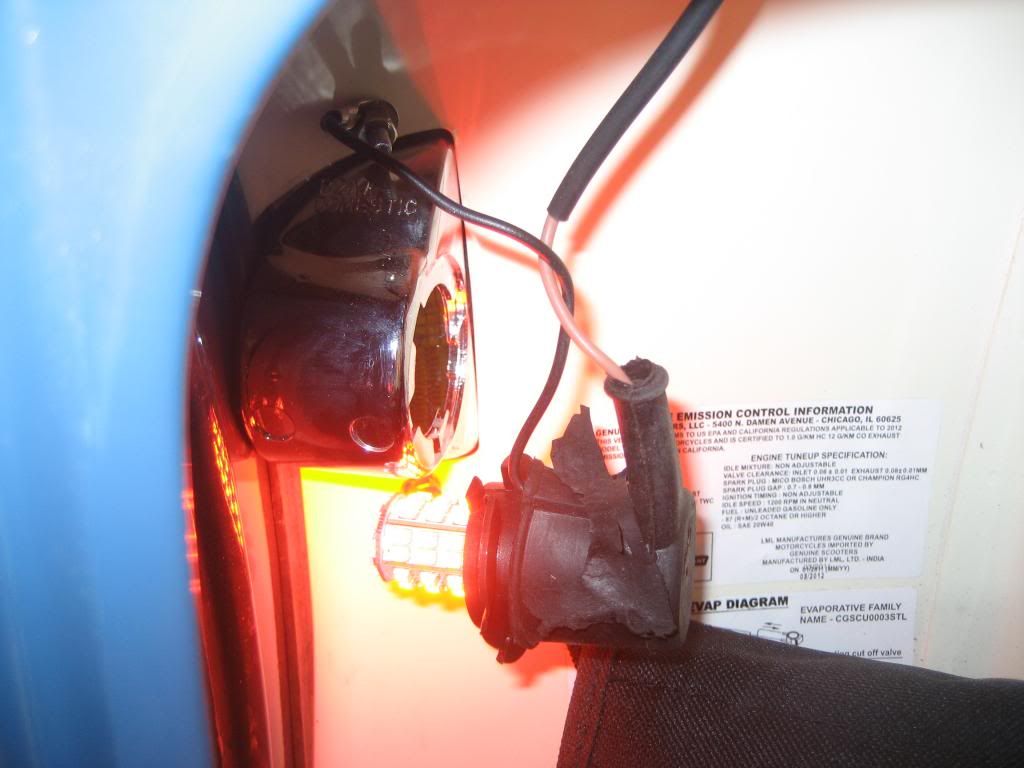
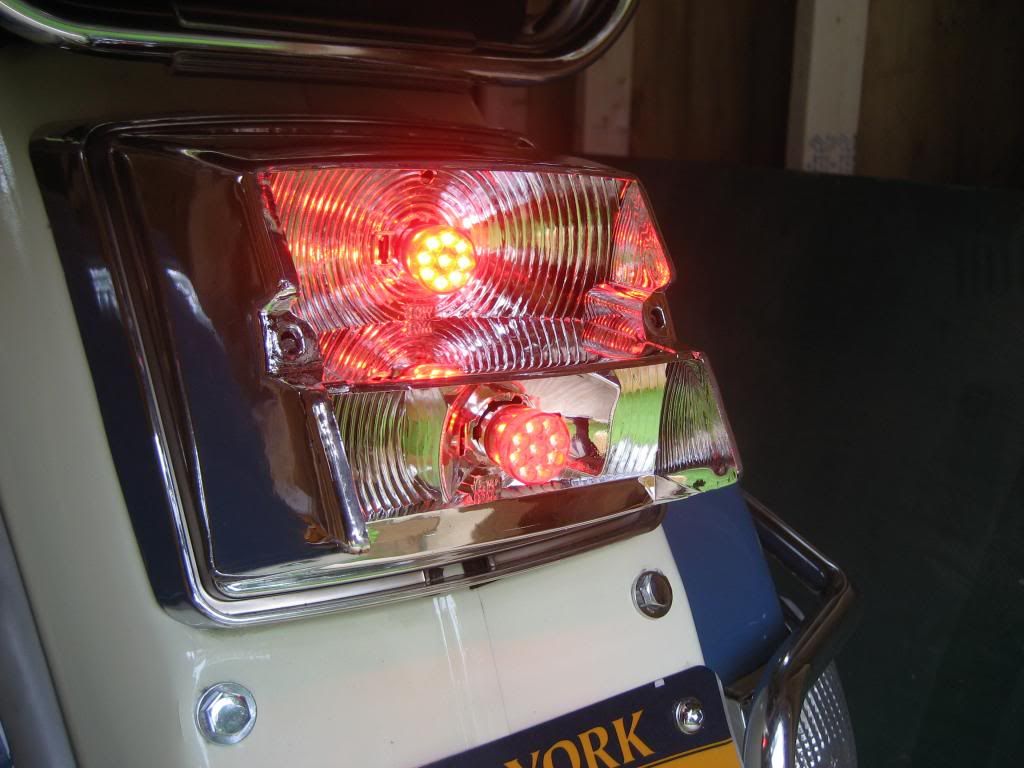
Before buttoning it all up, I tested the signal to be sure it would work:
I replaced both rear signals, and the LEDs are a much brighter, work in place of the stock bulbs with no other mods, and they are invisible inside of the lenses when not illuminated. However, the blink rate is much slower.
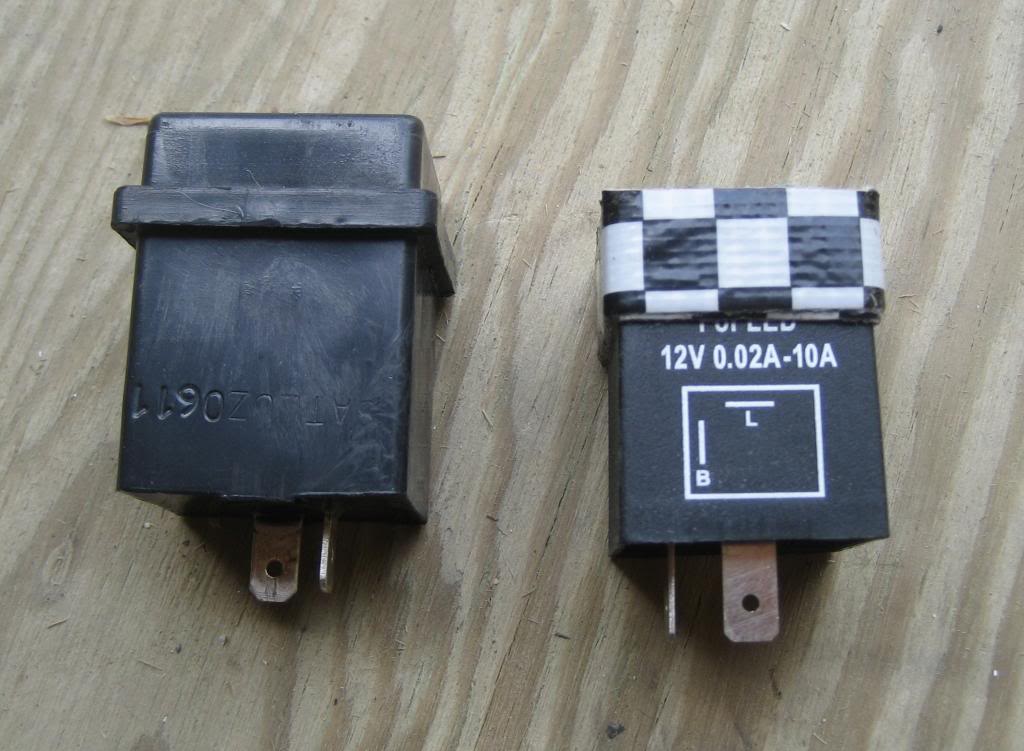
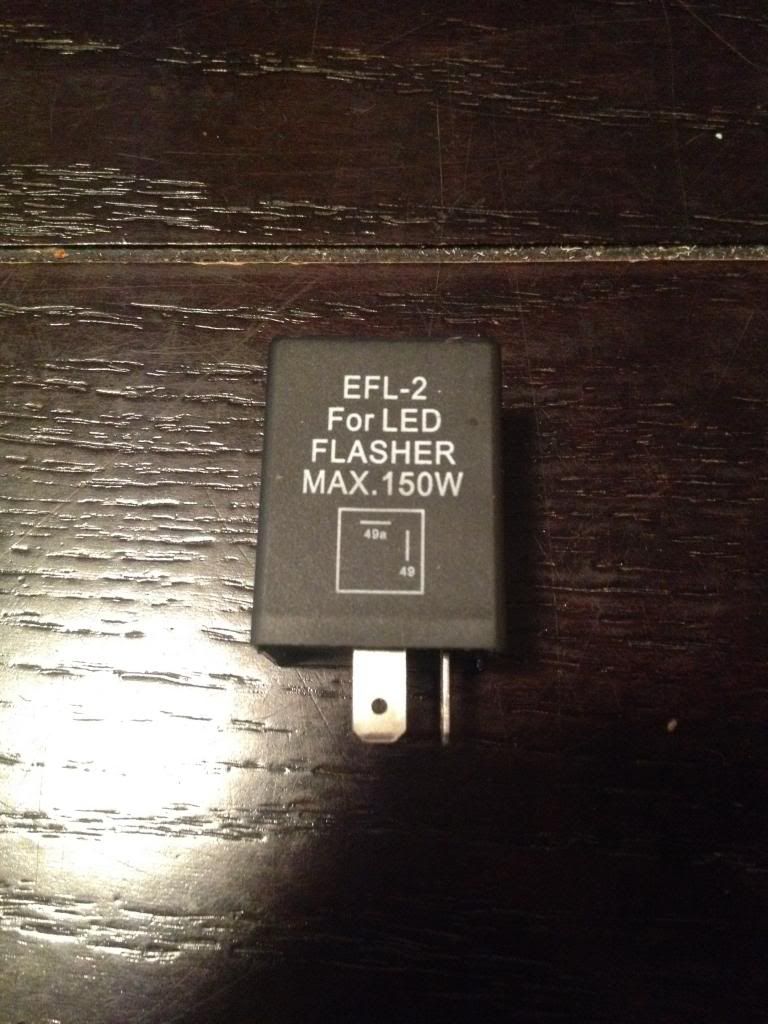
A bit more research showed that the stock flasher relies on the higher current draw of the incandescent bulbs to blink at the correct rate. To remedy this, a solid state flasher is needed which will work with both LED or incandescent bulbs in any combination. In order to ID the correct blinker needed, I had to pull the stock one from the Stella, and compare it to those on the autoillumination website. Well, I broke down and ordered the solid state flasher unit (# EFL-2) from autolumination.com, as well as two more 7507 PY21W Tower European Bulbs with 60 High Powered Wide Angle SMT LEDS for the front turn signals. Once I receive those, I will take more pictures and post my results.
I hope this helps!
Posted: Wed Apr 24, 2013 4:27 am
by magnato1
I'm so glad you decided to do this. I was doing all the research to get the LEDs in both front and back along with the flasher, but never but the bullet, I think because my Stella was in the shop for like a month. I'm very excited to see how this comes out!
Posted: Wed Apr 24, 2013 1:00 pm
by ScootLemont
Thanks!
I agree that he turn signals are not as bright as I would like them to be.
Looking forward to your update & please post up the new flasher part number when you install & confirm it all works
The rest of us appreciate it!
Posted: Tue Apr 30, 2013 1:17 am
by slotrod65
I received the two additional LED bulbs and the solid state flasher this afternoon. I am hoping to get them installed, and get some photos tomorrow.
Posted: Tue Apr 30, 2013 11:35 am
by jimmbomb
Nice write up.. And links too.... Bravo...
Posted: Tue Apr 30, 2013 3:00 pm
by slotrod65
ADDING A SOLID STATE FLASHER:
This morning I headed out to the shed for the rest of the LED conversion. The new bulbs and LEDs arrived yesterday:
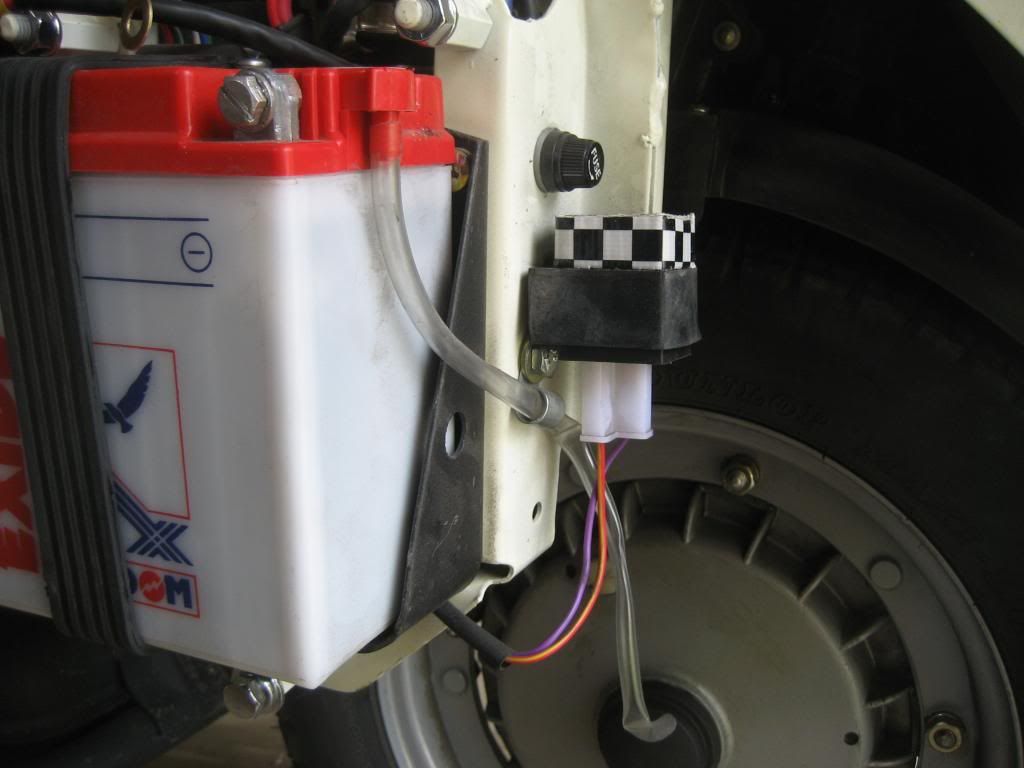
The first thing to do is to remove your left cowl, and your spare tire. This exposes the battery and the flasher:
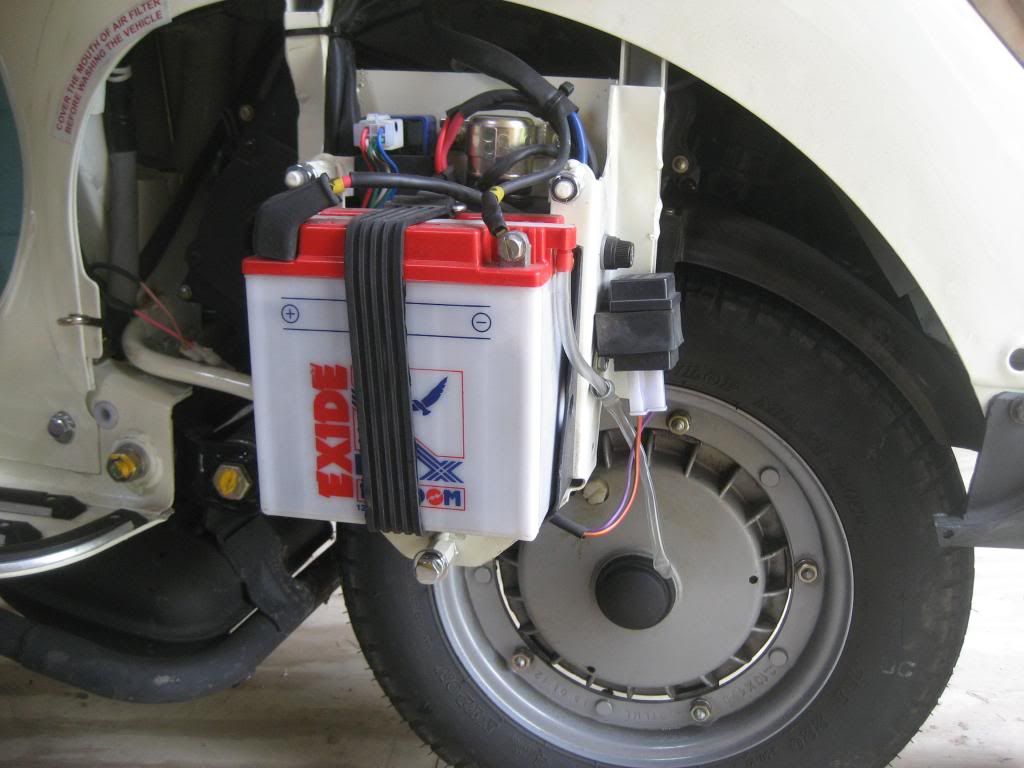
The flasher is the square box, just to the rear and around the corner from the battery, just under the fuse:
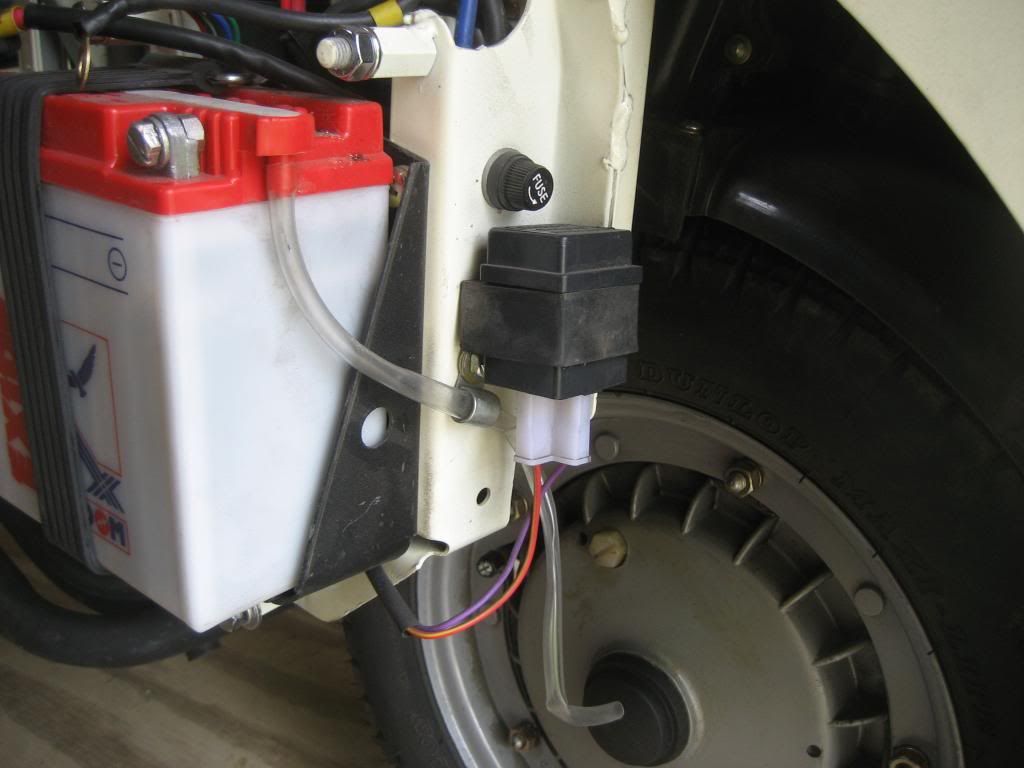
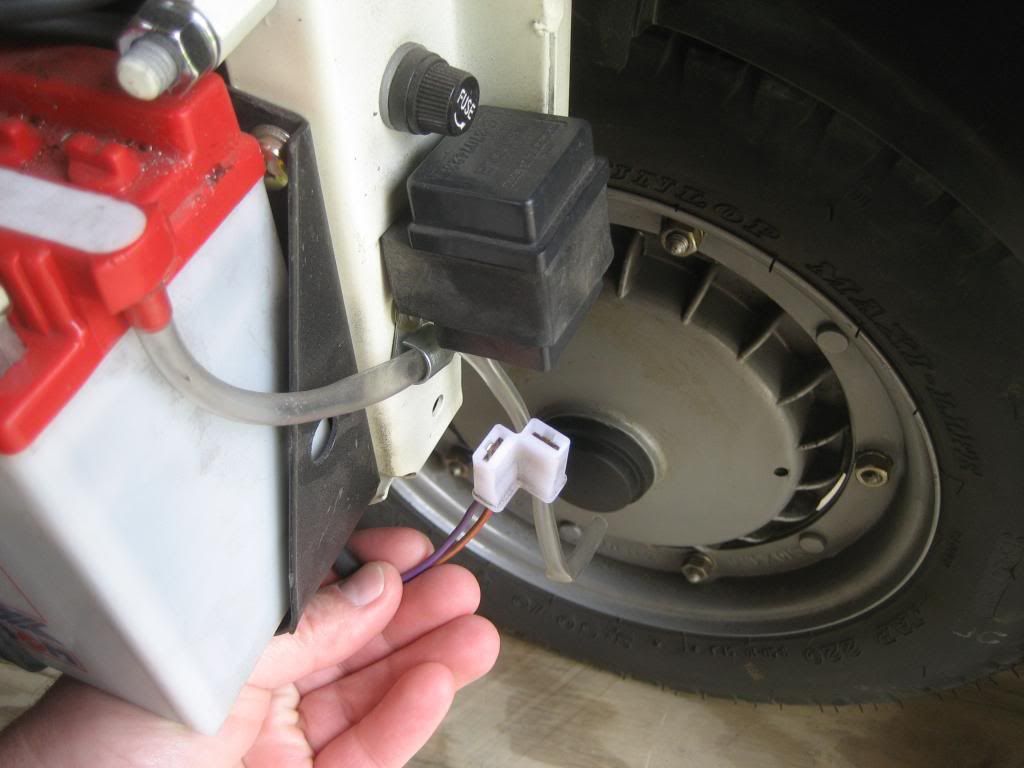
Since we are working with the electrical system, the first thing to do is disconnect the negative lead from the battery for safety. Then you can remove the plug from the bottom of the flasher. Pull on the plug, not the wires themselves. A little wiggling will get the wiring plug free.
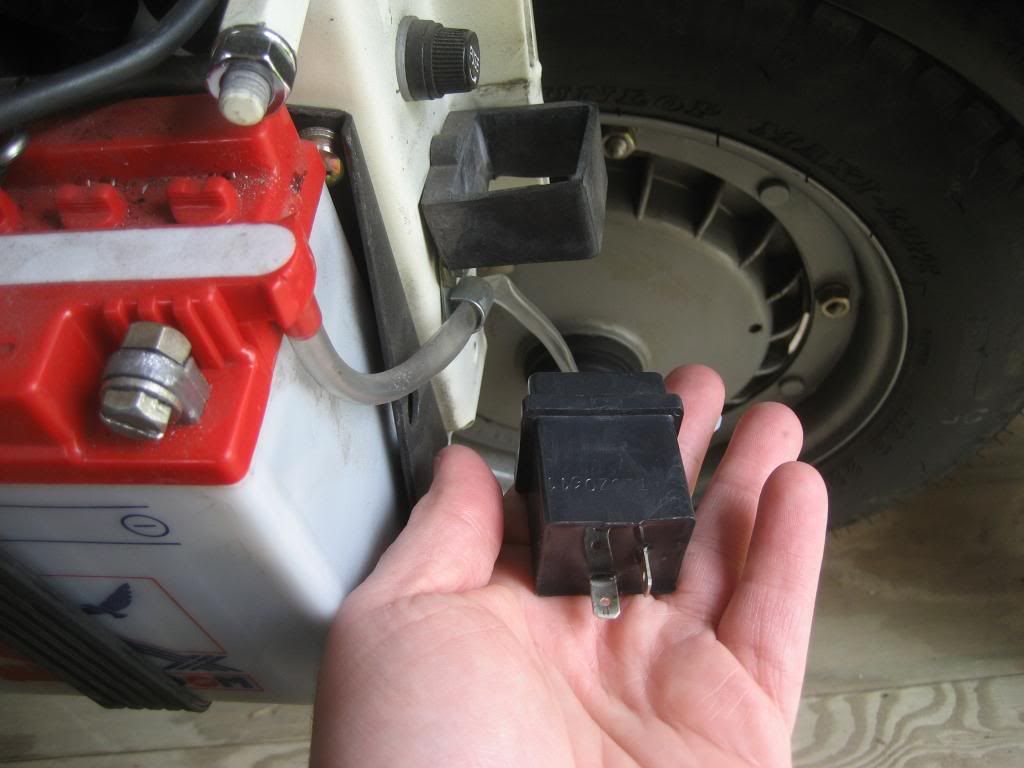
The flasher itself is held in with a square rubber mount, and it wiggles out the top:
The replacement flasher (on the right) compares pretty well with the original (on the left). It is a bit smaller, maybe by 1/4", but that turned out not to be an issue:
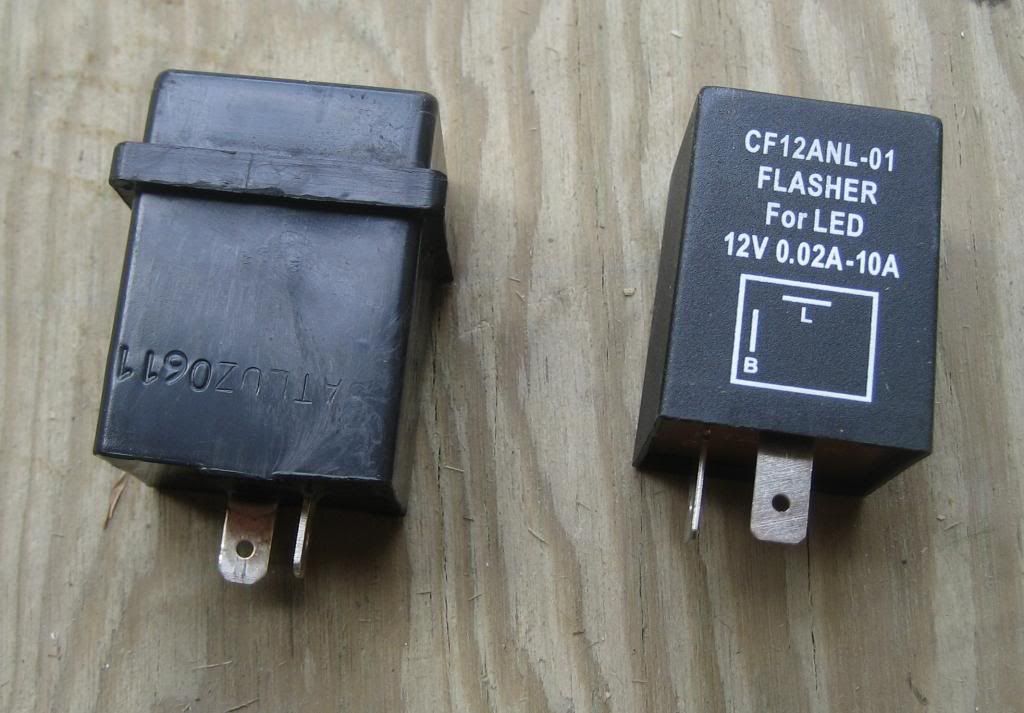
The original flasher is kept in place by a ring cast into its casing. The replacement is missing this, so I wrapped some duct tape around it to get the same profile:
With the tape added, the new solid state flasher popped right into place:
Next, plug the wiring into the flasher, and reconnect the battery. Then test the turn signals. This flasher works with any type or mix of bulb: Incandescent or LED.
Posted: Tue Apr 30, 2013 3:11 pm
by slotrod65
CHANGING THE FRONT FLASHER TO LEDS:
After changing the flasher, swapping out the front bulbs for LEDs is a breeze.
The best news is, the front bulbs are accessable through the inside of your glovebox, so you do not even need a screwdriver.
Open your glovebox, and with a twist and pull, remove the socket.
Remove the bulb by pressing down and turning, then reverse the procedure to install the LED. Then test to be sure everything works:
The other bulb is installed the same way:
When you are done, perform a final test to be sure all of the LEDs and the flasher work properly.

That's it! Now you have brighter turn signals, with a solid state flasher that is unaffected by current draw, blown bulbs, or cold weather.
Posted: Tue Apr 30, 2013 3:31 pm
by slotrod65
PARTS LIST:
Here is the final parts list ordered from
http://autolumination.com/
4 x AMBER 7507 PY21W Tower European Bulbs with 60 High Powered Wide Angle SMT LEDS
and the flasher:
EFL-2 two prong solid state flasher unit.
Posted: Tue Apr 30, 2013 7:26 pm
by ScootLemont
great write up - thanks!
Posted: Tue Apr 30, 2013 10:54 pm
by J33pman
Awesome! Going to do it to my P200 as well. Thanks.

EDIT: Any plans to do the brake light/tail lamp?
Posted: Wed May 01, 2013 12:38 am
by fisher1
Great write-up & contribution ...... nice going!
Posted: Wed May 01, 2013 12:46 am
by slotrod65
fisher1 wrote:Great write-up & contribution ...... nice going!
Thanks, and yes.
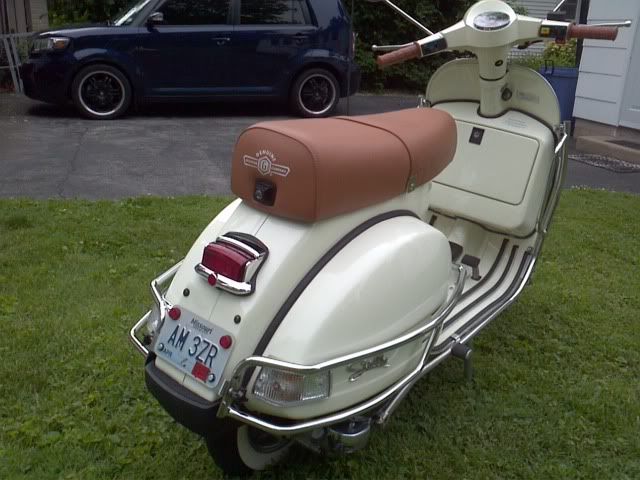
But I really want to swap out the stock taillight fixture for an acorn style, before I blow another $40 on LEDs.
Has anyone successfully done this?
Posted: Thu May 02, 2013 1:43 am
by Robbie
Although I like the instant on/off provided by the L.E.D.s I found that simply going to the solid state relay with its almost zero draw, increased the stock bulb output tenfold.
In addition, as you probably noticed with your mod, the instrument signal bulb is now at least double the brightness.......this also with just the relay change.
I just used a two pole Tridon (brand name) solid state relay found at most auto parts stores.
Rob
Posted: Thu May 02, 2013 6:01 am
by magnato1
slotrod65 wrote:fisher1 wrote:Great write-up & contribution ...... nice going!
Thanks, and yes.
But I really want to swap out the stock taillight fixture for an acorn style, before I blow another $40 on LEDs.
Has anyone successfully done this?
Well done sir. Do the signals blink slower, faster, or at the same rate now? I personally think they blink a little too quickly stock.
Posted: Thu May 02, 2013 12:33 pm
by slotrod65
The signals blink just a bit faster with the solid state flasher, but I don't feel that is really much of an issue.
Posted: Sun May 26, 2013 1:17 am
by slotrod65
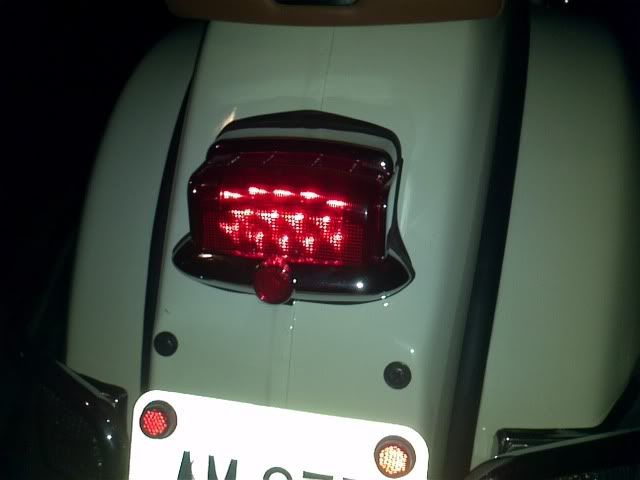
OK, I decided to spring for LED brake/tail lights as well since I am not sure when I will be changing the tail light.
I ordered from the same place:
http://autolumination.com/
and chose the 15 Led Matrix type bulb in Red to replace the stock 5007 and 5008. make sure you order the BA15s version with one electrical contact on the bottom. I chose this bulb as I was worried about clearance problems with the longer bulbs.
Once they arrived, installation was a snap. First I removed the two ugly black screws holding on the tail light lens:
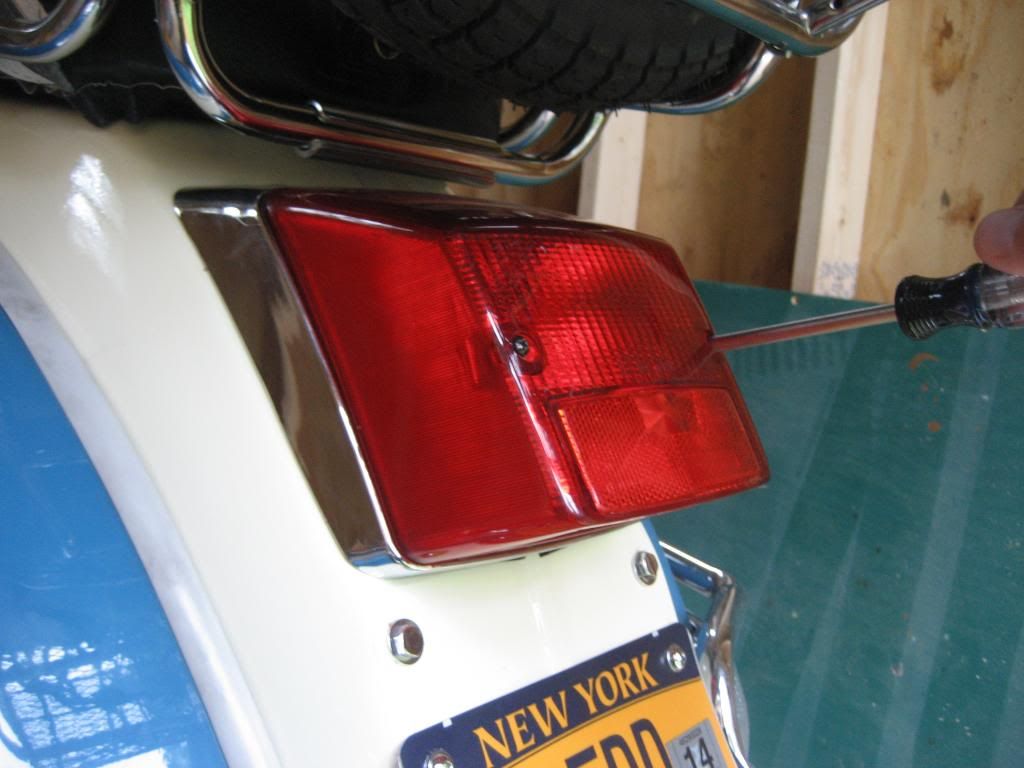
This exposed the stock bulbs:
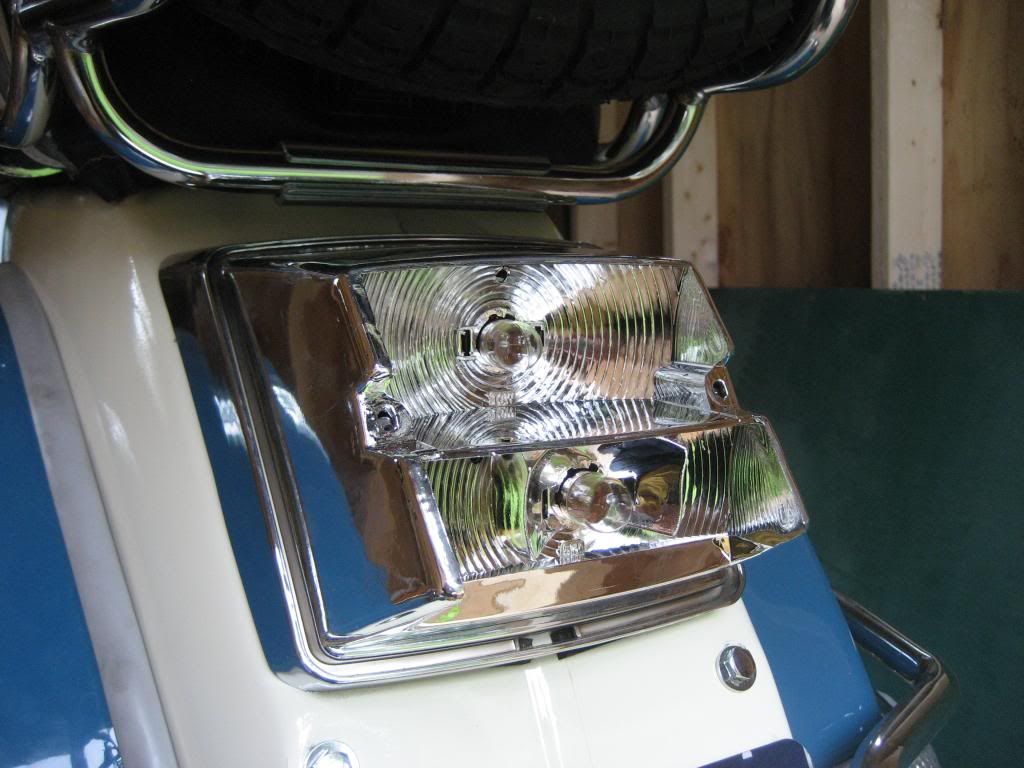
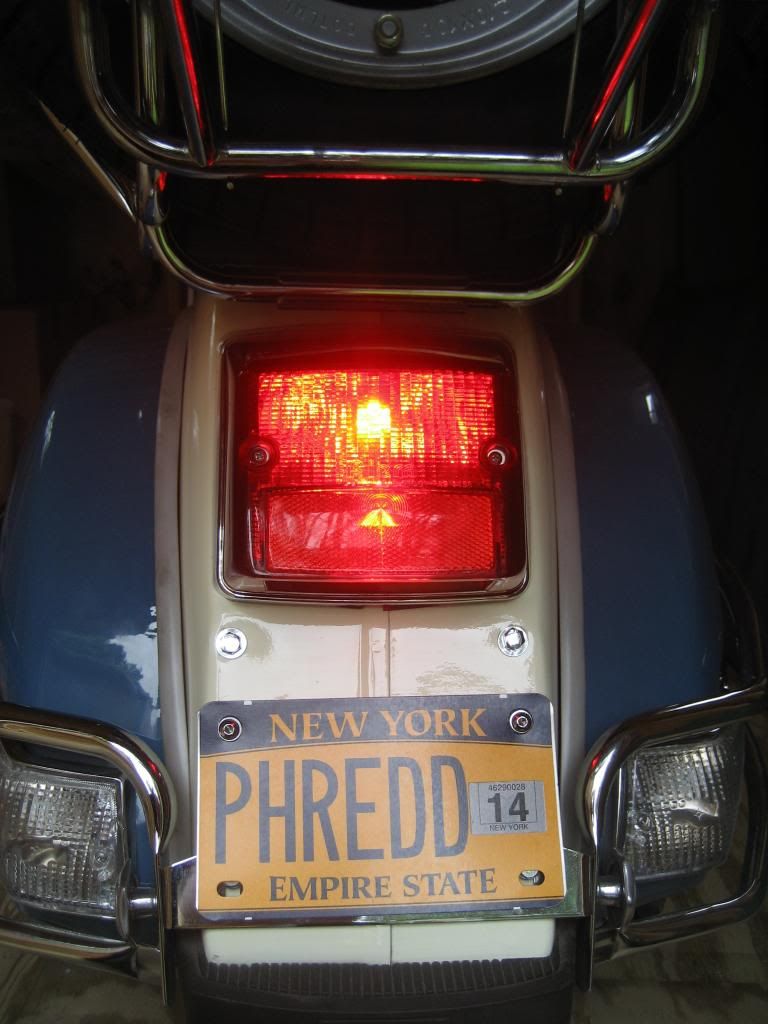
To remove the bulbs, just gently turn and pull. Install the LED by pushing and turning, then test:
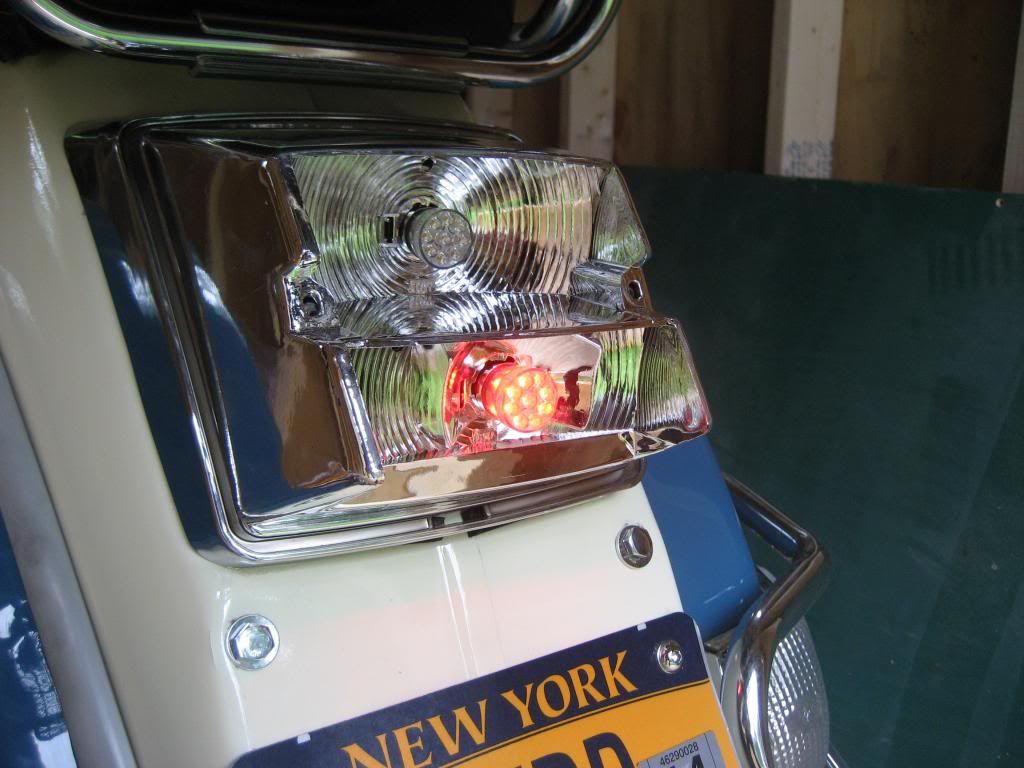
Install the brake light the same way and test:
Time to put the lens back on and install the screws. But wait! I have been working to remove all black rubber, plastic and hardware from my Stella, so it was off to the hardware store. There I picked up a replacement screws and washers made from stainless steel.
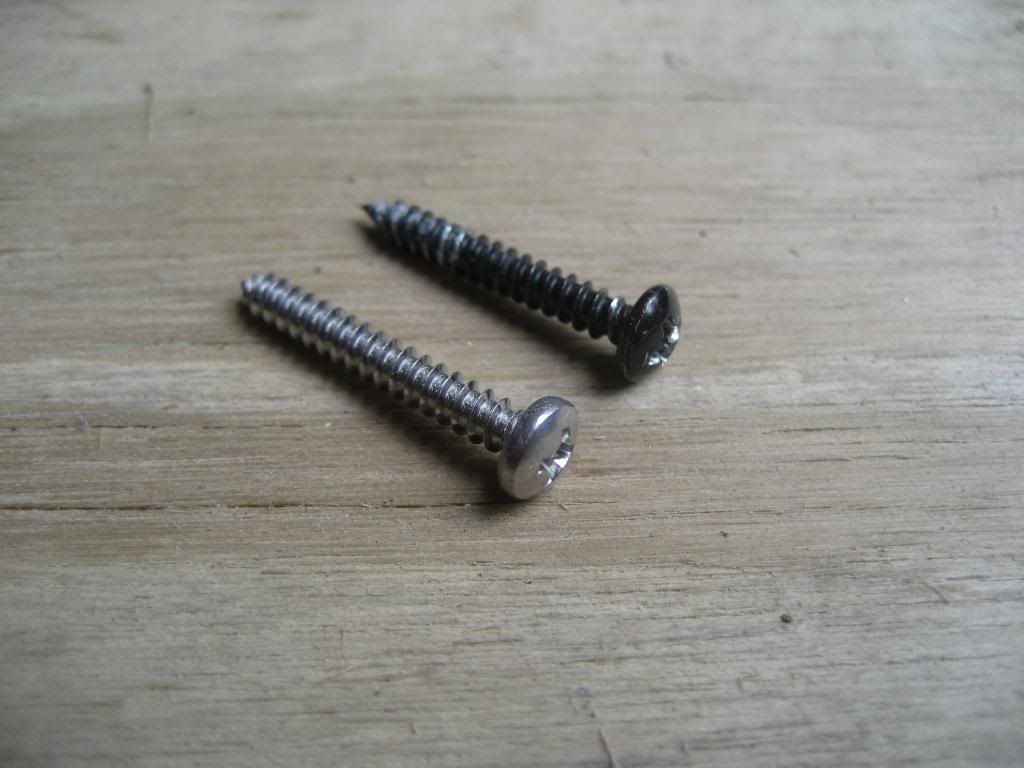
I installed the shiny news screws, and they look great!
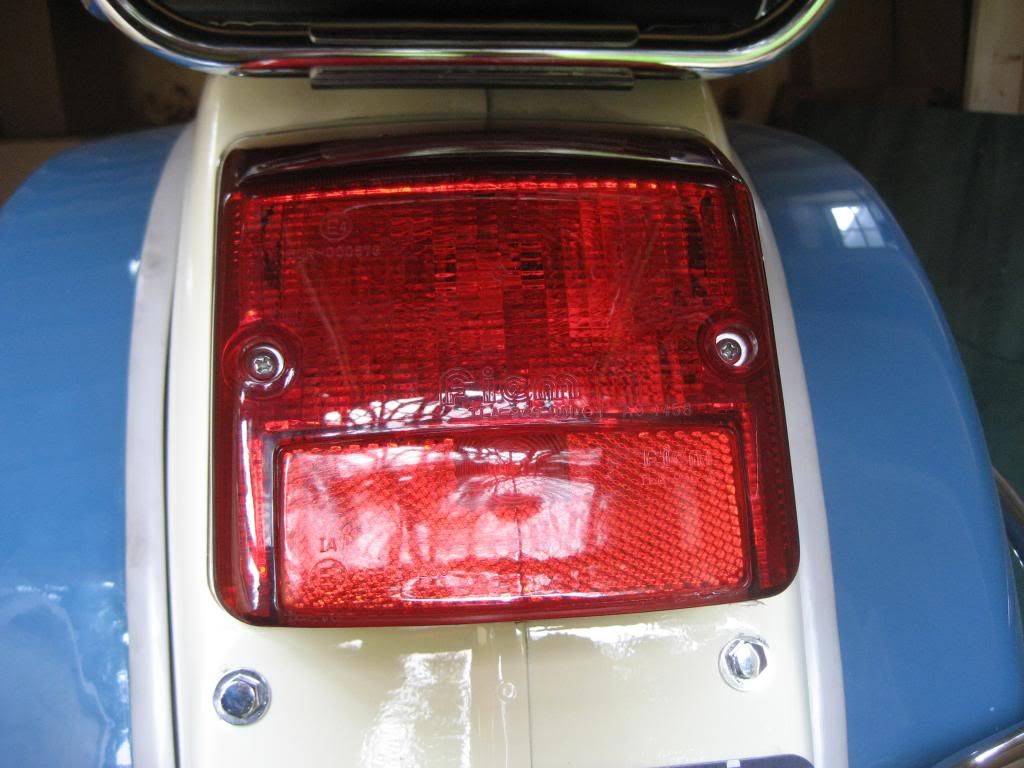
One final test to be sure everything works after buttoning up, and we are done:
I have replaced all the bulbs on the Stella now except those in the headlight. They are much brighter, and draw far less current.
Anyone put a solid state flasher in an older Stella 2T?
Posted: Fri Jul 12, 2013 6:47 pm
by mplsstella
Hello!
Great posts about the LED upgrades -- I ordered all the parts, but discovered that the flasher on my Stella 2T is completely different. Anyone have any info about swapping out the stock 2T flasher for a solid state one??
Thanks in advance!
Posted: Fri Jul 12, 2013 7:00 pm
by slotrod65
Can you post a photo showing the plug configuration?
Posted: Fri Jul 12, 2013 7:06 pm
by mplsstella
Yep, Can do soon... currently in a meeting. Give me a couple of hours
Thanks!!
Posted: Mon Jul 15, 2013 9:02 pm
by Cellarrat
Thanks for the great info. just ordered my upgrades...
Posted: Wed Sep 18, 2013 5:19 pm
by magnato1
slotrod65 wrote:OK, I decided to spring for LED brake/tail lights as well since I am not sure when I will be changing the tail light.
I ordered from the same place:
http://autolumination.com/
and chose the 15 Led Matrix type bulb in Red to replace the stock 5007 and 5008. make sure you order the BA15s version with one electrical contact on the bottom. I chose this bulb as I was worried about clearance problems with the longer bulbs.
One final test to be sure everything works after buttoning up, and we are done:
I have replaced all the bulbs on the Stella now except those in the headlight. They are much brighter, and draw far less current.
How does the new tail light work? Is it really bright? I think it is the weakest light on the scoot and I worry about it whenever I ride at night. I want to get something that is as bright as the tail lights on a car. How do you think it compares? I'm planning to order my stuff from Autolumination this week, but want to get the right tail light. Thanks!
taillight
Posted: Wed Sep 18, 2013 5:41 pm
by Cellarrat
It is brighter than the original but not blazing. I'd say a 50+% improvement.
The solid state flasher is the critical item much more juice getting to the bulbs.
Posted: Thu Sep 19, 2013 7:06 pm
by saturnphive
Did we ever find out what the difference is between a 4T and the 2T flasher? I would really like to do this conversion as well!
Posted: Thu Sep 19, 2013 9:38 pm
by magnato1
Nope. You should post a picture of your flasher and then these get a will be better able to help you out.
Posted: Thu Sep 19, 2013 9:56 pm
by saturnphive
Might give that a shot tonight. The LEDs look great and I've been having weak light problems anyway. What would you say total cost was - incl. taillights?
Re: taillight
Posted: Fri Sep 20, 2013 2:37 pm
by jimmbomb
Cellarrat wrote:It is brighter than the original but not blazing. I'd say a 50+% improvement.
The solid state flasher is the critical item much more juice getting to the bulbs.
One option for a brighter taillight is to just swap out the whole unit..
If you can spare the coin..there are many options..
This one went on my 2010.
look to tail light king.... something....dot c×m....
a bunch there
Light $
Posted: Thu Sep 26, 2013 5:07 pm
by mer10
What would you say total cost was - incl. taillights?[/quote]
I ordered all the parts and it totaled $125 with shipping to San Diego Ca
Posted: Tue Oct 01, 2013 5:13 pm
by slotrod65
I swapped out the tail light this week to a vintage SS180 style. Still used LEDs. Here is the link to my thread:
viewtopic.php?p=325834#325834
Posted: Sat Oct 19, 2013 6:54 am
by magnato1
Ok, so I did the turn signal install with all of the same parts that you used. My signals don't flash though, they just stay on. They work, they just don't flash. I can't imagine what I could have missed here.
Install new bulbs - check
Install new flasher - check
Turn lights on - check
Please, any suggestions?
Also, the turn signal chime doesn't function anymore either. Is this something that has to be disconnected for the LED bulbs to work?
Hopefully some electronics wiz will have some advice!
Posted: Sat Oct 19, 2013 12:40 pm
by Robbie
Re install the original bulbs in the front only.
You may have a relay that needs to see a bit of load.
If they then work, your sounding device will also work.
When I did the same thing last year I had the same situation.
Stuck the front bulbs in and worked fine.
Sometimes, the electrical load has become so low the relay can't 'see' it.
In that case, if you want to stay LED front and rear a resistor needs to be installed in line with each signal harness.
I just stayed with the stock fronts.
Rob
Posted: Sat Oct 19, 2013 1:21 pm
by slotrod65
This does sound like a relay issue. Did you purchase a digital relay strictly for use with LED bulbs?
Posted: Sat Oct 19, 2013 4:08 pm
by magnato1
I bought the same EFL2 LED flasher from autolumination. So I don't know why the flasher would work for you and not for me!
[/img]
Posted: Sat Oct 19, 2013 5:05 pm
by magnato1
Autolumination's website says that the flashers are designed to work with incandescent and with led, mix and match and it should work regardless. So, I put the incandescents back into the rear signal housings and it still wouldn't flash. Interestingly, with the incandescents in place, I got a faint, solid, chime from the signal chime. So, I then put the old flasher back in and now the signals and chime work normally, except with led bulbs in the front.
I know little to nothing about electronics, but it seems to me like the chime has something to do with this.
Slotrod, do you have your chime hooked up or is it disconnected?
Posted: Sat Oct 19, 2013 7:29 pm
by Robbie
Although new then I suspect you got a bum flasher.
Rob
Posted: Sat Oct 19, 2013 9:25 pm
by slotrod65
I agree. Sounds like the flasher is bad. It happens...They should send you a new one no problem.
Posted: Sat Oct 19, 2013 10:27 pm
by magnato1
Bummer, well, hopefully there wont be a problem getting a good one from them.
Posted: Sat Oct 19, 2013 10:55 pm
by slotrod65
Just follow the return process on their website.
Posted: Sun Oct 20, 2013 6:57 pm
by ericalm
Nice! I may have to make the same swaps soon.
I wish I could figure out how to take the turn signal indicator (but not the lights) off the relay, but I don't think there's a way. I played with a number of buzzers and beepers and my favorite had a built-in relay. So it sort of stuttered due to the relay in the cowl.
I guess I could wire something from the buzzer directly to the switch but what a pain.
Posted: Mon Oct 21, 2013 5:12 am
by magnato1
Yeah, the chime is so horrible. But, people always look, so if it makes me more visible, I'm ok with it.
Posted: Mon Oct 21, 2013 2:09 pm
by slotrod65
Does your new flasher say: 12v .2-10a? I don't see that on your pic. maybe they send you the wrong flasher?
Posted: Tue Oct 22, 2013 12:54 am
by magnato1
I think I found the problem. In your parts list above you say that it's the EFL-2 flasher, but if you look at the pics, it's the CF12 flasher. Wish I had caught this initially. The nice folks at autolumination have already sent out another flasher. I'll try it out when it comes, guessing it won't work, but at least we found the problem, I think...
Posted: Tue Oct 22, 2013 1:25 am
by slotrod65
Well, I am not glad they sent you the wrong flasher, but at least you know what is wrong, and you should be OK with the correct one.
Posted: Mon Feb 17, 2014 8:18 pm
by keaton85
Delete due to severe dislexia!

You were correct:
http://www.superbrightleds.com/carbulb_notes.php
Idono what I was thinking, sorry, I had it all backwards.
Posted: Wed Feb 19, 2014 3:44 am
by slotrod65
I am not sure that is the case. Red lenses block everything except red light. If red lens blocked red light, then no light would escape.
Posted: Sun Jul 06, 2014 6:30 am
by Spectre
Can anyone succinctly specify what I would need for a 2T Stella (especially the flasher)? I can't acertain it clearly here in the discussion.
Posted: Tue Jul 08, 2014 4:24 pm
by slotrod65
I have a 4T, and am not sure about the differences with a 2T. here are the parts I ordered:
To change your turn signals, you would need 4 LED bulbs and a digital flasher.
If you are ordering from
http://www.autolumination.com/ you ant to order:
4 x 7507 PY21W Tower European Bulbs with 60 High Powered Wide Angle SMT LEDS in AMBER
1 x CF12ANL-01 flasher.
You are good to go.
Posted: Sat Jul 12, 2014 6:52 pm
by Spectre
Thanks!
Found this as well, for those with the 2T Stellas:
http://www.scootercentral.net/forums/vi ... ed#p186323
Posted: Sat Jul 19, 2014 5:19 pm
by minilynnie
I love the way those LED lights look! I just purchased a Stella auto and was wondering if I could change the bulbs as well. Sorry I'm just such a newbie, that I wanted to ask before I start something I might regret later. Any info would be great! All I want to do is customize her and make her shine!

Posted: Sat Jul 19, 2014 10:23 pm
by Neurotic-Hapi-Snak
I noticed a problem. The taillight bulb is also the license plate light bulb. You put a red led bulb in, so your license plate light will be red, not white. Most States require white license plate lights. Just something to be aware of.
Posted: Mon Jul 21, 2014 1:34 pm
by slotrod65
minilynnie: Changing a Genuine Stella to LED is easy as long as you can turn a screwdriver. Just read through the thread a few times, especially the after comments where others have added their experiences, and follow the steps.
Hapi-Snack. If you have a state that requires a white license plate light, add a white bulb instead of a red one.


