Page 1 of 1
Spotlight conversion and wiring
Posted: Fri Mar 20, 2015 2:35 pm
by slotrod65
Hey gang,
So, I mounted vintage Notek and Lucas spotlights on my Stella last year, but did not wire them since each of the original vintage bulbs is a whopping 48 watts, and that would kill my battery in no time. Instead, I the plan is to convert the lights to low wattage LED bulbs. I am not using these as headlights, or even really as spotlights. The intent is to simply have more visibility at night when a cager is looking at me.
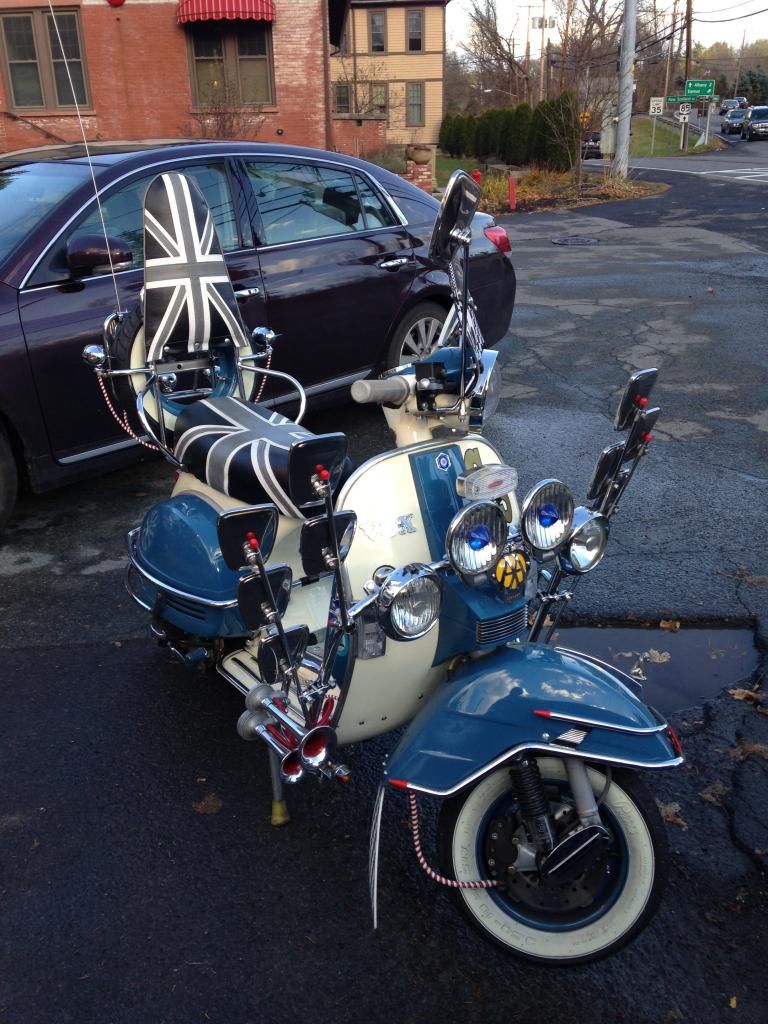
Posted: Fri Mar 20, 2015 2:38 pm
by slotrod65
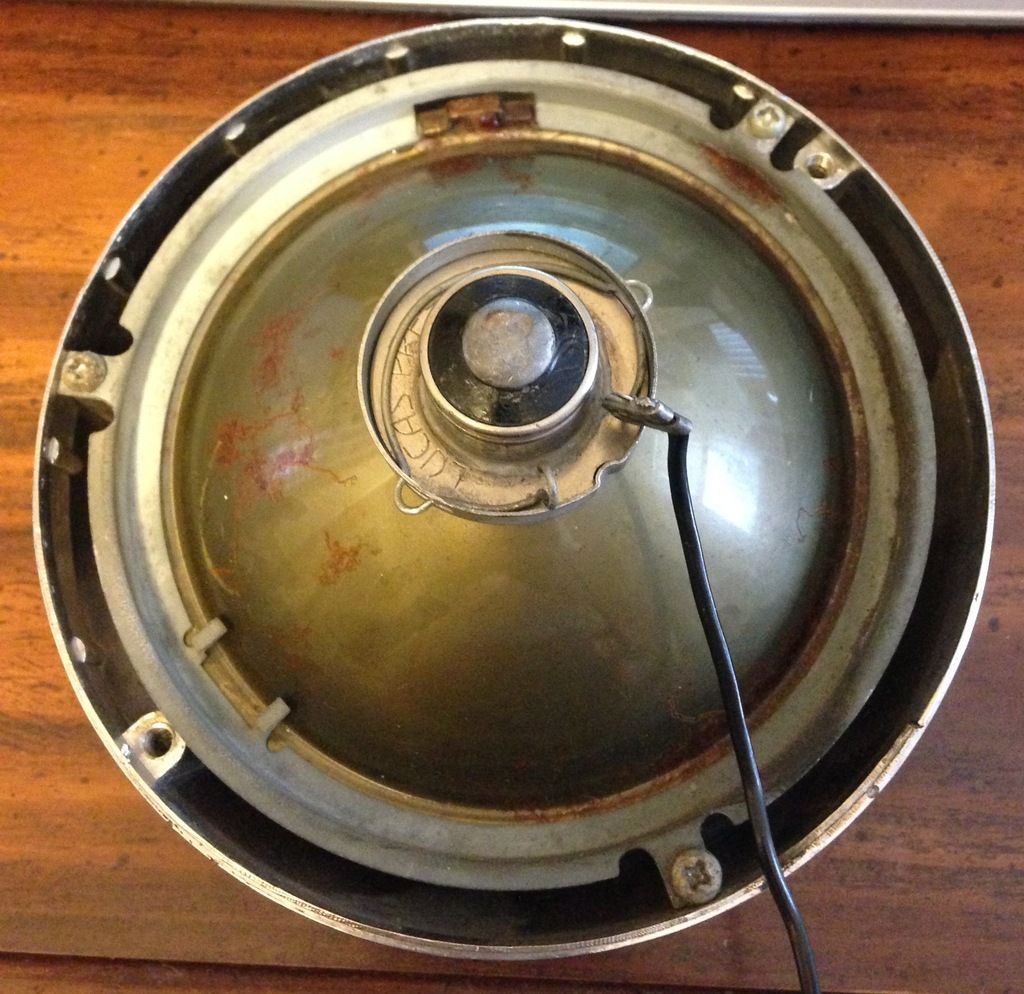
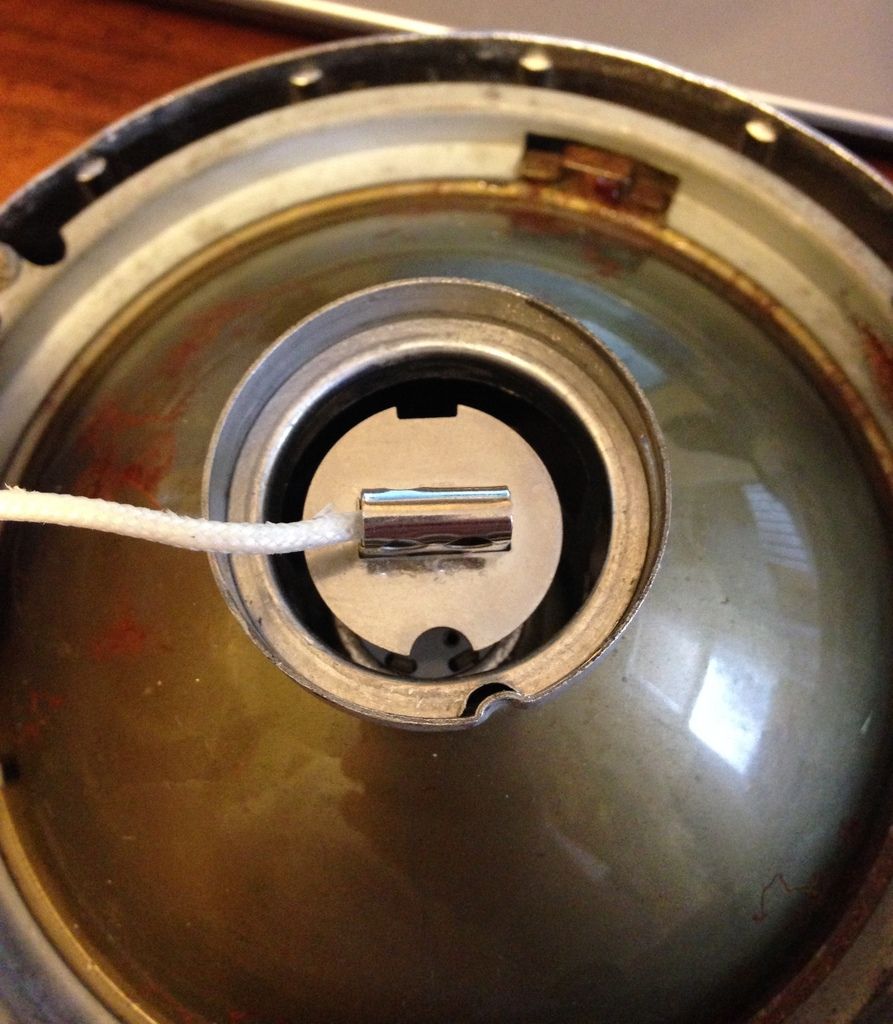
I finally got around to picking up a pair of H3 LED bulbs. I chose H3s because they have a mounting skirt, and the vintage bulbs have a skirt as well. Here is a photo of the original bulb mounting setup for the outer pair of Lucas spots: The skirt on the bulb is held in place by a spring clip.
Posted: Fri Mar 20, 2015 2:56 pm
by slotrod65
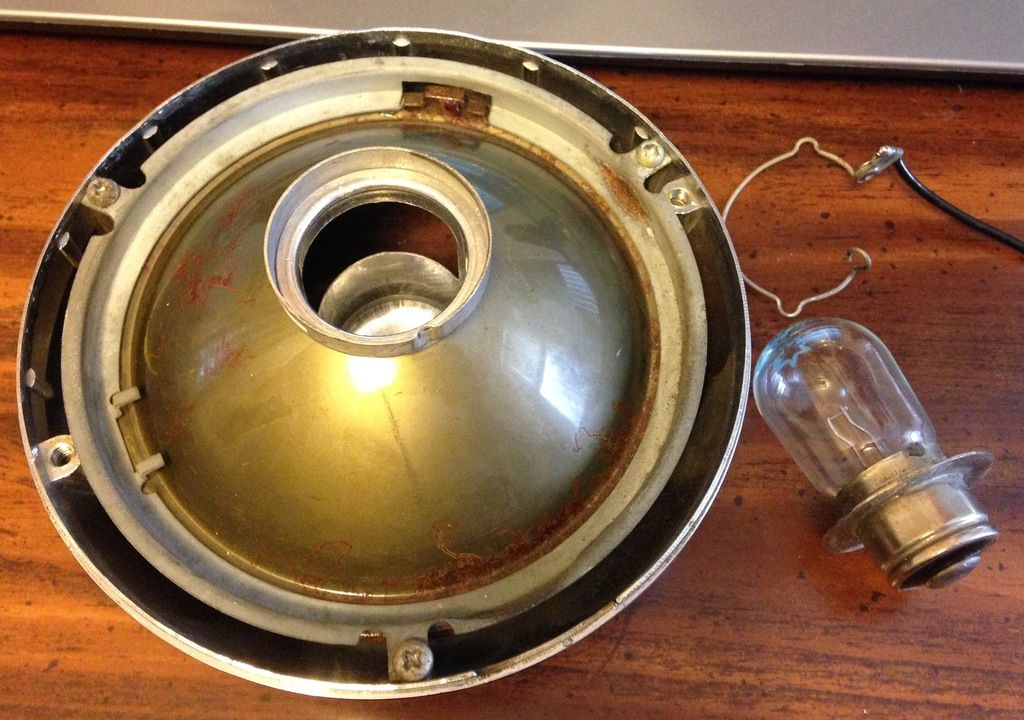
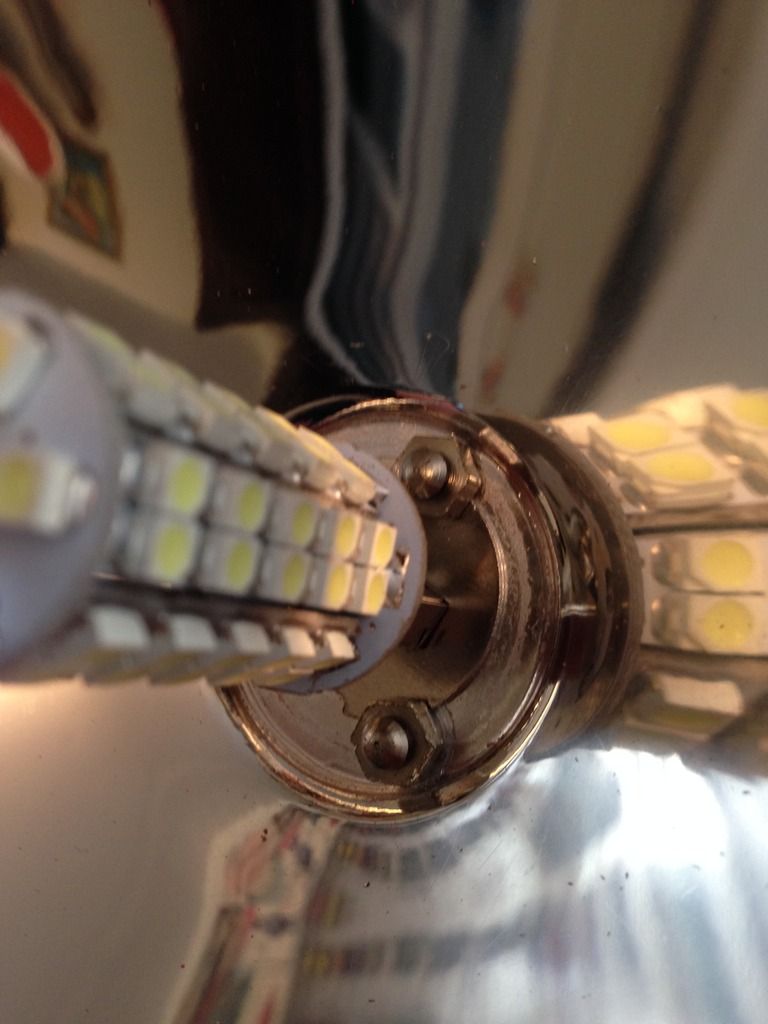
Here is the H3 LED bulb next to the original 48 watt bulb. Note the skirt.
It appears I was too smart for my own good: The skirt in the H3 bulb is too small for the mount on the spotlight.
Posted: Fri Mar 20, 2015 3:03 pm
by slotrod65
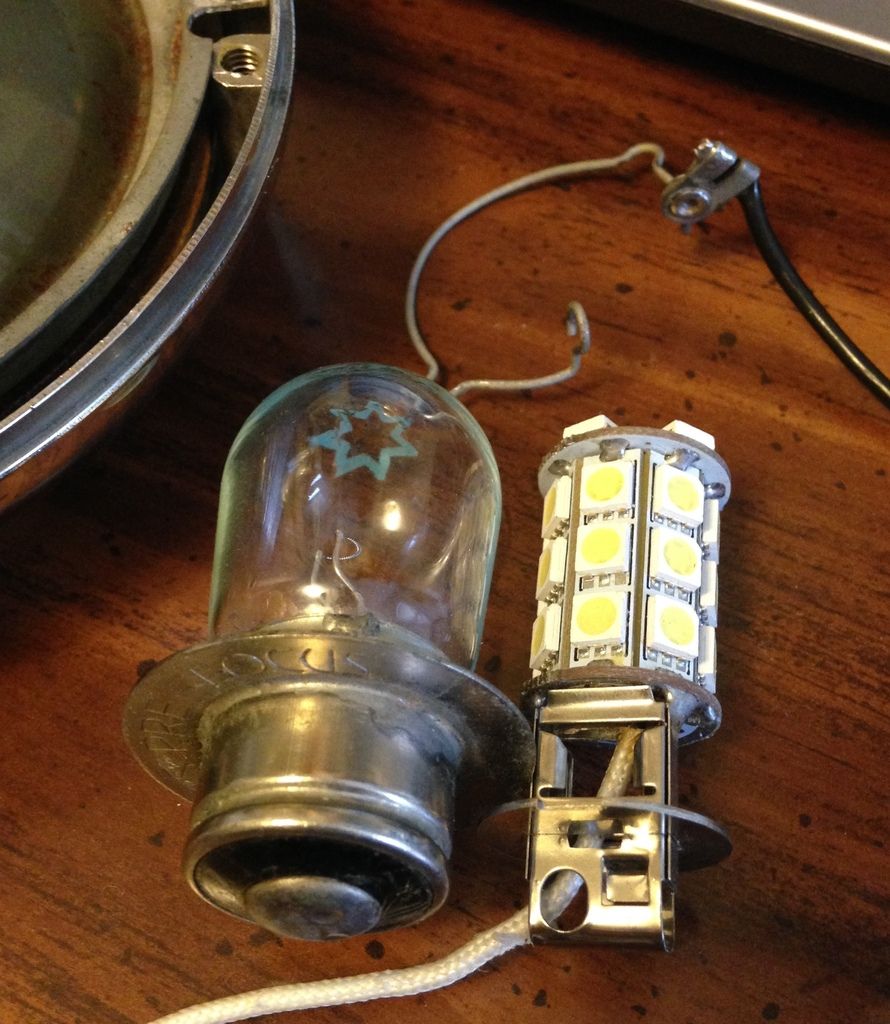
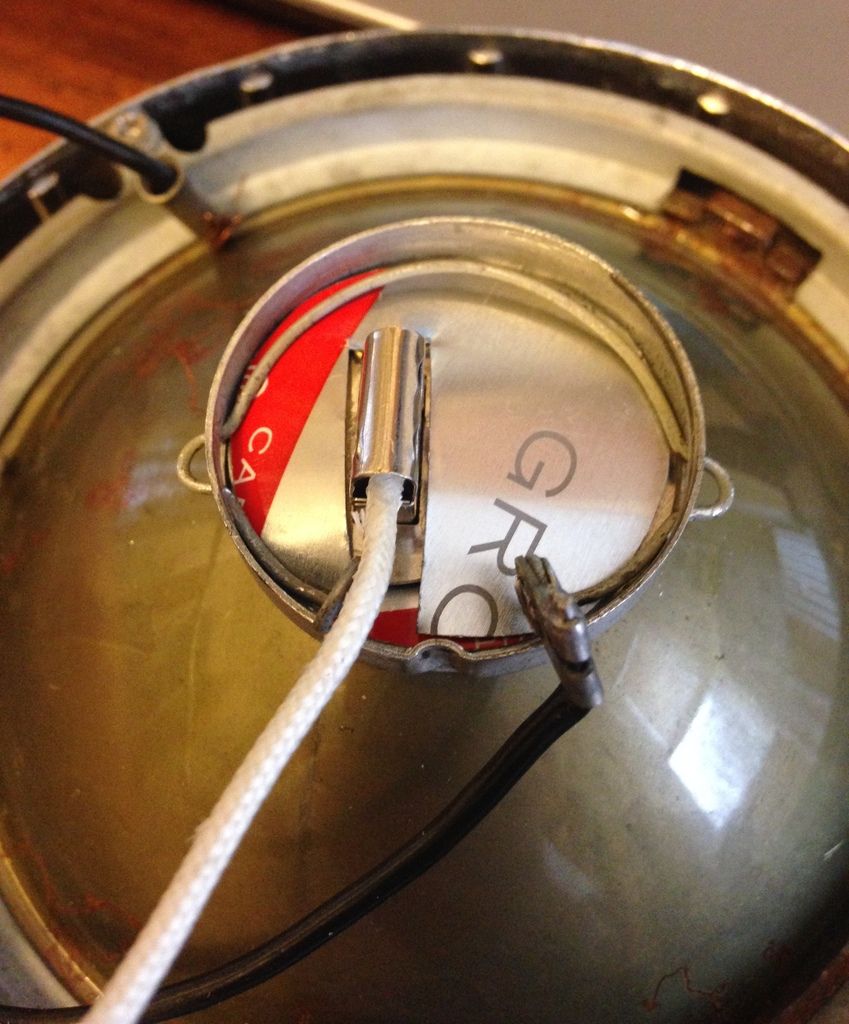
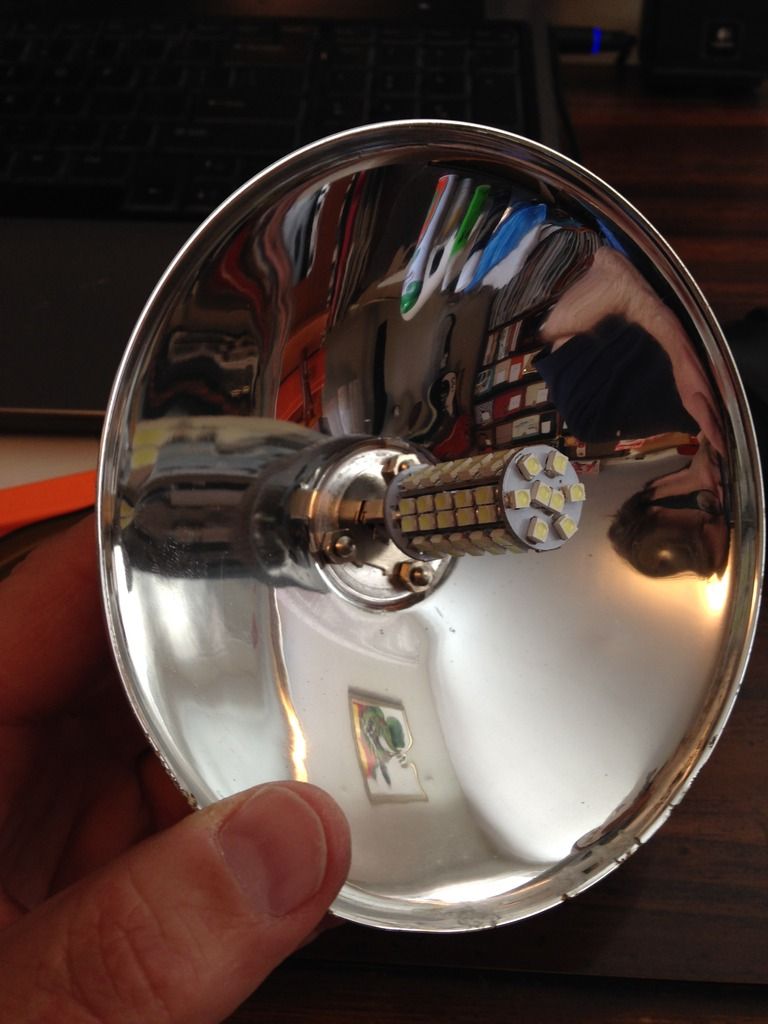
It was brainstorming time. I knew I would never find a washer the correct size to fit the light and the bulb, so I decided to make one. Then I realized I did not need a washer, but simply a spacer with a slot cut in it. I drink espresso and have a dozen empty Illy brand coffee cans lying around. The steel they are made of is smooth, and shiny, and I could not bear to just recycle them. I am glad I did not as a few cuts with the tin snips provided me with a strip of thin, springy steel and allowed me to cut out just what I needed. After several tries I settled on two spacers: One in front of the bulb skirt, and the other behind. The original spring clip holds it all together:
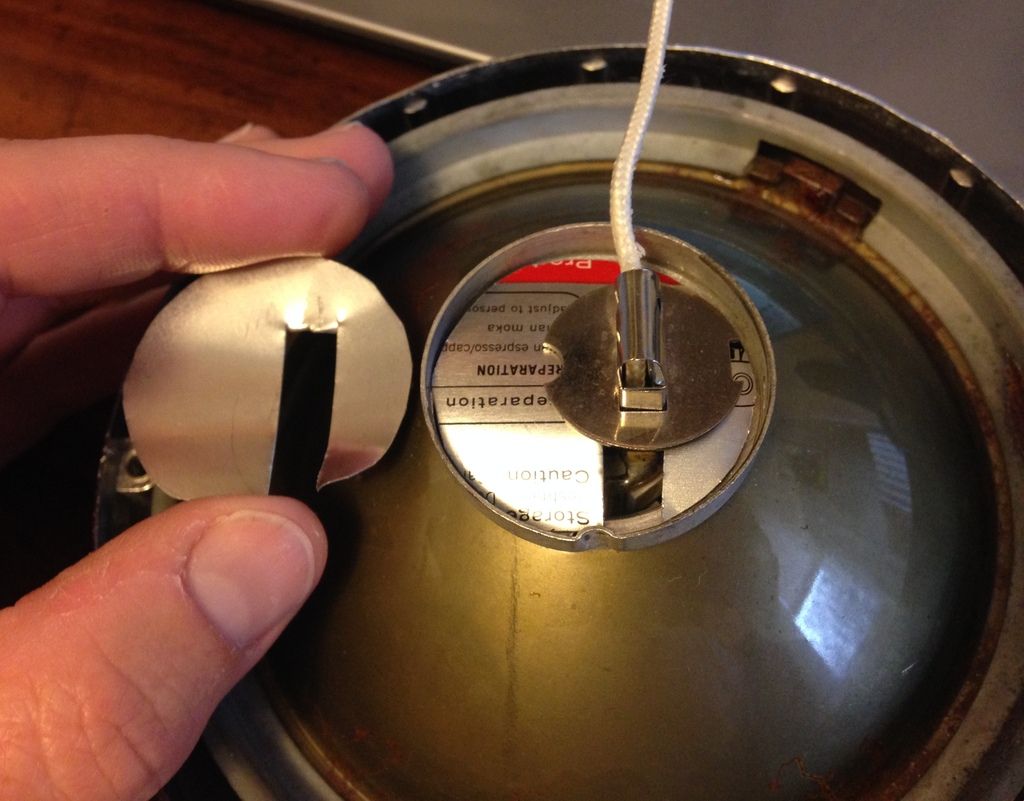
A gentle bend in the mounting spacers keeps everything tight, and the bulb does not move.
Posted: Fri Mar 20, 2015 3:05 pm
by slotrod65
Although everything looked good, there was no way to know until everything was assembled, and I cold test the results with a 9 volt battery:
https://www.youtube.com/watch?v=SZgZ4stWMys
Posted: Fri Mar 20, 2015 3:07 pm
by slotrod65
Next up: wiring into the Stella's harness, including a switch to turn them on and off.
Posted: Fri Mar 20, 2015 6:00 pm
by Stilts
Posted: Fri Mar 20, 2015 11:22 pm
by slotrod65
That's odd... it says Public. One more time:
https://youtu.be/SZgZ4stWMys
Posted: Wed Mar 25, 2015 2:23 pm
by slotrod65
Yesterday I removed the horncast, and ran wires into the glovebox. A piece of coat hanger wire came in handy yet again in assisting fishing the wired through the holes.
1: In the horn slot:
2: through the legshield and into the glovebox via the same holes used for the turn signal harness.
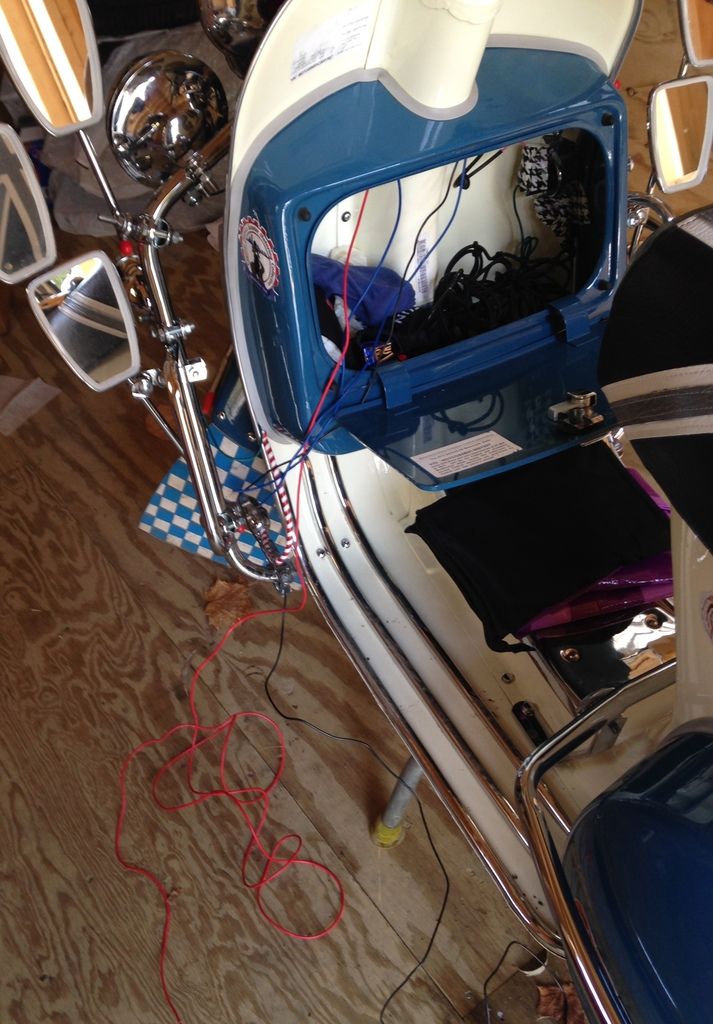
While I was in there, I spliced into the hot lead on the horn, and ran that wire into the glovebox as well. The red is the hot lead.
Posted: Wed Mar 25, 2015 2:26 pm
by slotrod65
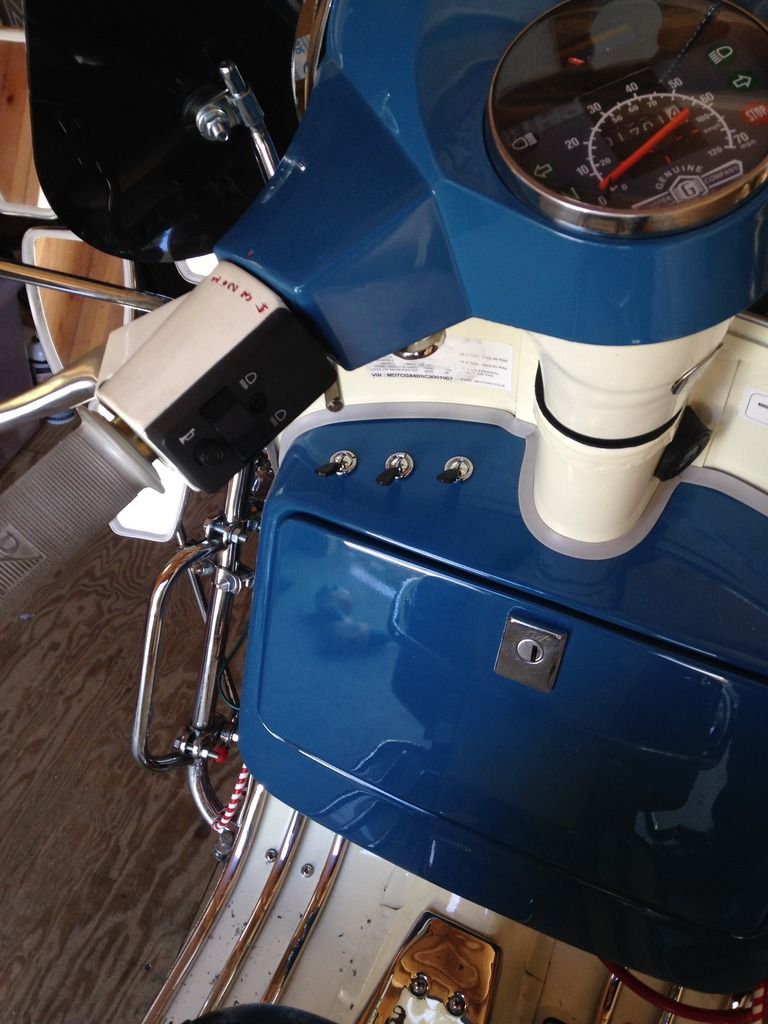
OK, so this morning I finally screwed up the courage to install the toggle switches. Why all the angst? Because I would have to drill holes in the glove box to mount them. Some masking tape allowed me to sketch right on the glovebox, and plan where I wanted to mount them.
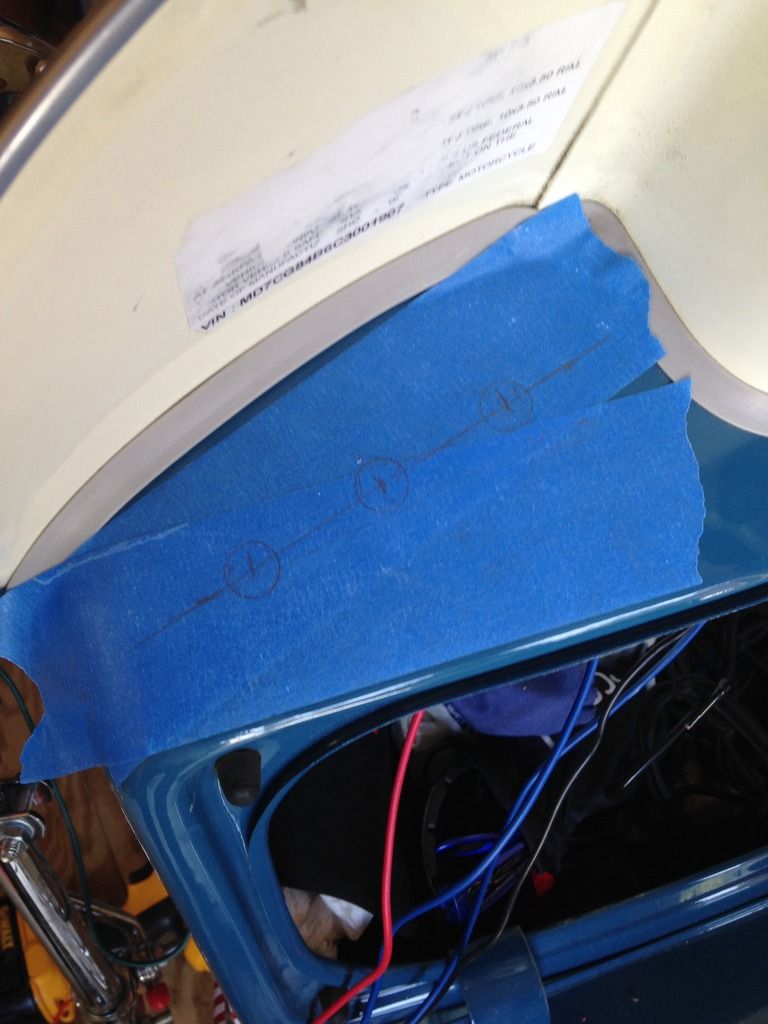
Then it was time to drill. I used a center punch so the drill bit would not wander, and drilled 1/8" pilot holes.
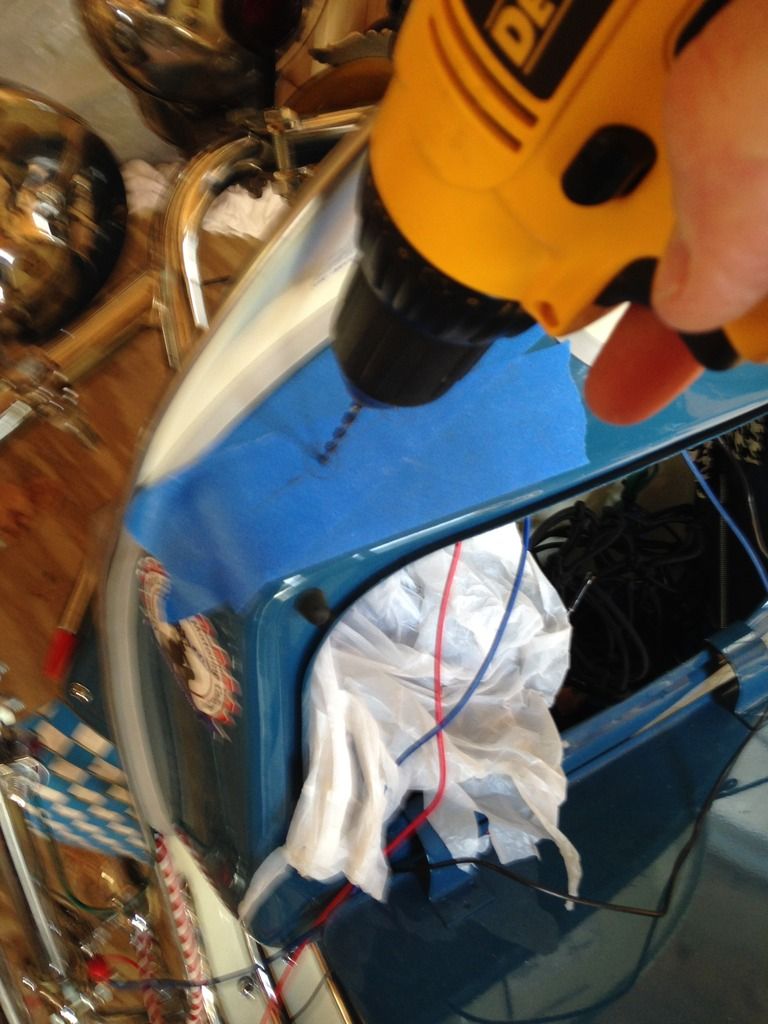
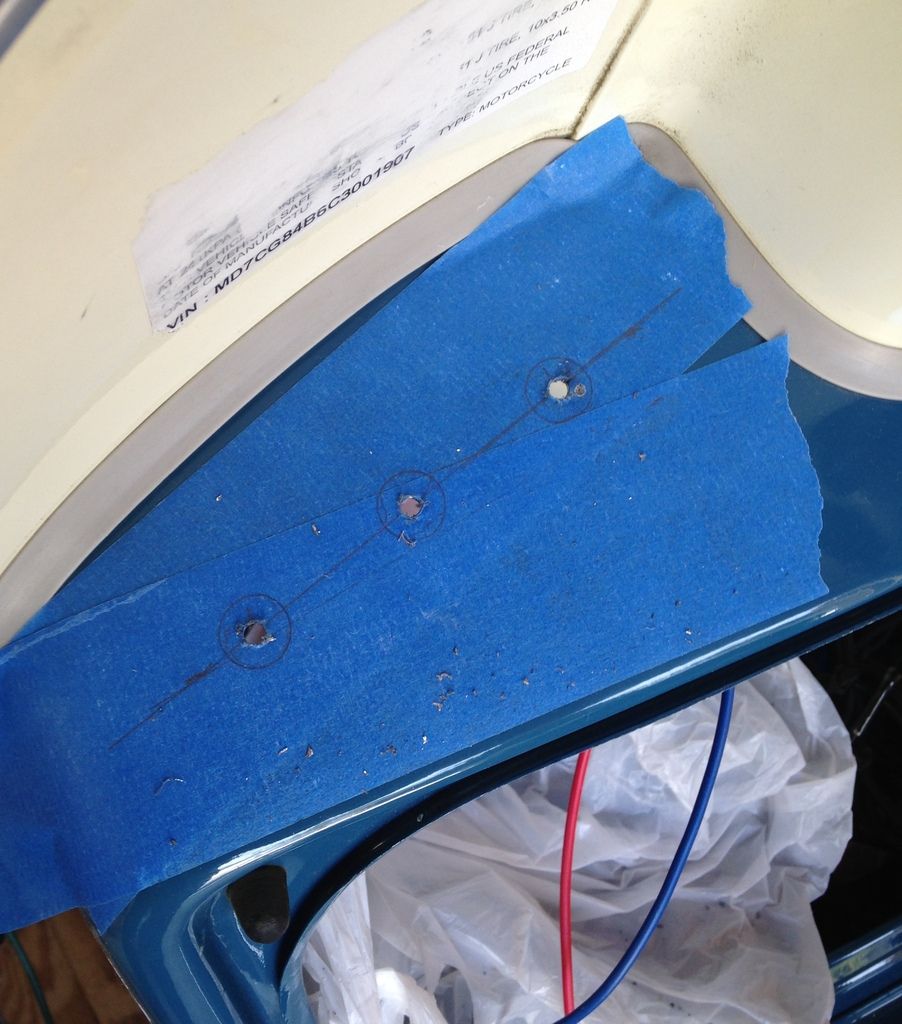
So far, so good...
Posted: Wed Mar 25, 2015 2:29 pm
by slotrod65
Posted: Wed Mar 25, 2015 2:31 pm
by slotrod65
Posted: Wed Mar 25, 2015 2:32 pm
by slotrod65
Posted: Wed Mar 25, 2015 2:34 pm
by slotrod65
And finally wired in the connections to the spots.
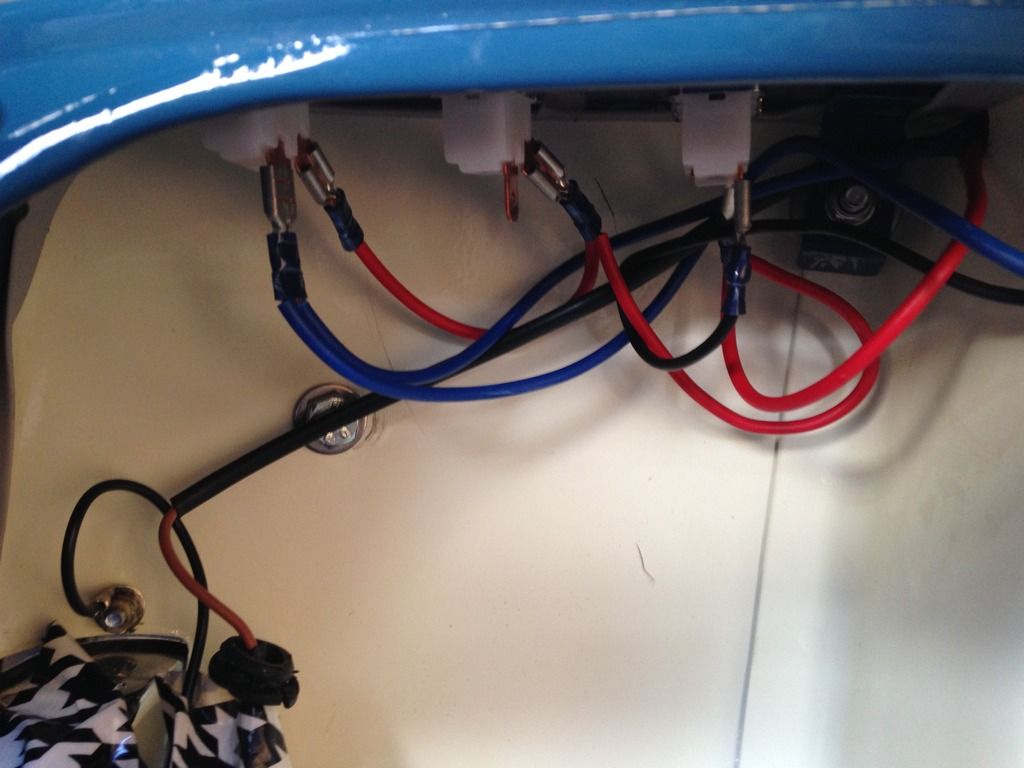
I am thinking that I will need to enclose the wiring in a project box to prevent shorts, but for now, I was very happy how it all worked out.
Posted: Wed Mar 25, 2015 2:38 pm
by slotrod65
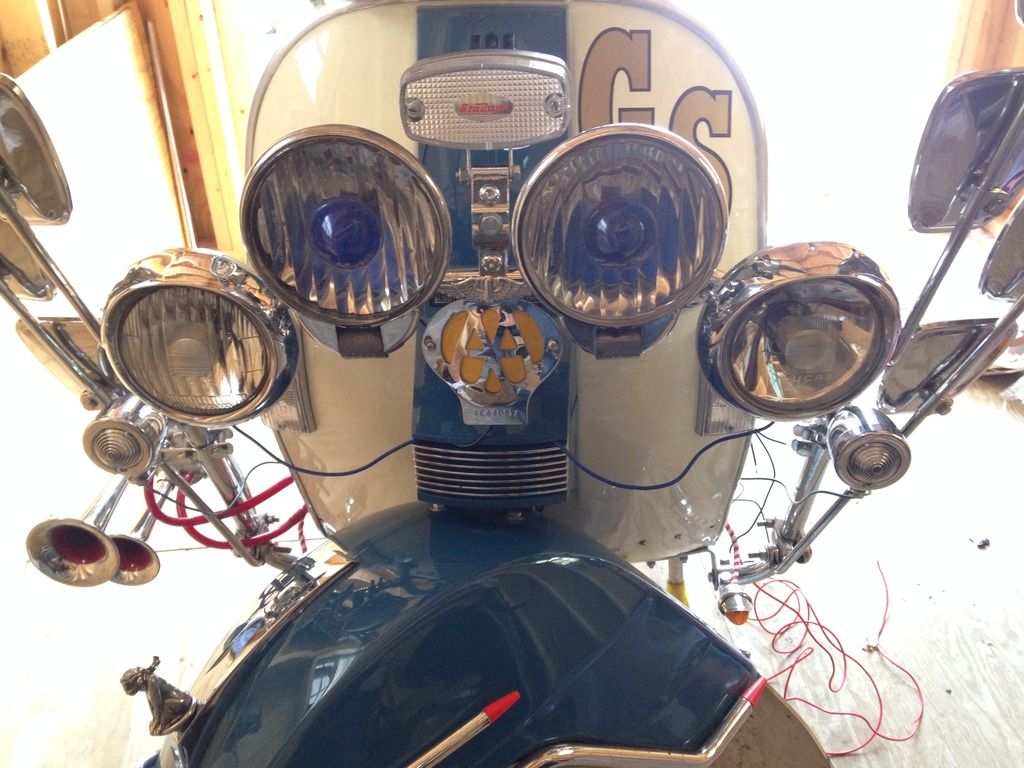
And the moment of truth:
https://www.youtube.com/watch?v=OC2uvU9V51Y
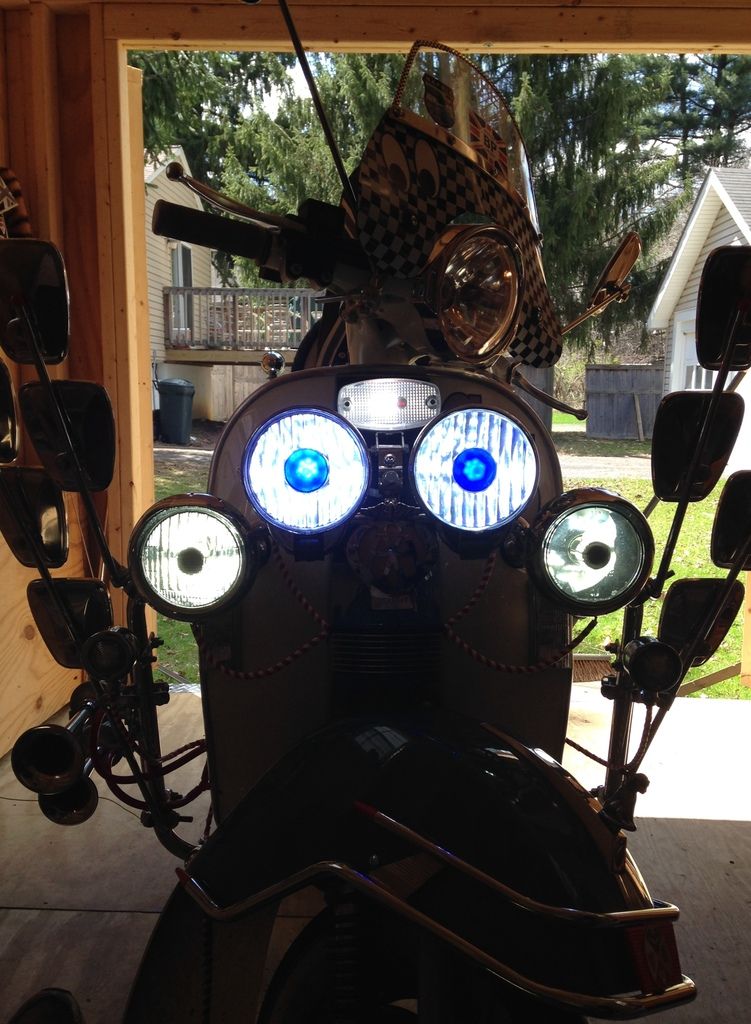
The stadium light in the center has a 102 LED bulb, while the Lucas lamps are only 28 LEDs. I plan on trying a pair of 68 LED and 102 LED in the Lucas lamps, but there maybe clearance issues as the LEDs are not the same size as the stock bulb.
Posted: Thu Mar 26, 2015 9:22 pm
by jimmbomb
Looks good!
i see 3 switches.. but on the video, i hear and see only 2 being switched and the results.
What's hooked to the 3rd one?
good job on switch install.
Posted: Thu Mar 26, 2015 11:29 pm
by slotrod65
Nothing at this time. I need to get another set of bulbs to convert the other pair of spots. Then I will wire those to the Center switch.
Posted: Tue Apr 28, 2015 7:16 pm
by slotrod65
OK, so I finally had time to convert the last two spots, I was worried these would be harder to convert, as the bulbs on the Notek lights are held in with three little screws. In fact. they were easier: a few notches added to the H3 bulb base with a triangle and mini round file and I was all set:
Posted: Tue Apr 28, 2015 7:18 pm
by slotrod65
I wried to the center switched just like the previous spots, and I am very pleased with the results. The LEDs do not project very much, but they shold be excellent running lights.
switches
Posted: Wed Mar 06, 2019 2:59 pm
by molly1260
this has been a great help thanks
I am doing exactly the same but cant find any decent switches do you remember where you got yours and if they are local to you would they post


