Connecting the deadlights, new bulbs and LEDs

All things Genuine Blur

Moderator: Modern Buddy Staff

Post Reply
User avatar
killbilly
Member
Posts: 389
Joined: Fri Jul 09, 2010 2:55 pm
Location: Austin, TX

Connecting the deadlights, new bulbs and LEDs

Post by killbilly »

Also did some other cosmetic work....

Hooking up the deadlights was pretty easy.

1) Remove the two screws in the upper cowl section corners that line up with the black plastic hood. Work that off gently to keep from breaking the tabs that hold it in place.

2) Reach down into the scooter and find the connectors for the turn signals. To do this, reach your hand down to the deadlight, then trace the wire back to the empty connector. Look for an identical connector which is hooked up to the turn signal switch. Disconnect those.

3) Take out the bolts holding the DOT signals. They're about 2" long. When you take them out, the DOT signal light will hang loose. What I ended up doing was tugging at the wires gently until I could see the small inline connectors (not the ones you disconnected in step 2) and pulled them apart. The DOT signal will come off out the side. Do that for the other side.

4) Now, you'll have the internal wire running up into the instrument cluster on one end, and the connectors you separated in the beginning on the other. What I did was pull that wire out through the cowling, gently, a bit at a time, and fished out the small leads. You end up with 3 pieces: the two DOT stalks with their leads on the end, and the central wires (they're wrapped) that run down the middle to the turn signal switch.

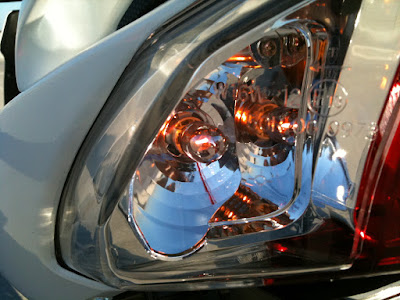
5) Now just connect the deadlights to the turn signal switch connectors and you're done! Photo of what it looks like:

Image

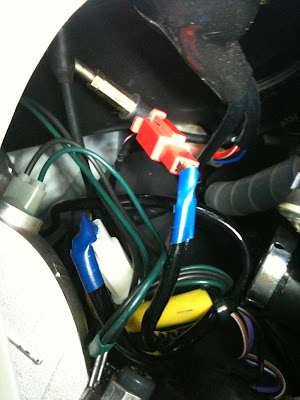
I believe the right side is the red one and the left side is the white one, but it's easy enough to test. The green/black wire you're seeing there goes to the innermost LED on the right hand side of the headlight if you're in a seated position.

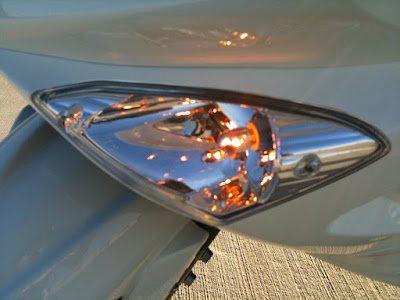
I had already taken out the amber lenses. My chrome amber bulbs finally showed up on Wednesday:

Image

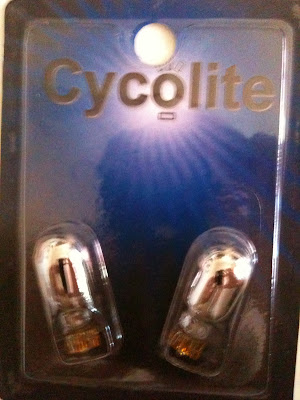
So I installed them in the front. I also went ahead and removed the rear amber lenses and put the bulbs in the tailsection, too.

Front:
Image

Rear:
Image

They're not quite as bright as I would like, but they light up well enough. I think they're fine.

Image


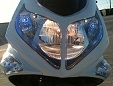
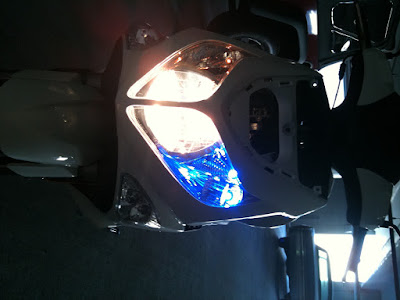
The next thing to do was attack the LED situation. I don't really like the front LEDs that are stock, so I opted for some blue ones and some white ones from SuperBright LEDs, (thanks DaveLHunter for the tips) and mixed and matched. Here's a closeup in shadows with two blue on one side and the stock on the other:
Image

Pretty intense. Too intense for my liking. So I pulled out the inner blues and put in white LEDs. Now, they look like this:
Image

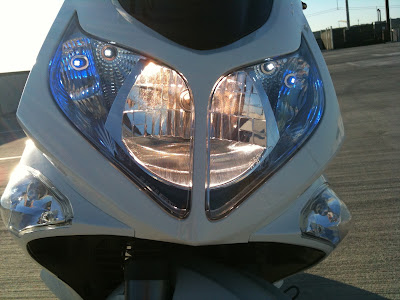
By day, they're not so bad, but at night, they're still a bit intense. I'm not sure if I like them. Some part of me thinks a yellow LED would look better and be a little...smoother, I guess. If I went with a bluer HID light, it might change the overall look. I'm not sure yet. I'm going to give it a few days and see how I feel about it. At roughly .76 per LED, it's not a burden to try a few out.

The next thing I did was take the hugger off the rear tire. It requires a LONG socket extension to get it off. I'm considering trimming it and shaping it a bit with a dremel, and then priming it and painting it bright white with a red accent piece. But in the mean time, the rear is even cleaner now.

Image

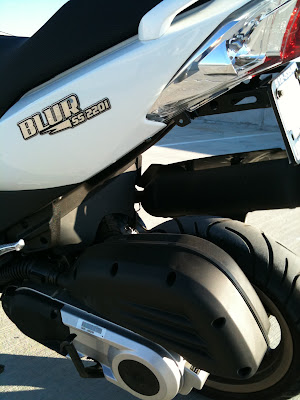
Kinda makes that giant airbox stand out. I need to call Scooterworks and find out if putting a pod filter on it would screw up the EFI.

Also took the reflectors off the forks. (Seriously? Foam TAPE?)

Image

Image

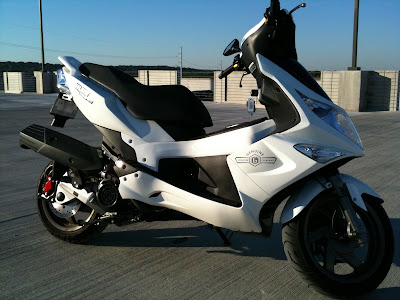
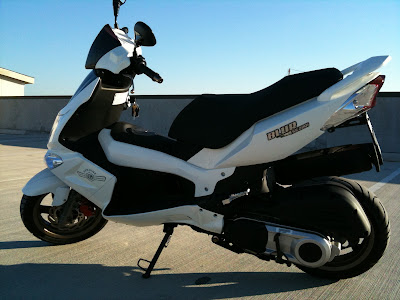
So it's moving along. New mirrors are next, I think. Maybe some bar end mirrors but I'm not sure yet. I'll post when I get the hugger re-painted, shaped and installed.
User avatar
Rippinyarn
Member
Posts: 652
Joined: Tue Aug 08, 2006 9:35 pm
Location: Royal Oak, Michigan
Contact:

Post by Rippinyarn »

Nice write up, Killbilly. I'm glad that you backed off those bluish LEDs, as the police might be a tad curious about that 8)

I can't wait to get my Blur back to do the deadlight resurrection!
Rovers SC
Check out the latest at scooterfile.com
User avatar
bigbropgo
Member
Posts: 1607
Joined: Thu Jul 31, 2008 1:41 am
Location: gotham city and the 801

Post by bigbropgo »

Looks really cool.
no i don't ride a scooter, i am a scooter pilot!
Image
VICTUS MORTUUS VENATOR
Image
davelhunter
Member
Posts: 217
Joined: Tue Jan 27, 2009 6:14 pm

Good Job!

Post by davelhunter »

Bill, You did a real nce job. The bike looks much better than stock! Go with an 8,000k or 10,000k HID. I am loving mine and it will look great with your led's!
User avatar
killbilly
Member
Posts: 389
Joined: Fri Jul 09, 2010 2:55 pm
Location: Austin, TX

Post by killbilly »

Might do that, Dave...payday next friday, y'know.

Thanks for all your advice on it, by the way...really made things easier.

I think I'm going to do the white fender project this week/weekend, although I have to leave for NorCal on Sunday and I'll be out there a week. Also getting it in to have the fuel leak looked at today.

Trying to think of what next. I'd like to do some performance mods, but the parts just aren't out there yet. I'm not equipped to do more than basic paintwork. I've thought about doing the stereo thing, although I think I'd like to try and rig an amp/speakers with a BT receiver so that I didn't need to run extra wiring.
User avatar
Rippinyarn
Member
Posts: 652
Joined: Tue Aug 08, 2006 9:35 pm
Location: Royal Oak, Michigan
Contact:

Post by Rippinyarn »

I did the deadlights yesterday, and found that it's red into white connectors, not the red-red and white-white that I thought that it was. I removed the entire wire that goes from the connectors up to the lollipops and just hooked the hanging empty connectors for the deadlights into the connectors that the extension plugged into. BTW, on my scoot one wire changes color in the extension!

Do we know what that blue empty hanging connector is for? It was not hooked to anything and I'm looking for something to hook my grips or gloves into, when it comes time for that 8)

I also added some foam grips and deleted the front reflectors. I tried to create a tape reflector on the chrome side of the deadlights, but I'm not happy with that so it's back to the drawing board.

I also found that when you delete the lollipops, you will have to use a spacer to replace the lollipop mounts if you are using the windscreen. I'm trying 3/4 spacers and will see if that works. Also, that the brass snug bolts on the windscreen are as soft and crappy as the bolts on the rear rack were. Sadly, I didn't replace them before I tried to install the windscreen and one broke off in the pinch bolt as I was trying to remove it. Bastard!

Edit 'cause brother can't type
Last edited by Rippinyarn on Thu Nov 11, 2010 6:51 pm, edited 2 times in total.
Rovers SC
Check out the latest at scooterfile.com
User avatar
DCUNITED4LIFE
Member
Posts: 152
Joined: Tue Sep 07, 2010 8:55 pm
Location: Richmond Old Dominion

Post by DCUNITED4LIFE »

I just came home from the store with the amber version for the TURN SIGNAL input and it has the anticipated "death click" where the signal doesn't actually work with LED lights. I heard this would happen but needed to try for myself. So now that thats established, what is needed to bring the turn signal into spec using the LED bulbs? I think I saw something here before but any links, info would be appreciated!

Thanks and I concur that the rear fender idea is a a bonus too! I might have to see some paint on mine. Regards.
Post Reply