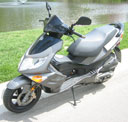
Removing body work
Moderator: Modern Buddy Staff
-
KCScooterDude
- Member
- Posts: 796
- Joined: Thu May 01, 2008 8:08 pm
- Location: Kansas City, Missouri
Removing body work
How do it do it?
-
Lostmycage

- FAQ Moderator
- Posts: 4062
- Joined: Tue Jun 17, 2008 3:36 am
- Location: The Interwebz!
There's the fast way and the long way. Trust me, the fast way sucks!
How far do you need to go? If it's just to a certain piece, I can answer right away, if it's to the frame, I'd have to look at it in the daylight to remember. I had all the plastic off when I rebuilt it after getting smacked last fall. It's not hard, but there are a ton of pieces (thankfully there's only like 3 main types of screws (not counting the hex heads that hold the tank/tunnel covers on at the rear).
I'll see if I can find time tomorrow to do a quick and dirty walk through of how to take it apart (hopefully I'll have my oil filter in so I can kill several birds with one screwdriver). I've been meaning to try out a new belt size anyway, lol.
Check out  Scoot Richmond's new site: My awesome local shop.
-
Racenut
- Member
- Posts: 467
- Joined: Thu May 22, 2008 5:36 am
- Location: Santa Cruz, Ca
- Contact:
It's a puzzle at times.
First.. pull the under seat bucket out... bolts at the bottom, beware of light and wires.
The trickiest part I ran into was the gas cap surround. You need to turn it counter clockwise about 1/8th of a turn and then it lifts right off. But it catches in it's normal position.. when you try to turn it, it feels like you're going to break it. Gentle but firm.. it will turn.
After that, you start finding screws and tabs and slots and it starts to make sense.
-
KCScooterDude
- Member
- Posts: 796
- Joined: Thu May 01, 2008 8:08 pm
- Location: Kansas City, Missouri
-
Lostmycage
- FAQ Moderator
- Posts: 4062
- Joined: Tue Jun 17, 2008 3:36 am
- Location: The Interwebz!
I'll see if I can take a look tomorrow. I got bamboozled by my wife. We went to go look at stepping stones and ended up buying 3x15' maples to plant in our backyard. I swear, every weekend! Gaah!
The headset is easy. There's 5 screws, the four surrounding the outside of the brake levers/handlebars and the nose screw. To get to the nose screw, take the horn shield off by taking off the two top screws on the interior of the leg-shield, then pry the top part of the horn shield out gently and slide up (horn shield connects at the point with a tab that slides under a slot).
One of those ratcheting 90 degree screwdrivers makes it really easy.
Pry up the top slightly and peek inside with a flashlight. You'll have to undo the speedo cable before you can take the top all the way off. It's easiest to go in from the front (tight fit). After you get that off, just undo the electrical connections and you're all set.
I'll see if I can double check the rest of the orange panels tomorrow. I got rid of the orange almost right away - just the rims left which I'm waiting on needing new tires for.
Check out Scoot Richmond's new site: My awesome local shop.
-
blurblaine

- Member
- Posts: 191
- Joined: Wed Sep 13, 2006 11:37 pm
- Location: Cincinnati, OH
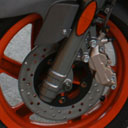
when it comes to the headset ... check out the pics here from babblefish and the digital cluster switchout because it shows the 5 screws 'cage' mentioned that you'll need to remove... (see photo #8 )
topic6613.html
topic6613.html
Blaine
The 'Nati
Blur 150
Sym RV250
http://www.blainekelley.com/scooters.html
orange is good ... except in the NFL!
The 'Nati
Blur 150
Sym RV250
http://www.blainekelley.com/scooters.html
orange is good ... except in the NFL!