Has anyone ever done this on a Roughhouse? I am getting incredibly frustrated at how far off my speedo is for actual MPH (over 10+) and I really want to print off my own and put in the correct speeds or modify the one that's in there. If there is a how-to and I missed it, can you link it?
Thanks!
Taking apart your speedometer
Moderator: Modern Buddy Staff
-
ender07
- Member
- Posts: 192
- Joined: Sun May 06, 2012 9:17 pm
- Location: Madison, WI
Taking apart your speedometer
Last edited by ender07 on Sun Jun 23, 2013 1:11 am, edited 1 time in total.
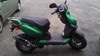
Roughhouse 50 - custom green paint job, Prima exhaust pipe, 5G rollers, 1000 RPM contra spring, 2000 RPM clutch pillow springs, 95 carb jet, UNI pod air filter, debadged, delobstered, PIAA Super Plasma performance headlight
-
OldGuy
- Member
- Posts: 248
- Joined: Mon Mar 18, 2013 4:25 am
- Location: Everett, WA
I have done it. Right now I have mine set so that it is very accurate at 25 mph. (I did this because a local community has 25 mph limits and the police are serious about enforcing them.)
I didn't do a step by step, but it is not too hard to get to. Once you get the spedometer out and open, here is what you do. Note that this will optimize the speedometer at only 1 speed. In this example, let's say you want good accuracy at 30, but your speedometer reads 34 (per gps) when you are going 30.
- Decide what speed you want accuracy at, say 30 mph.
- Determine how far off you are at that speed, by gps, maybe 4 mph high.
- Once the speedometer is out and open, lightly adhere a small (1/2" is fine) piece of painter's tape to the speedometer face, at the end of the needle arc, and mark the tape with dots showing intended (30) and indicated (34) speed. You can manually swing the needle up to those speeds to get more accurate marking on the tape.
- Now let the needle fall back to zero against the peg.
- gently lift the end of the needle up over the peg and let it come to rest, which it will do somewhere below the peg.
- Move the tape so the dot that was at 34 lines up with the needle.
- Now, with a medium flat blade screwdriver, carfully pry the needle of of its pin. It is just pressed on, but requires a bit of force.
- Let the speedometer movement re-settle.
- Now align the needle with the second, probably lower, mark and press it back on. In this example that would be the 34 mark.
- Let the needle settle and verify it is pointing where you want. If it is, put it all back together and test it out.
Remember, this is only good for setting accuracy at a single speed. You will want to recheck other speeds to see how far off they are. These speedometers are inherently inaccurate.
And be very careful when lifting the needle over the pin, and when prying it off. You don't want to bend the needle permanently, or scratch your spedometer face.
Also, save your tape with the markings until you are sure you like the result. The reason is this is your reference in case you want to put it back the way it was, or make another tweak.
I do not know of a way to make these speedometers more accurate over their whole range. My eventual solution was to add a digital speedometer, like a bicycle computer, that is very accurate.
1971 Hodaka Ace 100
1977 Suzuki GT250 is now sold... Good bike!
1980 Yamaha IT125
Honda: '66 CT90 KO; '83 CT110; '92 CT70; 2001 XR250
and 1 or 2 others... I need to sell some bikes!
1977 Suzuki GT250 is now sold... Good bike!
1980 Yamaha IT125
Honda: '66 CT90 KO; '83 CT110; '92 CT70; 2001 XR250
and 1 or 2 others... I need to sell some bikes!
-
OldGuy
- Member
- Posts: 248
- Joined: Mon Mar 18, 2013 4:25 am
- Location: Everett, WA
Oh, and... Once you have pressed the needle back on and are happy with its position, bring the end of the needle back up above the pin.
1971 Hodaka Ace 100
1977 Suzuki GT250 is now sold... Good bike!
1980 Yamaha IT125
Honda: '66 CT90 KO; '83 CT110; '92 CT70; 2001 XR250
and 1 or 2 others... I need to sell some bikes!
1977 Suzuki GT250 is now sold... Good bike!
1980 Yamaha IT125
Honda: '66 CT90 KO; '83 CT110; '92 CT70; 2001 XR250
and 1 or 2 others... I need to sell some bikes!
-
ender07
- Member
- Posts: 192
- Joined: Sun May 06, 2012 9:17 pm
- Location: Madison, WI