yeah... cheaper than scooterworks once you figure shipping & tax from them - not that they have any to sell - & I like the design of this betterMacJac wrote:Not a bad price SL - thanks!
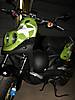
another new Rattler 110 owner
Moderator: Modern Buddy Staff
-
ScootLemont

- Member
- Posts: 2526
- Joined: Fri Apr 11, 2008 6:20 pm
- Location: Lemont IL
- Contact:
-
MacJac

- Member
- Posts: 153
- Joined: Mon Aug 04, 2008 6:22 pm
- Location: Downers Grove, IL
-
RuralRattler

- Member
- Posts: 104
- Joined: Wed Aug 13, 2008 12:55 pm
- Location: Yates Center KS
instead of a wrap I was considering this:
http://www.northwesthydroprint.com/process.htm
It seems they are doing it to everything nowdays and there are alot of companies out there that do it.
http://www.northwesthydroprint.com/process.htm
It seems they are doing it to everything nowdays and there are alot of companies out there that do it.

-
Ray Knobs
- Member
- Posts: 683
- Joined: Wed Jun 18, 2008 3:55 pm
- Location: Rochester NY
- Contact:

-
ScootLemont
- Member
- Posts: 2526
- Joined: Fri Apr 11, 2008 6:20 pm
- Location: Lemont IL
- Contact:
-
ScootLemont
- Member
- Posts: 2526
- Joined: Fri Apr 11, 2008 6:20 pm
- Location: Lemont IL
- Contact:

-
ScootLemont
- Member
- Posts: 2526
- Joined: Fri Apr 11, 2008 6:20 pm
- Location: Lemont IL
- Contact:
-
brimstone
- Member
- Posts: 446
- Joined: Sun Mar 30, 2008 2:07 pm
- Location: Juneau, Alaska
dang..i was looking forward to adding a blue reflective stripe. i guess it'll just be plain blue now. thanks for the info.
<a href="http://www.fuelly.com/driver/brimstone/rattler-110" target="_blank"><img src="http://www.fuelly.com/sig-us/20736.png" width="500" height="63" alt="Fuelly" title="Share and compare MPG at Fuelly" border="0"/></a>
-
ScootLemont
- Member
- Posts: 2526
- Joined: Fri Apr 11, 2008 6:20 pm
- Location: Lemont IL
- Contact:
well I still like the stuff & I still have it on my scooter
it just does not like to bend much
right now the original strip on one side has NO cracks
the strip on the other side has one - I will be replacing that soon
the small triangle section (rattler 50's only) on the nose) went to shit so i removed it.
On the front, one long section cracked, but I replaced it & it has not cracked again.
my take is that you have to put it where it goes & you dont get a second chance + no tight curves.
regualr tape pin stripe is a LOT easier to get on - but I still like the reflective because it is.... reflective
-
ScootLemont
- Member
- Posts: 2526
- Joined: Fri Apr 11, 2008 6:20 pm
- Location: Lemont IL
- Contact:
If I was going to make cards....
I would have something like:
modernbuddy.com
Forum for the owners of all models of scooters from the Genuine Scooter Co.
I think its important to have the part about "all models" becasue "modernbuddy" might lead people to think it's just for buddy owners
Eric: any suggestions?
I would have something like:
modernbuddy.com
Forum for the owners of all models of scooters from the Genuine Scooter Co.
I think its important to have the part about "all models" becasue "modernbuddy" might lead people to think it's just for buddy owners
Eric: any suggestions?
-
MacJac
- Member
- Posts: 153
- Joined: Mon Aug 04, 2008 6:22 pm
- Location: Downers Grove, IL
-
ScootLemont
- Member
- Posts: 2526
- Joined: Fri Apr 11, 2008 6:20 pm
- Location: Lemont IL
- Contact:
-
blake2415
- Retailer/Vendor
- Posts: 2
- Joined: Thu Sep 25, 2008 7:57 am
reflective tape from www.streetglo.net
Hello folks,
This is Bill Aggie with streetglo.
I found these posts here by accident, but I'm glad I did. Let me give you a few pointers about our reflective tape and how to apply it.
First, keep in mind that reflective tape is unlike decorative styling tape. Think of it as a sandwich... so to speak. On the topside is a layer of semi transparent styling tape, but on the bottom side, it's a base of micro prism elements, laid end to end.. like tiny grains of ultra ultra fine sand. These grains are designed to collect light and to reflect all of the collected light into a narrow beam right back to the lightsource. The better the design, the tighter the beam is back to the source. Keep in mind, this tape and other reflective products like ours or any other's reflective decals have the very difficult job of collecting enough overbeam light in the distance and focus reflecting it back to the source.. and bright enough that it's more noticeable than even the objects in your direct light beam. A trashcan at 15 feet gets full beam target while a reflective safety product at 40 feet only gets the scant overbeam light that's too dim to illuminate an ordinary object. So, the key here is to have a nearly waste free system of reflectors that let no light escape to the left and right but concentrate it back to the source. It is because of this requirement that the base of any reflector is rigid.
Making a turn with reflective tape involves slight expansion on one side of the tape and slight compression on the other side. Otherwise, a full turn will stress the outside edge and literally spit apart that base system of reflectors. The topside stretches so it will look like it's ok but in a week or so, the crack in the base will finally show through.
The stretch and turn method used for regular tape is not going to work with reflecgtive tape, it will crack. Rather than stretching around an object, use a liquid solution of 1 cup water and 3-5 drops of palmolive as a floating agent. the tape will slip and slide on this and it allows you to work a circle or curve into the tape without cracking the base.
While cracking is possible, don't let this help info convince you it's fragile, it's not. I just needs a different technique than most of us are accustomed to.
As one user found out, it's easier when the tape and bike are warm, but you need that soapy water solution in all cases .... hot or cold. OUr tape has an automotive grade quick stick adhesive and if dry tape touches an object, it doesn't come off without a good tug and this will crack the tape.
If you have ever installed any kind of pinstriping or decorative tape, you'll be able to install this, no doubt.
A technique for working our vinyl into a shape can be seen here:
http://www.streetglo.net/hotwraps.ameri ... ecals.html
While this is a graphics video (scroll to the bottom), watch how the flame tips are laid down. This is a good tape method for small areas. If running a large line, you can pull the tape tight but again, avoid excessive stretching.
Here's a trick of mine... if you have a complicated pattern or curve to make, do it with a thick electrical tape and get that laid down perfect. then simply edge butt the reflective tape to the electrical tape and once the reflective tape bonds, pull off the electrical tape.
Reflective accents to your bike isn't just a styling effort, it's a big safety boost and every one of you should consider reflective products even if not our own. These products can be a contributing factor to saving you from an impact. Another important consideration is to enhance your active lighting. Adding a set of running lights can dramatically reduce your chance for a left turning vehicle from turning into your pathway.
Some ways to gain an advangage include simply replacing your bulbs with brighter versions. J.C. WHitney has taillight replacement bulbs that are 30% brighter and they can give you an edge. ALso check your headlight. Most are angled deeper to the ground than is required by state regulations. Raise the beam height to the maximum beam height limit in your state. Raising the beam angle can double or triple your conspicuity to oncoming traffic.
That bike you see on the link is mine. While I do not recommend what I did to my bike I want to tell you what I did if only to inspire you to start thinking about your safety. The headlight was replaced with an offroad bulb with 40 more watts of low beam power. It's carefully set to bottom out at my states requirement. Those two running lights are perfectly set at the right and safe angle making them very noticable to oncomming cars. It's a light tripod and it's both bright in daylight and it's a shape that motorist can identify as a motorcycle which is a powerful tool that reduces front collisions.
QWell, I've been too wordy. I'll close for now. I hope I have helped someone be safer here.
Thanks,
Bill
-
ScootLemont
- Member
- Posts: 2526
- Joined: Fri Apr 11, 2008 6:20 pm
- Location: Lemont IL
- Contact: