Pictorial of installing Hot Grips on a 2008/9 Buddy 125

Discussion of the Genuine Buddy, Hooligan, Black Jack and other topics, both scooter related and not

Moderator: Modern Buddy Staff

Post Reply
User avatar
michelle_7728
Member
Posts: 1914
Joined: Fri Jun 12, 2009 2:16 am
Location: Renton, WA

Pictorial of installing Hot Grips on a 2008/9 Buddy 125

Post by michelle_7728 »

First: Sadly, the owners of HotGrips may be retiring, so these particular grips may not be available soon, but I've got to think that all grips would use a similar install procedure. I will try to find the part number and specs for the rotary temperature controller, and will add the info to this thread if successful.

Okay--Now with the disclaimers:

I'm no wiring expert, but what I have installed (on both of my Buddy 125's) has worked perfectly fine for me for the past couple of years.

However, use your own judgement in installing these...you are doing it at your own risk if you use my instructions or do not have a professional do it for you! I have had no problems, and don't see how any Buddy wiring could be burned up doing this my way, as no Buddy wiring is being used, but again, I am not an electrician...you are doing this at your own risk!

Also, as I am not an electrical guru, I really don't have much to offer in the way of troubleshooting should any weirdness occur.

There may be a better way to route the wiring...and a neater way to splice and tie things off, but this is how I did it.

...and warning in advance, as there are boatloads of pictures, but "that's how I roll". :P

The first picture shows what comes standard with the kit (well...the epoxy was optional). Not pictured in this photo, is the optional rotary heat controller I purchased.

I also bought (from a different source) a micro mini 5A switch and an LED.
Attachments
2 - LED & Switch.jpg
2 - LED & Switch.jpg (122.23 KiB) Viewed 728 times
1.jpg
1.jpg (48.73 KiB) Viewed 728 times
Last edited by michelle_7728 on Fri Aug 09, 2013 5:28 am, edited 2 times in total.
Past bikes: 08' Genuine Buddy 125, '07 Yamaha Majesty 400, '07 Piaggio MP3 250, '08 Piaggio MP3 500, '08 Aprilia Scarabeo 500
Current bikes: Two '09 Genuine Buddy 125's
User avatar
michelle_7728
Member
Posts: 1914
Joined: Fri Jun 12, 2009 2:16 am
Location: Renton, WA

Post by michelle_7728 »

Here's a close up of one of the pages that come with the kit, that shows the model # you will want to get if you are ordering it for a Buddy 125--and their disclaimer. Again, I installed this myself, so it can't be THAT hard to do. ;)

If you have any questions about whether these grips are the correct model # for your application, email the company. They responded very quickly to any questions I had.
Attachments
3.jpg
3.jpg (99.35 KiB) Viewed 727 times
Past bikes: 08' Genuine Buddy 125, '07 Yamaha Majesty 400, '07 Piaggio MP3 250, '08 Piaggio MP3 500, '08 Aprilia Scarabeo 500
Current bikes: Two '09 Genuine Buddy 125's
User avatar
michelle_7728
Member
Posts: 1914
Joined: Fri Jun 12, 2009 2:16 am
Location: Renton, WA

Post by michelle_7728 »

Here is a picture of all the pages that come with the kit. You wil be tossing the "Series" instructions, and instead using the "Parallel" instructions.
Attachments
This is the page you will end up using....
5.jpg (113.95 KiB) Viewed 726 times
4.jpg
4.jpg (129.38 KiB) Viewed 726 times
Past bikes: 08' Genuine Buddy 125, '07 Yamaha Majesty 400, '07 Piaggio MP3 250, '08 Piaggio MP3 500, '08 Aprilia Scarabeo 500
Current bikes: Two '09 Genuine Buddy 125's
User avatar
michelle_7728
Member
Posts: 1914
Joined: Fri Jun 12, 2009 2:16 am
Location: Renton, WA

Post by michelle_7728 »

The first picture below shows the difference between the original grip and the Hot Grip. The Hot Grips aren't that much bigger around...and actually I prefer the slightly larger size, which I find a little easier to grip. There is a bit of rubbery grippiness to the grips too...they aren't just hard smooth plastic.

Go here to see how to get the existing grips off if you want to keep them. I went ahead and just cut mine off using a steak knife (I'm such a heathen!), as I knew that once the heated grips were installed, there was no going back (even if I wanted to), once the adhesive set.
Attachments
Grips--Sanded & with adhesive
11 - Grips-sanded & w adhesive.jpg (136.93 KiB) Viewed 725 times
Temporarily putting grips on...
10 - Grips 3.jpg (97.11 KiB) Viewed 725 times
Picture of space there will be
9.jpg (129 KiB) Viewed 725 times
Sanding down lip
Sanding down lip
8.jpg (98.01 KiB) Viewed 725 times
Determining neutral and full throttle
7 - Grips 1.jpg (104.61 KiB) Viewed 725 times
Comparison of original and Hot Grip
6.jpg (121.26 KiB) Viewed 725 times
Past bikes: 08' Genuine Buddy 125, '07 Yamaha Majesty 400, '07 Piaggio MP3 250, '08 Piaggio MP3 500, '08 Aprilia Scarabeo 500
Current bikes: Two '09 Genuine Buddy 125's
User avatar
michelle_7728
Member
Posts: 1914
Joined: Fri Jun 12, 2009 2:16 am
Location: Renton, WA

Post by michelle_7728 »

In the below picture you see the routing of the right Hot Grip wires. You can see the slack I left so that when I'm at full throttle, there is no binding. You will want to make sure to route the wires down through the headset and into the front compartment such that when you rotate the handlebars you do not pinch or pull the wiring. Zip tie as needed, leaving slack at either end, for handlebar and throttle turning/rotation.

....sorry...some things are hard to get good pictures of.
Attachments
Measuring heat temperature controller...
16.jpg (98.74 KiB) Viewed 724 times
15.jpg
15.jpg (117.99 KiB) Viewed 724 times
14.jpg
14.jpg (116.22 KiB) Viewed 724 times
Where to put heat temperature controller
13.jpg (107.52 KiB) Viewed 724 times
Routing wiring for right hand grip
12 - Wiring of right grip.jpg (99.99 KiB) Viewed 724 times
Past bikes: 08' Genuine Buddy 125, '07 Yamaha Majesty 400, '07 Piaggio MP3 250, '08 Piaggio MP3 500, '08 Aprilia Scarabeo 500
Current bikes: Two '09 Genuine Buddy 125's
User avatar
michelle_7728
Member
Posts: 1914
Joined: Fri Jun 12, 2009 2:16 am
Location: Renton, WA

Post by michelle_7728 »

Continued....
Attachments
Curing the epoxy
Curing the epoxy
21 - Curing the adhesive.jpg (124.14 KiB) Viewed 723 times
Installing the controller
20.jpg (98.22 KiB) Viewed 723 times
19.jpg
19.jpg (93.05 KiB) Viewed 723 times
18.jpg
18.jpg (101.6 KiB) Viewed 723 times
Where to put controller
17.jpg (95.65 KiB) Viewed 723 times
Past bikes: 08' Genuine Buddy 125, '07 Yamaha Majesty 400, '07 Piaggio MP3 250, '08 Piaggio MP3 500, '08 Aprilia Scarabeo 500
Current bikes: Two '09 Genuine Buddy 125's
User avatar
michelle_7728
Member
Posts: 1914
Joined: Fri Jun 12, 2009 2:16 am
Location: Renton, WA

Post by michelle_7728 »

Note: both wires coming from each Hot Grip are black. It does not matter which you decide to use for A or B (see following diagram), so long as you have each Hot Grip have an A & a B.
Attachments
Wiring diagrams
Wiring diagrams
25 - Wiring diagrams.jpg (126.37 KiB) Viewed 722 times
LED install
LED install
24 - LED install.jpg (128.13 KiB) Viewed 722 times
Location of LED
Location of LED
23 - Location for LED.jpg (98.21 KiB) Viewed 722 times
Drawing of wiring for curing the adhesive
22 - Curing the epoxy.jpg (107.24 KiB) Viewed 722 times
Past bikes: 08' Genuine Buddy 125, '07 Yamaha Majesty 400, '07 Piaggio MP3 250, '08 Piaggio MP3 500, '08 Aprilia Scarabeo 500
Current bikes: Two '09 Genuine Buddy 125's
User avatar
michelle_7728
Member
Posts: 1914
Joined: Fri Jun 12, 2009 2:16 am
Location: Renton, WA

Post by michelle_7728 »

In the interest of not posting a whole bunch of pictures similar to those I have posted previously, and eating up all the forum's server storage space, I have reused some previously posted pictures. The best way to follow this, without it getting too confusing, is to have two browser windows open at this point. In one browser window, be viewing this heated grips thread, and in the other one view my Gorilla alarm install thread.

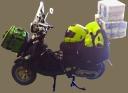
Below are the pictures I am talking about (referring to pictures in the Gorilla alarm install thread), numbered as indicated below:

* Steps 1 - 10 show removing the battery cover, engine front cover, and the pet carrier.

* Step 12 shows wiring I did previously for my Gorilla alarm install....I basically followed the same path with the heated grips wire routing as well:
- For your Heated Grips install, you will need to have a 16-18 gauge wire coming from the front of the bike (in the wiring diagram I drew, it's the yellow wire on the right side of the in-line fuse), back to the on/off switch that powers the circuit, then you will have another 16-18 gauge wire going from the switch to the positive terminal of your scooter's battery.

* Steps 23 - 27 show "A" way you can run the wires (I actually ran the heated grips wire on the other side of the battery this time...not sure why I ran the alarm wires on the far side, where the dashes are, last time....)

* Step 30 shows a view from above of how I ran the alarm's wires. I followed this same path when running my wire for my heated grips switch to the battery.

* Steps 39, 40 & 41 show a way you can help to secure your battery compartment, since you are already messing around with it. Of course a determined thief could still steal your battery, but you might discourage the lazy ones...

* Steps 47 through 54 show how you could go about installing a switch housing and switch should you choose to do the install the way I did.

NOTE: In step 51, keep in mind that the toggle switch pictured was for my alarm system, which uses less voltage. If you want a microswitch for your heated grips you will want one that can handle at least 5 amps--see the 2nd photo in my pictorial.

And finally, here are a few extra pictures:
Attachments
Reminder light & alternative heated grips on/off switch location
29 - Reminder light & alternative switch location.jpg (97.86 KiB) Viewed 721 times
Various pet carrier views
28 - Various pet carrier views.jpg (96.58 KiB) Viewed 721 times
Wiring to & from switch
27 - Wiring to & from switch.jpg (135.36 KiB) Viewed 721 times
Battery connection
Battery connection
26 - Battery connection.jpg (97.49 KiB) Viewed 721 times
Last edited by michelle_7728 on Fri Aug 09, 2013 5:37 am, edited 1 time in total.
Past bikes: 08' Genuine Buddy 125, '07 Yamaha Majesty 400, '07 Piaggio MP3 250, '08 Piaggio MP3 500, '08 Aprilia Scarabeo 500
Current bikes: Two '09 Genuine Buddy 125's
User avatar
michelle_7728
Member
Posts: 1914
Joined: Fri Jun 12, 2009 2:16 am
Location: Renton, WA

Post by michelle_7728 »

If you decide to put your switch elsewhere, you might be able to use the on/off switch that comes with the kit (I "guess" it's an on/off switch...I
didn't look at it very closely. It was just too big to fit where I wanted it to go--in the housing I already had my alarm system power switch in).

I chose to go with the rotary dial for a couple of different reasons:
1. using the heat sink they provided meant finding a place to attache it that could take the heat it would generate.
2. Having the rotary dial meant I had much more choice in how warm or hot I have my grips at any given time.

And yes, the rotary dial does click to "Off" when you turn it counter clockwise all the way...I just did not like the fact that anyone could walk up and turn it on when I was away from my scooter, and that there was
no way for me to tell at a glance (a reminder light, if you will) that it was on.

I have been able to ride 20 miles round trip with the grips on (a variety of medium heat at slower speeds, and cranking to high when it is colder out or I'm just going faster) with no issues. I put the Battery Tender Junior on it when I get home and after about 15 minutes or so, it's all recharged.

I hope this pictorial makes sense. :)
Past bikes: 08' Genuine Buddy 125, '07 Yamaha Majesty 400, '07 Piaggio MP3 250, '08 Piaggio MP3 500, '08 Aprilia Scarabeo 500
Current bikes: Two '09 Genuine Buddy 125's
User avatar
tommyred
Member
Posts: 132
Joined: Wed Feb 02, 2011 3:07 am
Location: Santee, San Diego County, CA

Re: Pictorial of installing Hot Grips on a 2008/9 Buddy 125

Post by tommyred »

Are both sides the same, or is the throttle side bigger?
The Reverend Wage
Ordained Dudeist Priest ☯�
Abide!
User avatar
michelle_7728
Member
Posts: 1914
Joined: Fri Jun 12, 2009 2:16 am
Location: Renton, WA

Post by michelle_7728 »

The Hot Grips are identical...they are not marked "right" or "left".
Past bikes: 08' Genuine Buddy 125, '07 Yamaha Majesty 400, '07 Piaggio MP3 250, '08 Piaggio MP3 500, '08 Aprilia Scarabeo 500
Current bikes: Two '09 Genuine Buddy 125's
Post Reply