
You'll notice that Genuine sent me an orange trunk instead of a black one. I assume that's because I was going to get an orange buddy. If you've read my posts, you know how that ended up. Still I'm not going to complain about a free trunk. I'm going to take the scoot in to Scooters Originali sometime in the next few weeks for some maintainance. I think I'll ask them about painting the entire scooter + trunk a new color.
First up is the front rack.

It's actually very sturdy. And if chrome is your thing, you'll probably like it. It wasn't hard to install. The hardest part was popping open the two holes in the front case.

It takes a lot of force to pull the spring loaded rack down. I haven't tried strapping anything to it yet.
Next is the windshield.

This was a major pain to install. As someone pointed out in an earlier post, the instructions are in Italian. Luckily I read Italian. As well as a six year old. With a severe learning disability. But I got the thing on anyway. I'm sure it's not perfectly aligned, but I know it's not going to come off.
Unlike the pictures in the catalog, the black trim does not go all the way around.

You can see how the rig moves the mirrors up and outward. This actually makes the mirrors a lot more usefull. Here's a closer shot:

I was not really big on windshields, but it does make the bike feel a little more stable. I think it's a good add on.
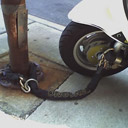
Finally, the trunk.

See how it just sits there like a pumpkin? A closer shot of the trunk shows that it's not the highest quality.

I'm not sure what the goofy red sticker is for. Here's a shot of the trunk open:

And with my helmet in it to give a sense of scale:

Now notice it's not quite big enough to hold my helmet:

That helmet does fit under the seat, though just barely. So the trunk isn't a must have, but I have carried some stuff in it and it does work just fine. Though the trunk feels kinda flimsy, the metal back rack is solid.

I'm willing to bet you could strap a better or larger trunk on there. That said, I don't think the trunk is too small. Let's face it, the Buddy isn't that large of a bike.
So that's it. All the goodies installed. If you have questions, fire away.


