edit** I had individual pictures that I posted, but they were too displaying too large. I have instead included a link to the album, which is hosted on imgur. Sorry, and I'll get the formatting worked out soon. All the things reference below can be found on the album.
Guys and gals,
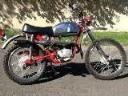
Before I begin, here's a picture of my 2008 Roughhouse. I painted it matte black a few years ago (before they started selling them in matte black!) and I love this thing.
This is an awesome forum and I'm glad I found it, especially at a time of need! First, has anyone had any issues when replacing headlights? I replaced my headlight a few weeks ago and the low beam has since burned out. Here's a picture of it:
I don't think I installed it incorrectly in regards to the spring/bar that holds it in place, and I put condensation boot back in place after installation, so I can't figure it out. I've attached a picture of the tension bar, even though I'm sure that it has no impact on whether or not my bulb burns out.
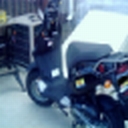
Lastly, has anyone found a way to make their battery attached terminals of their battery tender fit nicely while leaving the quick release plug outside the battery bay? I was able to trim a piece of the battery door so that the cable could hang out on the floorboard, but now I am starting to hate the setup. Attached is a picture of what I'm talking about.
Thank you in advance for all the help. I'm looking at making a change to the exhaust in the near future, so I'm sure I'll be back for more guidance. Also, I took the advice from the bulb information post and ordered the LED pilot light and the PIAA replacement headlight. I'm excited to start modding my roughhouse. Next up is the LED taillight!
<iframe class="imgur-album" width="100%" height="550" frameborder="0" src="http://imgur.com/a/sXbwY/embed"></iframe>
2008 Roughhouse! Questions for you guys, and please comment!
Moderator: Modern Buddy Staff
-
dlg1416
- Member
- Posts: 5
- Joined: Sun May 04, 2014 10:42 pm
-
agrogod
- Member
- Posts: 1156
- Joined: Mon Jul 19, 2010 9:29 pm
- Location: Rancho Cordova, CA
Hi and welcome to the MB forum. As a fellow Roughhouser you have encountered some very common problems.
When you installed your headlight did you touch the bulb with your bare skin? The oils from your hands/body will cause the bulb to burn out quickly. Use some type of glove, cotton or vinyl, so you do not make direct contact with the glass.
From the picture supplied it looks like your retainer spring is installed correctly, and no it should not have an impact on the bulb burning out early, unless the bulb housing is rattling around in the mount area. This could cause the bulb itself to break if it is jarred around too much.
As for the battery tender wiring, drilling an access hole in the bottom of the battery well is a preferred method. Use some silicone based sealer to keep water and debris from getting up inside the well. And some self sticking velcro (the type with adhesive on one side) can be used to secure the wire until it is needed.
When you get around to changing out your taillight you will probably need an LED friendly flasher relay. Not having one may cause your LED lights to function incorrectly or not at all.
"When your mouth is yapping your arms stop flapping, get to work" - a quote from my father R.I.P..
always start with the simple, it may end up costing you little to nothing
always start with the simple, it may end up costing you little to nothing
-
OldGuy
- Member
- Posts: 248
- Joined: Mon Mar 18, 2013 4:25 am
- Location: Everett, WA
Welcome!
I can't comment on the headlight, but I can help with the battery tender connector.
My local awesome dealer installs connectors on all new scooters they sell. On my Roughhouse they led the tender cable out the same hole the battery cables exit, at the rear. They then brought it under the scooter and fastened it with a tie-wrap to another cable under there. So, it's under there ahead of the center stand pivot on the left side, and I just have to grab it and connect.
Others charge through the 12V "cigarette lighter" plug in the front. This is always connected to the battery, via a 1 amp fuse. It isn't off when the key is off. So, if you can make an adapter from your charger to the 12V outlet, then you can charge through there. This makes the 12V outlet an "inlet" for charging.
1971 Hodaka Ace 100
1977 Suzuki GT250 is now sold... Good bike!
1980 Yamaha IT125
Honda: '66 CT90 KO; '83 CT110; '92 CT70; 2001 XR250
and 1 or 2 others... I need to sell some bikes!
1977 Suzuki GT250 is now sold... Good bike!
1980 Yamaha IT125
Honda: '66 CT90 KO; '83 CT110; '92 CT70; 2001 XR250
and 1 or 2 others... I need to sell some bikes!
-
theemptythrone

- Member
- Posts: 234
- Joined: Wed Feb 27, 2013 1:48 am
- Location: Spokane,WA
-
dlg1416
- Member
- Posts: 5
- Joined: Sun May 04, 2014 10:42 pm
@agrogod, thanks for the suggestions. I really screwed up and put my grubby paws all over that headlight. I'll make sure I wear gloves when I change my bulb tomorrow.
@oldguy and agrogod, thanks for the suggestions on the battery tender. Sounds like I'll be threading it out of the battery compartment with the other wires that make their way out.
@theemptythrone, where'd you find the load regulator at? How easy is it to replace?
@oldguy and agrogod, thanks for the suggestions on the battery tender. Sounds like I'll be threading it out of the battery compartment with the other wires that make their way out.
@theemptythrone, where'd you find the load regulator at? How easy is it to replace?
-
theemptythrone
- Member
- Posts: 234
- Joined: Wed Feb 27, 2013 1:48 am
- Location: Spokane,WA
-
agrogod
- Member
- Posts: 1156
- Joined: Mon Jul 19, 2010 9:29 pm
- Location: Rancho Cordova, CA
A modding we will go. Start at the pipe first, most bang for the buck, and build up from there. A kit is ok if you want to use predetermined parts, but you will end up changing out something that came with it just because it somehow won't feel right.
Modding if done carefully will either give you that screaming monster you have always dreamed of, or a slightly above average stock machine.
What I will stress the most is research, research, research. This will take into account the type of riding you want to do, the terrain you do it on, your riding style, weight, budget, reliability.
I personally like going about this a piece at a time, if something goes wrong or acts up you can be sure it was that last mod you did. Then you adjust or switch back to an OEM part till you figure it out.
Plus there are lots of RH50 riders here that can help you out. Most of us have done some type of modding, so there is a plethora of personal experience you can fall back on.
Now go and mod your beast and keep us posted!
"When your mouth is yapping your arms stop flapping, get to work" - a quote from my father R.I.P..
always start with the simple, it may end up costing you little to nothing
always start with the simple, it may end up costing you little to nothing