Here's what I did:

The hugger removes with four 12mm bolts. You have to take off the guide brackets for the rear brake line, but you can re-install them after removing the hugger. You will need a LONG ratchet extension to reach in to get the bolts on 3 sides. On the right rear, I'd use a box wrench to be able to clear the exhaust. It's tight with a ratchet.
I made a template with some graph paper and a pencil, using an x/y graph to get the curves symmetrical. High school geometry came in handy, after all.

Next, I used a colored pencil (raiding the girlfriend's art supplies helped) to make a line tracing the curved template. I was mainly aiming for symmetry...

...at which point I went after it with a spiral blade on a Rotozip tool. This proved to be not such a great idea. Even at the lowest setting, the plastic would vibrate badly. I had to clamp it down in several places. If you do this, always take off LESS MATERIAL THAN YOU THINK YOU NEED. You can't get any back if you cut too far or deep. Be patient, take off small bits at a time.

Once I got it to this point, with the rough shape, it was time for finer work. From here, I used a lighter-duty Dremel with a sanding wheel, although you could have done the whole task with the Dremel. I'm just impatient and like having any excuse for the big power tools.

Now it's starting to look better. From here, it's fine shaping with the Dremel, trying to get smooth curves and symmetry with the hugger.

By now, I've got the shape I want. It's just about ready for priming and sanding....

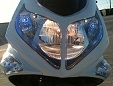
Except that I don't like the shape. It's still too long, and still covers more of the tire than I like. So I decide to whack a couple inches off the end and smooth that out, and make it look like a race hugger. I also squirt some Krylon plastic primer on it to get an idea of the finishing requirements. This is more along the lines of what I imagined.


Now comes the process of priming and sanding. I would put a heavy coat of primer on it, and then sand it down with 400, 600 and then 800 grit paper to smooth it out and get the high spots filled in. I don't like the textured plastic - want something smooth and glossy. I did this three or four times, I think, over a couple of weeks.
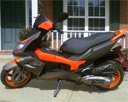
Then, tonight I reinstalled it. I was running out of daylight and the lighting in my parking garage isn't the greatest. Also managed to get some greasy finger smudges on it, so I need to go back and clean it a bit. But I do like the way it looks, and it makes my Blur unique. Considering maybe a bright red edge on it, or possibly a checkered decal. Not sure yet.


It looks better in person than in the photos. I'm not much of a photographer and the iPhone isn't much of a camera.
Anyway, that was the most recent project.
Next, I'm thinking about taking the badges off and either custom-designing a Blur logo for it, or maybe getting a black/white "G" logo to put on the sides, sort of like the one on the black cowl up front. Haven't made a decision.
Ideas? Thoughts?
After that, I may attack DaveLHunter's stereo mod. I like the idea of some tunes while riding.