Jimmy seat

Stella, LML, Bajaj and other Indian scooters

Moderator: Modern Buddy Staff

Post Reply
User avatar
slotrod65
Member
Posts: 473
Joined: Wed Dec 05, 2012 9:28 pm
Location: Albany NY

Jimmy seat

Post by slotrod65 »

I always wanted a Jimmy Seat on my scooter. You know, like the one Jimmy has in Quandrophenia. Sometimes they are called ironing boards. Well, I also wanted a rear rack that folded and held a spare tire. When I got my Stella I found that no one makes a 3-in-1 rack with a tall backrest so I had given up on having one... Then, over on the LML Owner's Group of Great Britain forum, I spied a 4T with a 3-in-1 rear rack with a tall Jimmy style backrest. I wrote to Geezer, the owner of the scooter, and he told me that he built his tall backrest and bolted it to the low rest frame. We traded a few IMs and he told me how he went about it in detail. I was hooked, and had to do it!

So... I ordered a tall backrest cover from PK Trim to match my custom Black jack seat cover, and went at it:

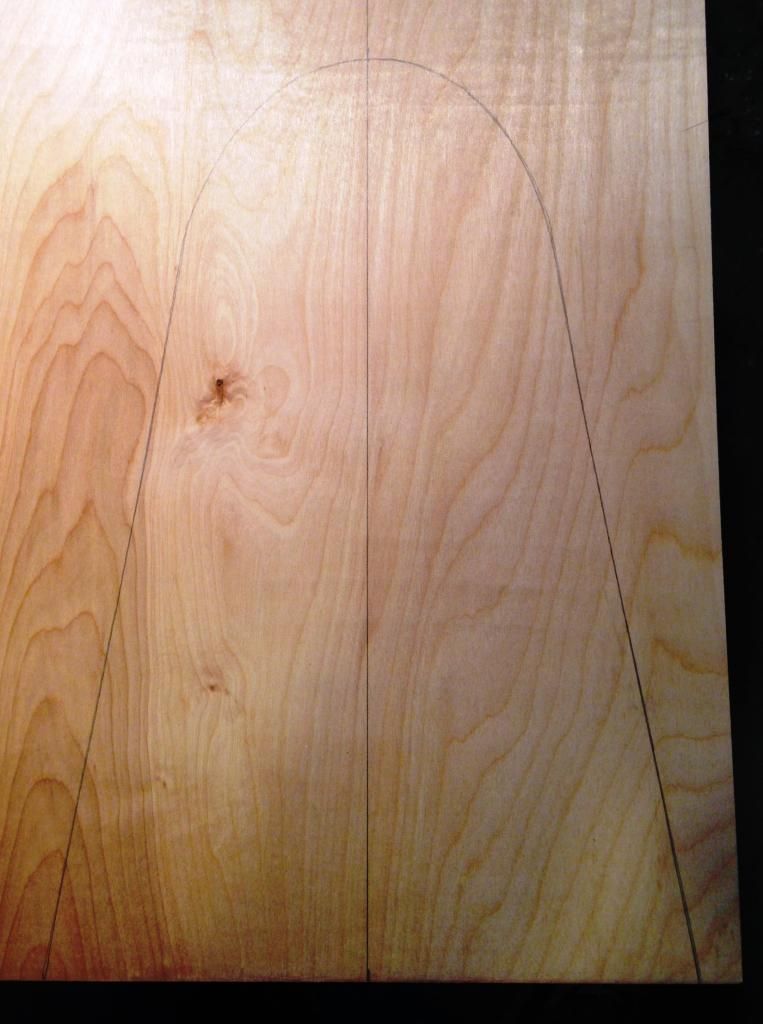
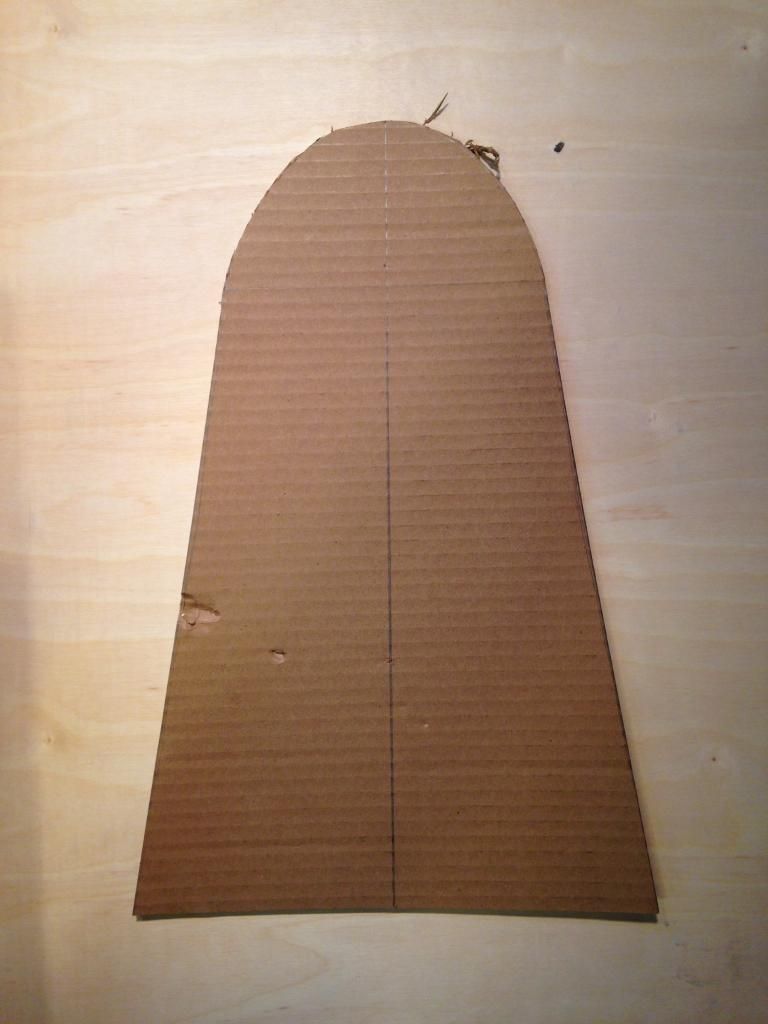
First I made a cardboard pattern. I love cardboard patterns since they are free, and if you mess up you can just start over.

Image

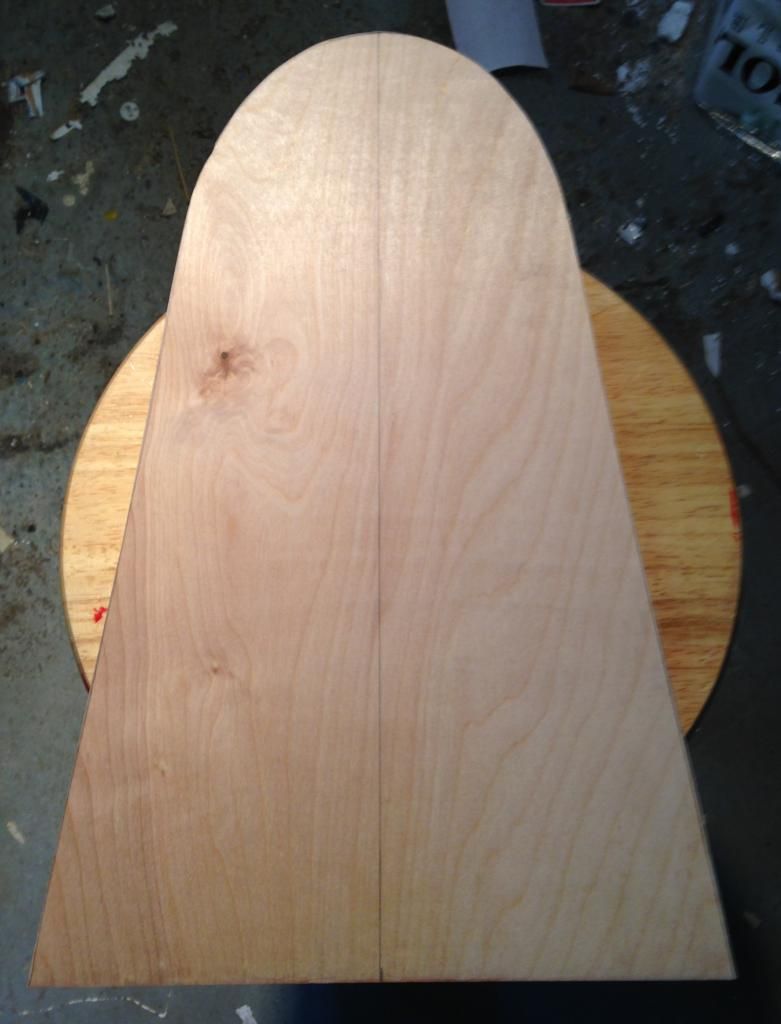
Once the pattern fit well inside the cover, with just enough room to handle the wood and the padding, I traced it into 5/8" furniture quality birch ply and cut it out:

Image

Image
Last edited by slotrod65 on Fri May 09, 2014 2:08 pm, edited 2 times in total.
User avatar
slotrod65
Member
Posts: 473
Joined: Wed Dec 05, 2012 9:28 pm
Location: Albany NY

Post by slotrod65 »

After checking that the wood was indeed the right size, I used the cardboard pattern to plan the bolt holes:

Image
Last edited by slotrod65 on Fri May 09, 2014 1:55 am, edited 1 time in total.
User avatar
slotrod65
Member
Posts: 473
Joined: Wed Dec 05, 2012 9:28 pm
Location: Albany NY

Post by slotrod65 »

Once I was satisfied with the bolt hole location, I traced the holes onto the wood, then realigned them, and drilled two, checked the second set and drilled them. The stove bolts were hammered in and the board was tested for fit.

Image

Image

Image
Last edited by slotrod65 on Fri May 09, 2014 1:56 am, edited 1 time in total.
User avatar
slotrod65
Member
Posts: 473
Joined: Wed Dec 05, 2012 9:28 pm
Location: Albany NY

Post by slotrod65 »

I originally planned on using six stovebolts to mount the backrest, but once I got the four on there, it was obvious that it was not going anywhere.
User avatar
slotrod65
Member
Posts: 473
Joined: Wed Dec 05, 2012 9:28 pm
Location: Albany NY

Post by slotrod65 »

Now it was time to turn the board into a back pad. I purchased 2" thick foam at Jo Anne's fabrics, traced the wood and cut out the foam with a brand new disposable blade.

Image

Image
User avatar
slotrod65
Member
Posts: 473
Joined: Wed Dec 05, 2012 9:28 pm
Location: Albany NY

Post by slotrod65 »

Then rows of duct tape were applied to the front side of the foam, and I leaned on it hard, wrapping the tape around the board.

Image

Image

I had to apply tape twice to a few areas to get the shape I wanted, but it came out OK.
User avatar
slotrod65
Member
Posts: 473
Joined: Wed Dec 05, 2012 9:28 pm
Location: Albany NY

Post by slotrod65 »

Next I stuffed the board/pad into the cover, and got it straightened out. It was do or die time: The bolt holes were lined up, and cut into the pleather with little x's

Image

Image

Image
User avatar
slotrod65
Member
Posts: 473
Joined: Wed Dec 05, 2012 9:28 pm
Location: Albany NY

Post by slotrod65 »

All that remained was to bolt the tall backrest onto the frame, using 5/8" D rings. I plan on buying 4 chrome 1/4" acorn nuts next week to replace the cheapo zinc plated nuts that are on there now, but other than that, it is all done.

This was done in two nights, with lots of planning, but turned out easier than I expected.


Image

Image

Image

Image
Last edited by slotrod65 on Fri May 09, 2014 2:10 pm, edited 1 time in total.
User avatar
Drum Pro
Member
Posts: 1163
Joined: Thu Sep 01, 2011 4:03 am
Location: Victorville, Ca.

Post by Drum Pro »

Dude that is MEGA BRILIANT! Looks good, Well done....
User avatar
jrstone
Member
Posts: 260
Joined: Wed Apr 03, 2013 3:14 am
Location: Edmond, OK

Post by jrstone »

Amazing. You don't see enough of this in America...
User avatar
Stilts
Member
Posts: 281
Joined: Thu Jun 23, 2011 7:33 pm
Location: Baltimore, MD
Contact:

Post by Stilts »

Very, very nice!

Now get that pipe installed! ;)
Image
User avatar
Drum Pro
Member
Posts: 1163
Joined: Thu Sep 01, 2011 4:03 am
Location: Victorville, Ca.

Post by Drum Pro »

How much total did it cost you to make that in materials?
User avatar
slotrod65
Member
Posts: 473
Joined: Wed Dec 05, 2012 9:28 pm
Location: Albany NY

Post by slotrod65 »

Let's see...

The wood was about $8, the foam was $9, the nuts and bolts and brackets about $6, but the cover was from PK Trim in the UK and cost me $80. If you can get a cover/make one, the rest is pretty cheap.
misterbrackets
Member
Posts: 162
Joined: Thu Apr 18, 2013 5:19 am
Location: Vista CA (San Diego)
Contact:

Post by misterbrackets »

Great job with the seat! Where did you get the bolts/brackets? Those are going to be perfect for when I make a custom wooden crate to attach on to the rear rack :)
User avatar
BuddyRaton
Scooter Dork
Posts: 3887
Joined: Sat Sep 09, 2006 10:08 pm
Location: Boca Raton, Florida
Contact:

Post by BuddyRaton »

Nice job and a great looking scooter! The only things I don't get are the GS on the legshield and the yellow stand boots..
Last edited by BuddyRaton on Fri May 16, 2014 11:16 pm, edited 1 time in total.
"Things fall apart - it's scientific" - David Byrne
www.teamscootertrash.com

'06 Cream Buddy 125, 11 Blur 220, 13 BMW C 650 GT, 68 Vespa SS180, 64 Vespa GS MK II, 65 Lambretta TV 175, 67 Vespa GT, 64 Vespa 150 VBB 64 Vespa GL
User avatar
Drum Pro
Member
Posts: 1163
Joined: Thu Sep 01, 2011 4:03 am
Location: Victorville, Ca.

Post by Drum Pro »

BuddyRaton wrote:Nice job and a great looking scooter! The only thing I don't get is the GS on the legshield.
Genuine Stella...
User avatar
BuddyRaton
Scooter Dork
Posts: 3887
Joined: Sat Sep 09, 2006 10:08 pm
Location: Boca Raton, Florida
Contact:

Post by BuddyRaton »

Drum Pro wrote:
BuddyRaton wrote:Nice job and a great looking scooter! The only thing I don't get is the GS on the legshield.
Genuine Stella...
I can see that...but it's kinda pushing it! :mrgreen:
"Things fall apart - it's scientific" - David Byrne
www.teamscootertrash.com

'06 Cream Buddy 125, 11 Blur 220, 13 BMW C 650 GT, 68 Vespa SS180, 64 Vespa GS MK II, 65 Lambretta TV 175, 67 Vespa GT, 64 Vespa 150 VBB 64 Vespa GL
User avatar
Drum Pro
Member
Posts: 1163
Joined: Thu Sep 01, 2011 4:03 am
Location: Victorville, Ca.

Post by Drum Pro »

Now I gotta get all "Obi Wan" from "Star Wars" and say, "Depending on your point of view".. :lol:
User avatar
slotrod65
Member
Posts: 473
Joined: Wed Dec 05, 2012 9:28 pm
Location: Albany NY

Post by slotrod65 »

They actually are just D shaped clamps I picked up at Lowe. They come in many sizes, so measure the tube you will be clamping to before buying them:

Image
hewl35
Member
Posts: 21
Joined: Tue Jan 01, 2013 12:51 am
Location: Kansas City, KS

Post by hewl35 »

slotrod65 wrote:They actually are just D shaped clamps I picked up at Lowe. They come in many sizes, so measure the tube you will be clamping to before buying them:

Image
That's an Adel Clamp. Normally used on cars to isloate the fuel/brake lines from rubbing on the frame.
Post Reply