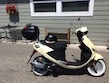
Here are some pictures to prove I have it.
Updates and details coming soon...
Moderator: Modern Buddy Staff


You have to take the brake lever off in order to get to the cable. To lubricate the cable, I used a Teflon based spray. I'll take mine apart again and take some pictures to make it easier to understand.ucandoit wrote:Where on the rear brake cable do you lubricate and what do you use?
Thought that was a glovebabblefish wrote:Thanks, but ?BuddyRaton wrote:Nice job! From the second photo it appears that you have very flat fingers!?


I had thought about doing this because I know a few people have done it with good results. The problem is, some of the panels have mounting tabs that are broken off which doesn't allow them to lock together so will need replacing anyway. In one of the pictures, you can see one of the panels being held in place with a plastic wire tie.k1dude wrote:Instead of new body panels or a professional paint job, I'd suggest repairing the cracks with bondo or epoxy, then hitting it with Plasti Dip Spray. If you don't like the result, you can always peel it off.
https://plastidip.com/our-products/plasti-dip/
When the scooter is on it's centerstand and on a level surface, it teeters easily on the centerstand. When the weight of the front wheel is removed, the scooter teeters to the rear wheel and stays there.ucandoit wrote:babblefish. How do you elevate the front wheel of the scooter to remove the wheel for the tire change? And did you remove the rotor, to protect it, during the tire change? When replacing the rubber seal in the front axle do you also need to grease any bearings there? Thank you.
Thanks. I don't like working in a dirty engine compartment. I'm the same way with my cars, too. I've had 10-15 year old cars with engine compartments that looked the same as when they were new. Come to think of it, I have a 41 year old car with an engine compartment that I'd eat my dinner off of. It's a disease...bgwss wrote:Wow you are making that thing look spiffy! How did you clean the engine with air hose or just elbow grease?
And it's fun to do!babblefish wrote:BTW: anyone living in the San Francisco Bay Area who would like some help on their scooter or want to learn how to do stuff on them, you're welcome to contact me via PM and we can arrange something.
Forgot to mention that this is offered at no cost. I just like to share knowledge. Good Karma and all that...
Put the anti-seize on the threads of the bolts or the nut, not just the tip. A little goes a long way, so don't over do it.ucandoit wrote:Babblefish. So, when reinstalling the exhaust, after changing the tire, I should put a dab of anti-seize on the tip of the two exhaust bolts then screw on the two nuts? I've read to be very gentle tightening those two nuts. Wouldn't anti-seize cause the nuts to maybe loosen during the vibration of riding. I don't understand when to use anti-seize.
They're something I bought off of eBay for under $8. The ad for them says they are made of rubber, but they feel and look more like plastic. Not very soft and are slippery to grip. They are also not a drop-in replacement because the throttle cable spool (circled in red in the photo) is too big and needs to be shaved down to fit into the Buddy throttle housing. It might be possible to remove the spool and replace it with the one from the Buddy, but I didn't try doing this. I'm going to be replacing them with a pair that I found at a local motorcycle shop that are softer and have more grip.RickyDragon wrote:What kind of grips are you using? I like to look of them.
No, I didn't have to move the throttle tube. The grips I used had openings on their ends for bar-end mirrors. The mirrors slid right into the end of the handlebar.exmayor wrote:I have a set of crg mirrors I am going to mount on my Buddy when I pick it up the end of next month did you have to move the throttle tube toward the center to make clearence for the barend mirror?
Thanks. Rick
Yeah, they're pretty faded, but they are gray from the factory, though currently all beat-up and faded. I decided to change their color to black and have started repainting them. I'll try using a vinyl paint on the rubber mat, but if that doesn't work, I'll buy a new black one from Scooterlounge.k1dude wrote:I think you need to use some Mother's Back to Black on your cockpit covers and floor mat.
Back to Black can be used on grey or any other color of vinyl/rubber/poly. IIRC, it's sort of a creamy/clearish/whitish color that spreads on easily and restores whatever color back to it's original appearance. I've used it effectively on gray, black, and beige before.babblefish wrote:Yeah, they're pretty faded, but they are gray from the factory, though currently all beat-up and faded. I decided to change their color to black and have started repainting them. I'll try using a vinyl paint on the rubber mat, but if that doesn't work, I'll buy a new black one from Scooterlounge.k1dude wrote:I think you need to use some Mother's Back to Black on your cockpit covers and floor mat.
Thanks, but I want to change the color to black anyway. For faded plastics, I use a product from Meguiar's called Natural Shine Protectant that is also creamy white and works really well. It includes a UV blocker that helps protect against the sun.k1dude wrote:Back to Black can be used on grey or any other color of vinyl/rubber/poly. IIRC, it's sort of a creamy/clearish/whitish color that spreads on easily and restores whatever color back to it's original appearance. I've used it effectively on gray, black, and beige before.babblefish wrote:Yeah, they're pretty faded, but they are gray from the factory, though currently all beat-up and faded. I decided to change their color to black and have started repainting them. I'll try using a vinyl paint on the rubber mat, but if that doesn't work, I'll buy a new black one from Scooterlounge.k1dude wrote:I think you need to use some Mother's Back to Black on your cockpit covers and floor mat.