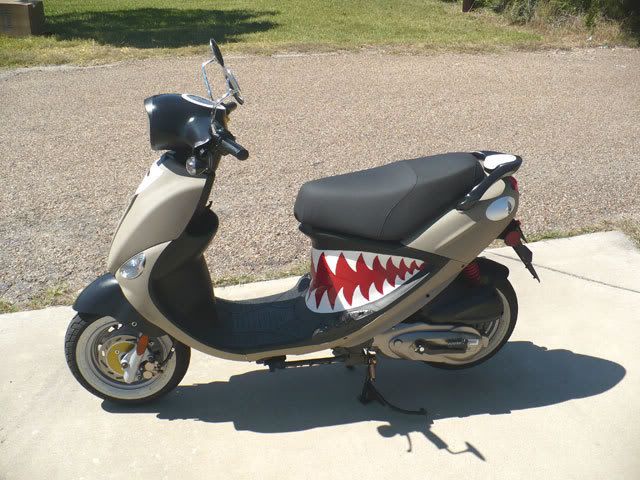
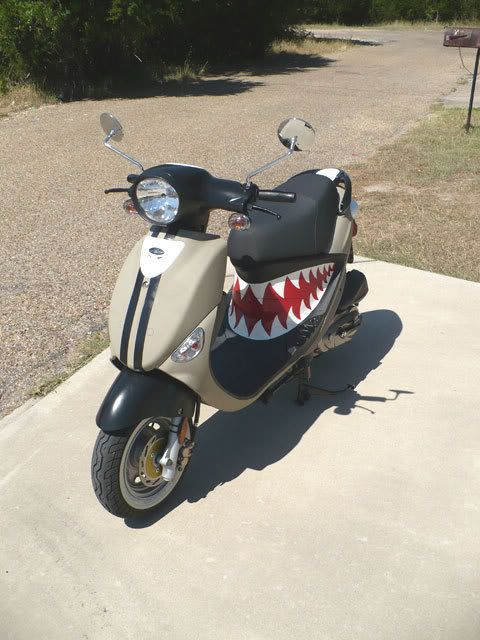
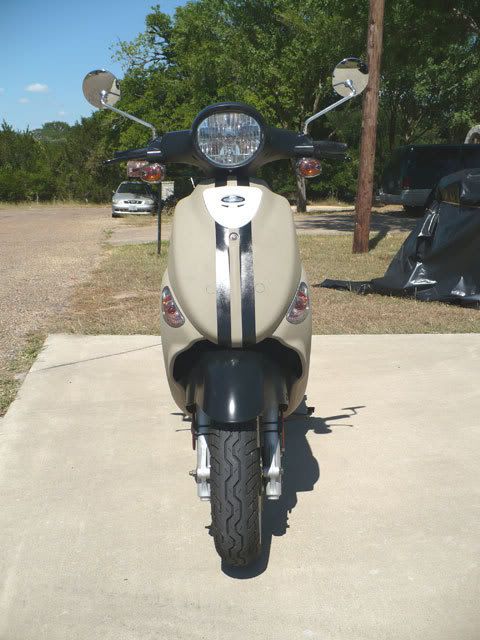
These photos were taken at my parents' lovely villa in Belton, TX this afternoon (finally got to bogart a camera). I live in Austin, TX, so now that I'm back I'm what you'd call "ripe". I'm going to go take a shower... Enjoy!
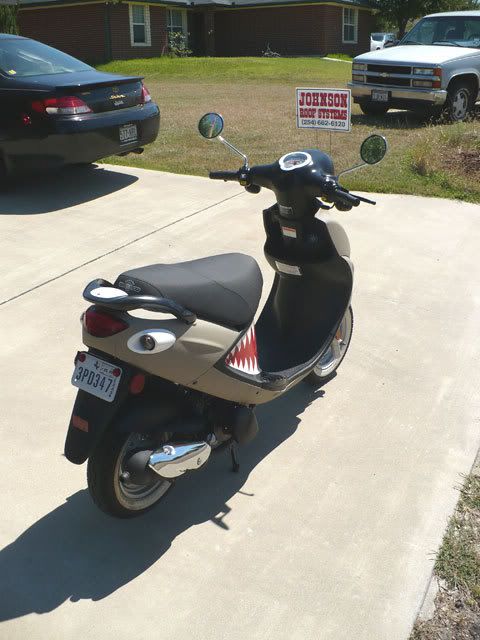
kudos to you, sir! i especially like hot the back blinkers look like the eyes of the beast. bravo!!
sunil: "And if you spend 40 dollars making a pizza then you sir are a retard."
ericalm: "No name calling, please. Maybe he's using truffles and top-grade meats."
Thanks for the kudos everybody! I couldn't have done it without lunch breaks and vacation time. You guys are right, it aches for pinup girl art. Maybe a tasteful airbrushing of my girl in the appropriate getup. Somehow, it almost seems more permanent than a name tattoo though...
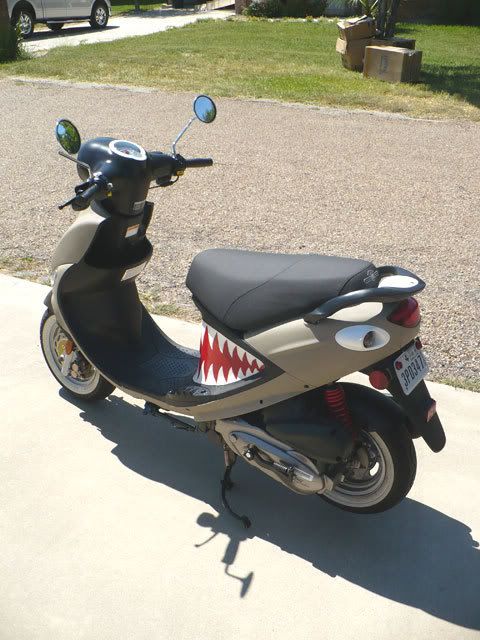
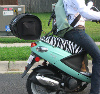
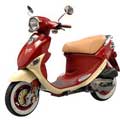
Mikie, I washed the interior first and then cleaned it with paint thinner to prep the surface. Then I taped off the mouth area and used Krlyon Fusion (for plastics) to spraypaint it all red. Afterwards, I painted the teeth by hand with generic acrylic paint. After everything was dry I spraypainted it all with a Rustoleum clear coat enamel and then peeled the tape away. If I could do it again I would probably tape off the negative image of the teeth and spraypaint it instead of painting it by brush.
Mad, making the blinkers into full fledged eyes is an awesome idea, it didn't even occur to me while I was working on it. I could use the white parts as the whites of the eye and then do some black outlines. Yep, that's what I'm gonna do.
Ryder1, the light color was a Krylon Fusion based paint, but it was branded as Camo-something-or-another. It comes in three or four different "camo" colors and is labeled "Ultra-Flat" on the cap. So far I've only been able to find it at Wal-Mart.
Things I learned: I really liked the way the 'Satin' Krylon Fusion paint turned out; that stuff is pretty hard to mess up. The 'Ultra-Flat' Krylon Fusion stuff though seems to be a little trickier as I had a few rough spots turn up. Not sure, but it could just be because I was trying to cover a larger surface and didn't do a 'full coat' each time. Also, I would definitely document which order you took off the panels before trying to put them back together. I thought I was being clever by placing the screws back in their threading each time I took off a panel (which I learned from you cats), but what really hurdled my girdle was the puzzle that is the interlocking Buddy panel system. Finally, when the spray paint can says it needs 7 days to become chip resistant, it means it... but it delivers on the promise!
MikieTaps wrote:All these painting stories are making me feel like this is actually something I can do and not mess up… I mean if someone with bad brains can do it
Hey now, I have to wear a helmet all the time just to keep what brains I have IN! I am a clumsy dude. If I can do it, anybody with some spare time and a love for "happy accidents" can do it.
KRUSTYburger wrote:What kind of tape did you end up using on the textured plastic? None of the tapes I had would stick to it...
I used some off-brand blue painter's tape from Lowe's. I threw the packaging away so I can't remember the name. Maybe it stuck because I cleaned the surface with paint thinner first and let it dry? Either way, it stuck "okay", but paint did peak underneath the paint in a few spots.
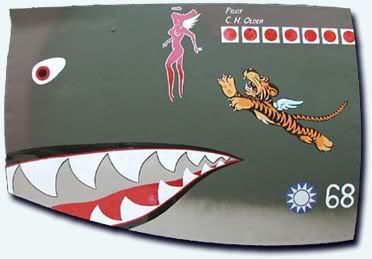
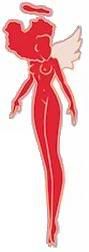
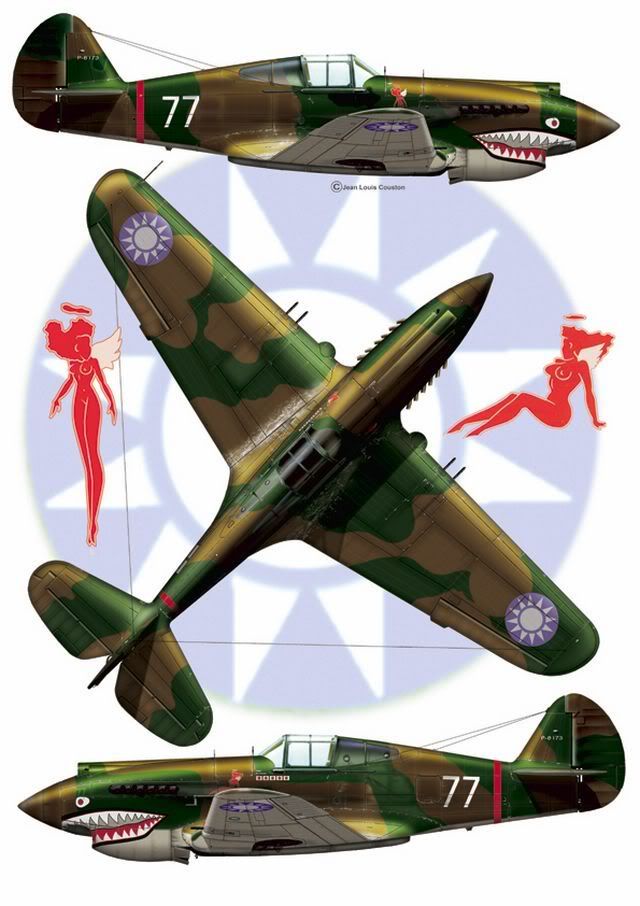
OK BB Here is what I was looking at but I don't have the time or the patients that you have. The Widow Maker looks beautiful. As for a pin-up I found some that were used with the Flying Tigers. Look up Charles H. Older, he was with the Flying Tigers.
Your scoot with this pinup.
Here is a different one.
I brew... therefore I am.
Smoked Porter - Drinking
Peach Smoked Brown Ale - Drinking
Maibock - Lagering
British Mild - Carbonating
Oatmeal Stout - Aging in Whiskey barrel 3 weeks left
BadBrains wrote:SNIP - Either way, it stuck "okay", but paint did peak underneath the paint in a few spots.
An old painters trick is to spray some clear along the tape line (and letting it dry) before your color in order to seal the tape edge and reduce paint "creep".
Awsome paint job you did though! Also, I've seen that camo paint at Autozone auto parts stores.
BadBrains wrote:\but what really hurdled my girdle was the puzzle that is the interlocking Buddy panel system.
I know someone posted this somewhere recently in the "General Discussion", but is it too much to ask for some of you veteran painters to give a quick Cliff Notes version on the way/order of disassembling the interlocking panels? I don't know if that would be too time consuming or not, but it would be great for people who may be a little anxious about what they might run into even though they are interested in possibly painting their Buds.